Contents
You can plant dill on the balcony at any time of the year, if the room is insulated and it is realistic to maintain a temperature of at least +15 degrees. The plants themselves are unpretentious – they need to be given regular watering, as well as provide lighting. Top dressing is applied only once per season, and the first greens are cut off a month after germination. Basic cultivation rules and useful tips are described in the article.
Is it possible to grow dill on the balcony
Growing dill on the balcony for greens is quite realistic. To do this, you need to prepare special containers, store fertile soil, install lighting, and conduct electrical wiring. Seeds are carefully prepared to germinate. To do this, they are soaked in water or a special solution.
Landing dates are chosen depending on the characteristics of the premises. You can plant dill on the balcony in the summer, if it is not insulated, and grow it until the end of September – the beginning of October. If the room is insulated, you can plant and harvest all year round.
When planning, consider timing. So, early-ripening varieties give greens in a month, mid-ripening – after 40 days, and late – after 50-60 days. By this time, you need to add another week, which will take to prepare the dill seeds for planting, as well as for germination.
The area of even a small balcony makes it possible to get a good enough crop for personal needs. From a square meter per season, you can get at least 2,5 kg of dill. To increase volumes, planting can also be carried out on multi-tiered racks. If you want to grow dill for sale, a greenhouse with an area of 100 mXNUMX is suitable for planting.2. In this case, the production will be profitable.
Conditions for growing dill
Growing dill at home on the balcony is quite realistic if you follow the basic conditions:
- Stable positive temperatures not lower than 15 degrees. If you plant in winter, autumn or early spring, you must first warm the balcony.
- For planting use only fertile soil containing compost or humus. The soil should be loose and have a neutral or slightly acidic reaction.
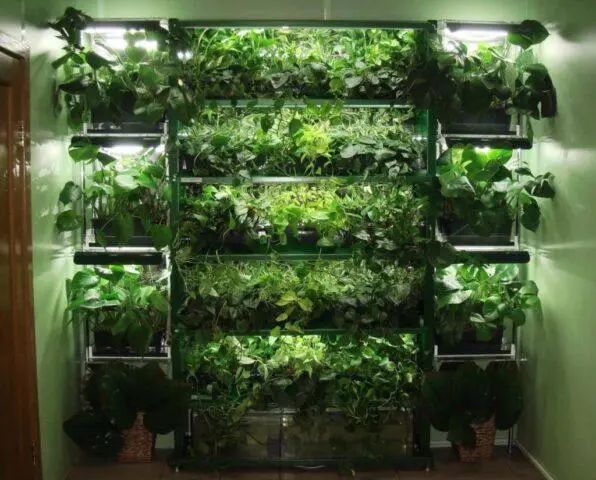
- Be sure to take care of lighting. You can also grow dill on the balcony in winter if you install phytolamps, LEDs or other lighting devices. Under these conditions, planting and growing is possible even with a lack of sunlight.
- After the procedure, it is important to organize dill care on the balcony. The soil should be regularly watered and loosened, weeded if necessary. Fertilize periodically. If the soil is fertile, it is enough to do this twice a season.
Dill can be grown year-round if the temperature is consistently above +15 °C
Dill varieties for the balcony
On the balcony, you can plan to plant almost all varieties that are grown in an open house or in a greenhouse. You should pay attention only to the yield, as well as to the ripening time. If you need to get greens in just a month, you can consider early varieties:
- Grenadier;
- Umbrella;
- Richelieu;
- Gribovsky;
- Kibrai;
- Further.
Among the mid-season varieties that ripen in 40-50 days, the following can be distinguished:
- Lesnogorodsky;
- patterns;
- Amazon;
- Buyan.
Late varieties for planting on the balcony give a harvest in 50-60 days:
- Gourmet;
- Alligator;
- size;
- Firework.
Growing dill on the balcony from seeds
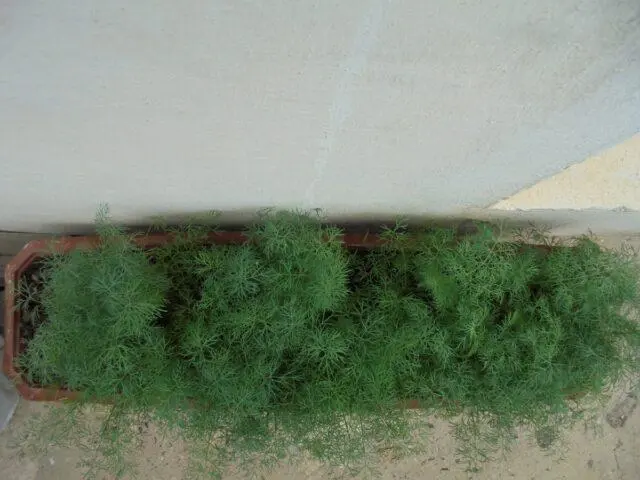
Planting dill seeds on the balcony is carried out in ordinary containers for seedlings. First you need to think about the place where they will stand. It can be a window sill, special shelves or multi-tiered racks. The latter option is more preferable, since it allows you to grow not only dill, but also other greens – parsley, onions, cilantro.
Selection and preparation of containers
For planting, choose a fairly spacious container with a depth of 10-15 cm. It can be wooden, but for practicality it is better to purchase plastic boxes. They do not rot and do not heat up in the sun. At the bottom you need to make several drainage holes. After that, the containers are thoroughly washed with soap and disinfected. To do this, it is enough to hold them for an hour in a solution of potassium permanganate (1 g per 1 liter). You should get a bright pink liquid.
Soil Preparation
Before planting dill on the balcony, it is very important to prepare the ground. If there is no soil, you can purchase universal soil for seedlings in a store for summer residents. But it’s cheaper to mix it yourself. To do this, use standard components (ratio 2:1:1:1):
- sod soil;
- black peat;
- humus or compost;
- coarse sand.
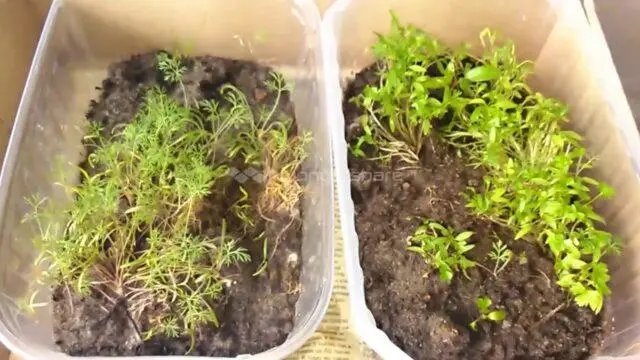
Seedlings are grown in fertile, loose soil
A few days before planting, the soil is disinfected in a solution of potassium permanganate (1 g per 1 liter) or placed in the freezer for several days. To restore the microflora, it is recommended to make “Nitragin” or other bacterial top dressing.
Seed preparation
Dill seeds have an important feature – their shell is covered with essential oils. These substances prevent germination, due to which germination is markedly reduced. To get a lot of seedlings, the seeds must be processed before planting. Preparation is carried out in several stages:
- You should start by checking the seeds for suitability. In 1 liter of warm water dissolve a tablespoon of salt (with a slide), mix thoroughly and put the seeds for a few minutes. Those that emerge are rejected.
- The seeds are placed in warm water or herbal infusion of chamomile for several hours. A few drops of a growth stimulant are also added there – it can be “Heteroauxin”, “Zircon” or other means. If there is nothing, you can get juice from aloe leaves, dilute with water twice and hold for 3-4 hours.
- For successful planting and growing dill on the balcony, the seeds should be pickled in a bright pink solution of potassium permanganate (1 g per 1 liter). The grains are placed in gauze and kept for three hours. Hydrogen peroxide 3% can be used instead of this liquid, but seeds can be kept for no more than six minutes.
- Lay on a damp cloth in a saucer, cover with another layer on top and germinate in a warm, darkened place for a week.
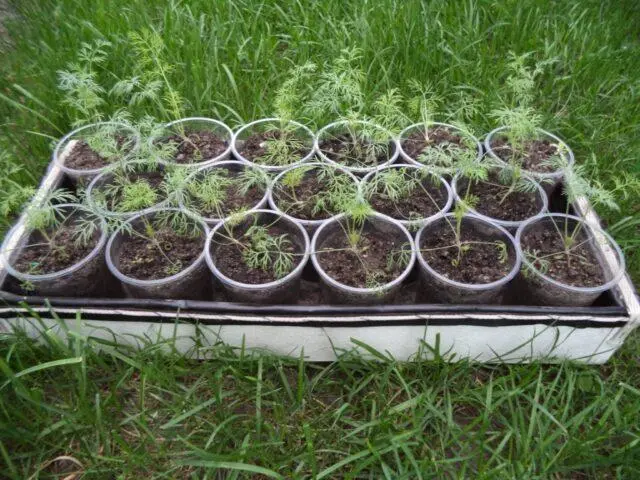
- After sprouts appear, they are transferred to seedling boxes.
Place to grow
To grow dill on the balcony, you should choose the right place. Landing is carried out on the side that faces south, east or southeast. In the west, cultivation is also possible, but the yield will not be as high. As for the northern windows, they should not be considered at all. If there is very little sunlight, then even in the summer it is necessary to use lamps. They are installed at a height of 50 cm from the tops of the bushes.
On the balcony, there is often not enough space for planting dill. To save space, use shelving with several tiers. They should be high enough so that even the bottom shelf gets enough light. It is also necessary to provide a place for installing lamps.
Seedlings are easier to grow on multi-tiered racks
How to plant dill on the balcony
To properly plant dill on the balcony, you must proceed as follows:
- Pour the soil into containers and level the surface.
- Make several grooves 1-2 cm deep at a distance of 15 cm.
- Distribute germinated seeds at 5 cm intervals.
- Sprinkle soil on top and spray with water from a spray bottle.
- Cover with a film with holes and put on a balcony or in a greenhouse.
Features of care
Caring for dill when planting on the balcony is easy. Water the plants often enough so that the soil does not have time to dry out. At the same time, it should not be too wet, as this will damage the roots and the plants may die. Before germination and in the first week after that, water is given from the sprayer. It should be warm, so the liquid is preliminarily settled for at least 12 hours.
After watering, loosen the soil, trying not to damage the roots. If necessary, weeding is done. Two weeks after the emergence of seedlings, thinning is started, leaving only the strongest shoots. Shrubs can grow close together, but too dense planting (“green carpet”) should be avoided. Otherwise, dill on the balcony will not have enough light, space for development. In addition, the soil will not dry out, fungal diseases may appear.
Another important point is that the plants need to be fed. If the soil is fertile, fertilizer can be applied 10-15 days after germination. For this, complex preparations are used, for example, Fertika or Kemira Lux. Organics can also be used – liquid potassium humate, mullein infusion 1:10 or bird droppings 1:20.
It is no longer necessary to fertilize a second time, since dill grows quickly on the balcony. But if the greenery began to turn yellow, the bushes are clearly lagging behind in development, another application is carried out. Sometimes the leaves begin to turn red, which indicates a lack of potassium. Then you should add potassium salt or potassium sulfate.
To get a crop, dill needs to be watered regularly.
If any bushes suffer from diseases or pests, it is better to remove them immediately. The rest of the greens are treated with folk remedies, for example, infusion of wood ash, laundry soap, tobacco dust, decoction of wormwood, dandelion or celandine. The use of chemicals is not recommended, since toxic substances accumulate in greenery and can be detrimental to health.
Conclusion
You can plant dill on the balcony in spring or summer, if it is not insulated. But if there is lighting and the ability to maintain a stable positive temperature, you can harvest all year round. Even under minimal growing conditions, 2,5-3 kg of fresh herbs are obtained per square meter. If you save space due to shelving, you can plant not only dill, but also other garden greens on the balcony.