


Contents
Helen Bradley talks about how to group data in an Excel PivotTable for further summarization and analysis.
When working with a PivotTable in Excel, you may come to the conclusion that a lot of data needs to be summarized even more. This can be done by grouping data, and the purpose of this article is to show you how.
Group by value
Imagine this situation: You are analyzing a selection of invoices collected in a pivot table. You can generalize invoices by grouping them into groups of 5, 10 or even 100 invoices. Let’s look at an example where the row id is OrderID is a numeric field. At the moment, each account corresponds to a separate line, and the result is rather cumbersome. We can group this data to simplify the table.
In this pivot table, each ID OrderID presented on a separate line. Such data can be considered generalized, but this is not enough for us.
To do this, right-click on one of the OrderID this pivot table and from the menu that appears, select GROUP (Group). Because OrderID is a numeric field, then the dialog box will already be prepared for numerical grouping with fields Starting At (Beginning with), Ending At (By) and By (with a step). In this situation, Excel prompts you to group items by 10 pieces.
By default, Excel suggests as a value Starting At (Starting at) first element OrderID: 10248. However, you can fine-tune or create a different grouping by setting your own parameter value Starting At (Beginning with). To start with an element 10240, enter this value in the field Starting At (Starting at) – You can set any start value, even one that is not in the data.
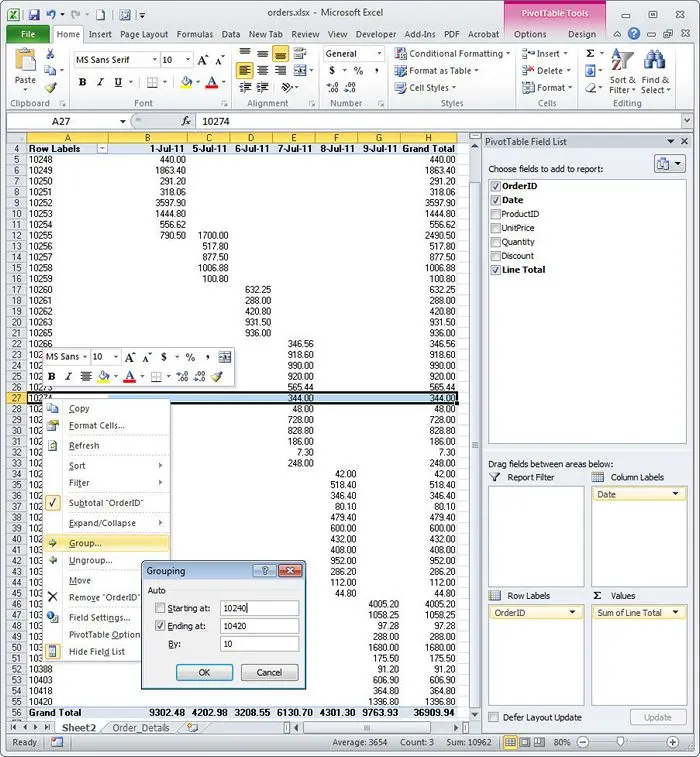
We configure data grouping parameters – they will be grouped by field OrderID ten consecutively numbered orders.
So we set the value Starting At (Starting from), left the value Ending At (By) such as suggested by Excel, and left the value By (In increments) equal 10because it suits us. You can make groups smaller or larger by changing this value – for example: 5, 20, 50 or 100. Now click OK. Data will be grouped by value OrderID into groups more convenient for processing.

This is what the data looks like, grouped by OrderID. As you can see, they are much more generalized than before.
Group by date
If the data you are working with is dates, then you can use a similar trick. To group information by date, right-click on a date in a column or row in your pivot table and select GROUP (Group). You can choose the grouping step − Seconds (Seconds) Minutes (Minutes) Hours (times), Days (Days), Months (Months) Quarters (Quarters) or Years (Years), and set the start and end time. For grouping by years, quarters and months, the interval is fixed equal to 1, and for grouping by days you can set your own interval, for example, equal to 7 days to group data by week. To do this, select Days (Days) as a grouping step, set the number of days to 7, specify for parameter Starting At (Starting from) a date that falls at the beginning of the week and press OK. Information will be grouped by week.

A large amount of data will be grouped by weeks (7 days each), and the first day will be Sunday – the day of the week corresponding to the date specified in the parameter Starting At (Beginning with).
Grouping data manually
Not always a set of records can be divided into groups with the same ease as a sequence of numbers or dates. Sometimes a group becomes a group simply because you choose to. In this case, you can create your own grouping. Open the sheet with the pivot table, click on the first data element that you want to include in the group and further, with the key pressed Ctrl, click successively on all the elements that you also want to include in this group. Then on the tab PivotTable / Options (Working with PivotTables / Analysis) click Group Selection (Group by selection) and the items will be added to the new group. In the same way, you can select other elements and create another group.
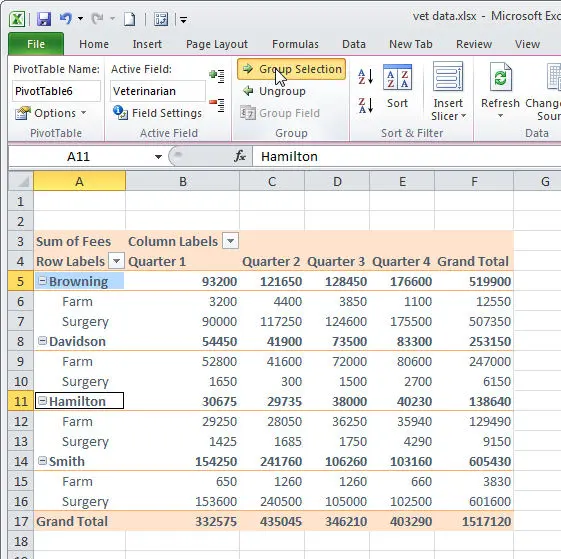
By selecting several fields, you can combine them into groups in a way that suits you.
With this tool, you can group data into small collections that are easy to work with. Since groups are named by default Group 1 (Group 1) and Group 2 (Group 2), you will have to rename them yourself. To do this, click the cell containing the name of the group, and in the formula bar, enter a more appropriate name for the group.
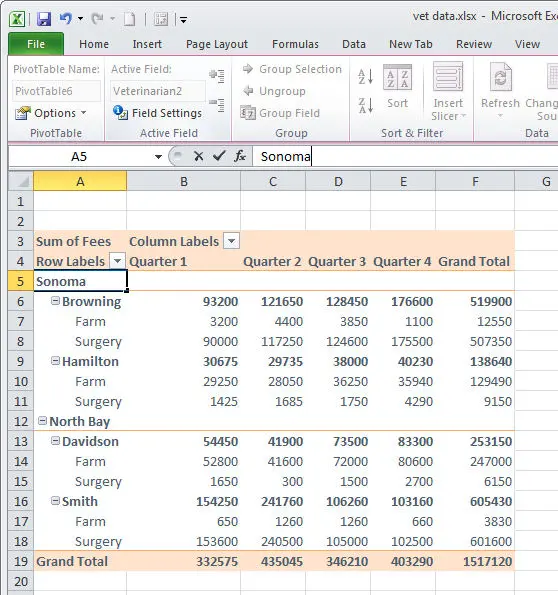
After the groups are created, you have the right to rename them however you like.
You can expand or collapse a group by clicking the symbols plus or minus (+/-) to the left of the group name.
Correcting errors
Sometimes, when trying to group the selected data, you will receive an error message stating that the selected data cannot be combined into a group. There are a number of reasons why this might happen. One reason is that if you’re trying to create your own grouping, you must select two or more items to create a group – you can’t create a group from a single entry.
If you have empty cells in those fields where there should be dates or numbers, then this will also cause an error message. An error will also appear if the cell contains a text value instead of a date or a number. In each case, check the original data and correct the error, then refresh the pivot table and try again.
Group detail
One of the benefits of grouping data is that you can extract a subset of the grouped data to a new sheet. To do this, select a group, and double-click on the cell with the total you are interested in. The data from which this total was collected will be extracted to a new sheet in the current Excel workbook.
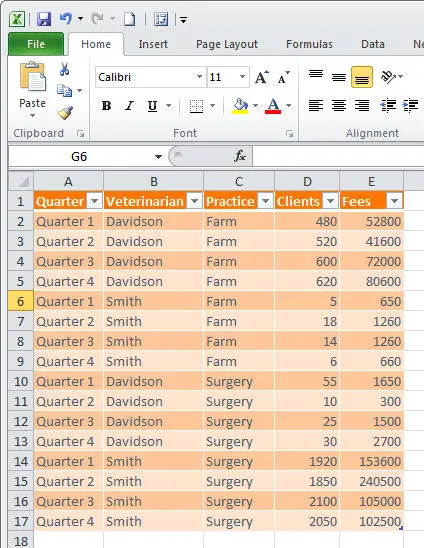
Double-clicking on any value in the PivotTable creates a new sheet containing all the data related to that value.
Grouping and multiple consolidation ranges
You can create groups in a PivotTable that is made up of multiple consolidated ranges, such as data on different worksheets in a workbook. To do this, in Excel 2007 and 2010 on the Quick Access Toolbar, add the command PivotTable and PivotChart Wizard (Master of pivot tables and charts).
To do this, click the drop-down menu of the Quick Access Toolbar, select More Commands (Other commands), in the dialog box that opens, set the group All Commands (All commands) and in the list of commands find PivotTable and PivotChart Wizard (Master of pivot tables and charts). Click the button Add (Add) to add a button to the Quick Access Toolbar.
Now you can create a PivotTable from multiple Excel ranges with consistent data layout. You will need data with the same number of columns, the same column headings, and each table may have a different number of rows.
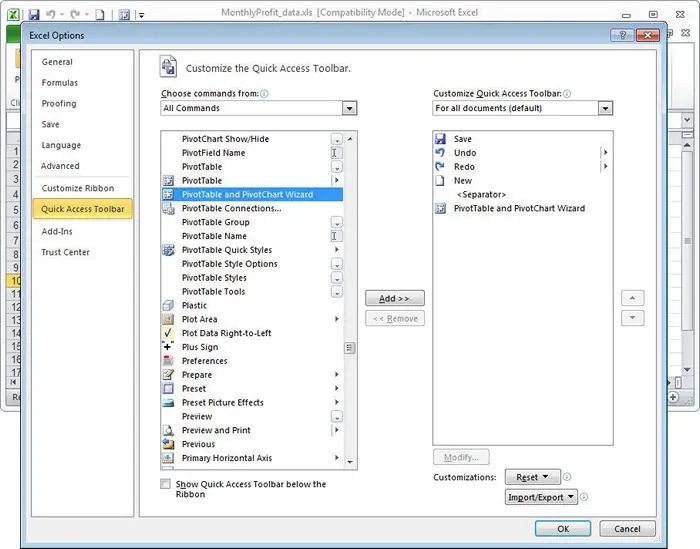
This command has been removed from the Excel 2010 menu, but you can add it to the Quick Access Toolbar yourself.
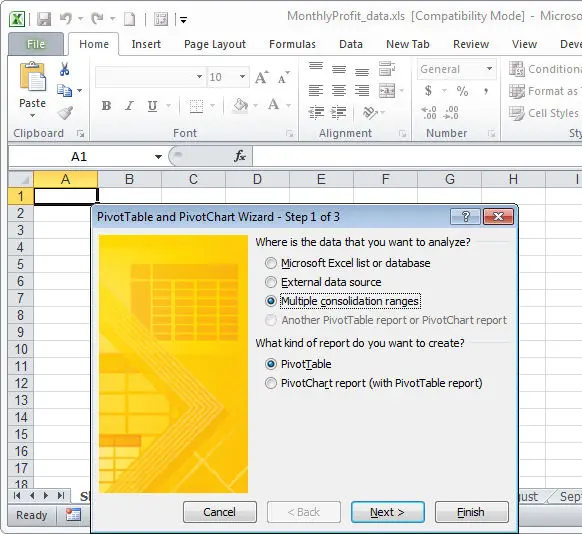
Create a new sheet in your Excel workbook, click the button you just added PivotTable and PivotChart Wizard (PivotTable and PivotChart Wizard), select items Multiple Consolidation Ranges (In several consolidation ranges) and PivotTable (Pivot Table) and then click Next (Further). Select I will create the page fields (Create Page Fields) and click again Next (Further). Now you need to specify each of the ranges. Go to the first sheet, select all the data, including the table headers, and click Add (Add). Repeat the steps to add information from the next sheet, and so on, until you have added data from all the sheets that you planned to use in the pivot table.
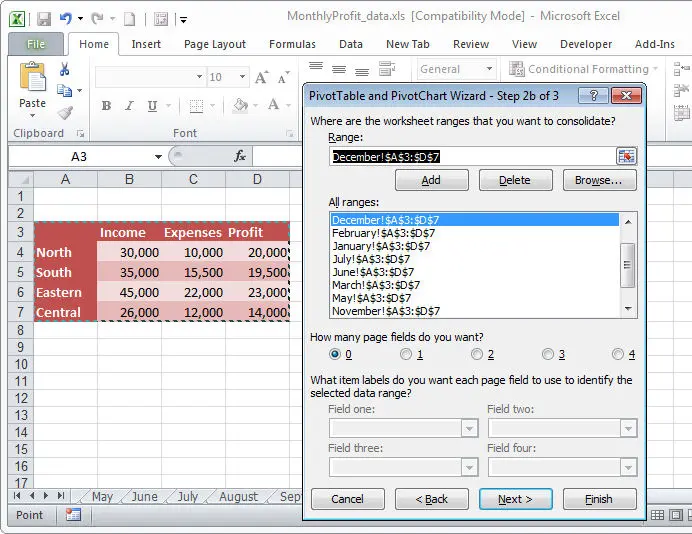
PivotTable and PivotChart Wizard allows you to combine several ranges at once in one pivot table.
В PivotTable and PivotChart Wizard the first step is to choose which data ranges will be used.
Next, specify the number of fields that you want to add to the pivot table – most likely, you will need one or two. Now select one of the ranges in the box a little higher and enter a group name for it. Then select the next range and follow the same steps for it. And so on for all ranges. If the group name already exists, you can choose not to enter it, but select it from the drop-down list.
So, for example, a range containing dates could be part of a group that divides months into quarters, as well as part of a group that divides months into seasons: Winter (Winter), Spring (Vesna), Summer (Summer) and Fall (Autumn). Groupings can be on any basis that you consider appropriate for your data. Click Next (Next), click on the cell that should contain the upper left corner of the pivot table and click Finish (Ready).
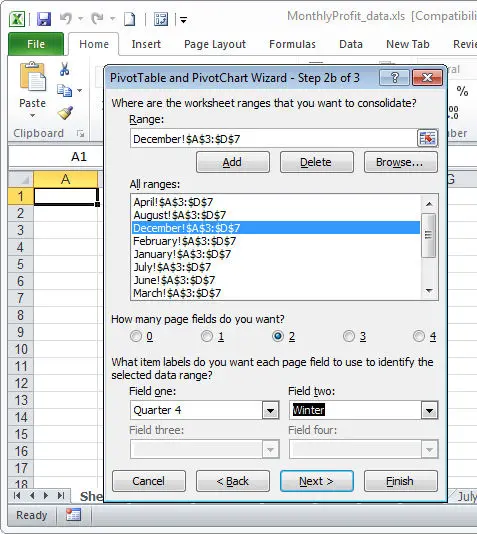
В PivotTable and PivotChart Wizard You can associate ranges with pages as shown in the image above − Quarters (Quarters) and Seasons (Season).
Pivot table will be generated automatically, groups will be created as fields report filters (Filters) in the PivotTable Fields list, but you can drag these fields into the PivotTable field if you wish. Row Labels (Strings) or Column Labels (Columns).
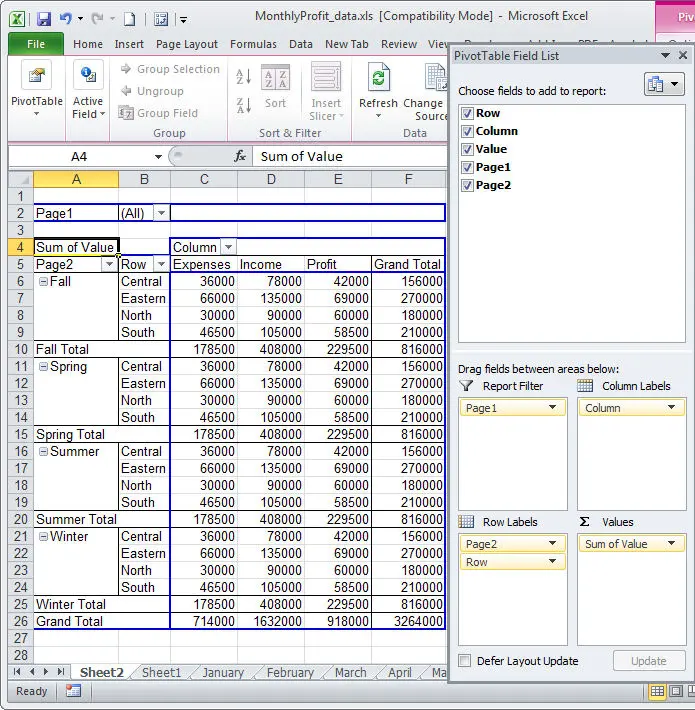
The picture above shows: we have moved the page Page 2 (Seasons) from the area report filters (Filters) to area Row Labels (Lines).
Whether you’re grouping data in a pre-made PivotTable, or you’re doing it in conjunction with creating a PivotTable from multiple ranges, the result will be the same, and it will be another useful tool in your arsenal for summarizing data in Excel PivotTables.