


Have you ever created really large documents in Microsoft Word? If so, then you probably know that Word doesn’t always handle them well. Sometimes it makes more sense to split a long document into several separate Word files.
But how, then, to be sure that the pages are correctly numbered, and how to create a table of contents and an index for the entire document? In this case, a tool called Master Document (Main document). It allows you to combine multiple Word files into one.
Main document is a Word file that contains links to a list of other standalone Word files called nested documents. The content of nested files is not transferred to the main document, but is only linked to it. This makes it possible to edit nested documents individually. Any changes made to subfiles are automatically reflected in the main document as well. If several people are working on the same project at once, the main document allows you to distribute its individual parts to different participants for simultaneous work.
In this article, we will show the basic techniques for creating a master and subdocuments from a sketch, as well as creating a master document from existing files. In addition, we will show you how easy it is to add content to the beginning of the main document.
Create a main document from a sketch
If you start creating the main document without having material ready, you can create it from a sketch. To do this, create a new Word document and save it with a file name that makes it clear that this is the main document.
After you have saved your main document, go to the tab View (View) and click Outline (Structure) section Document Views (view modes).

Enter headings for your document in outline mode by changing their levels. To do this, use the drop-down list of levels or the green arrows in the section Outline Tools (Working with the structure).

When you have entered all the titles you want, press the command Show Document (Show document) in the section Master Document (Main document).

In section Master Document (Main document) new features will become available. Select the entire document structure and click Create (Create).

Pressing this command wraps each document in its own container. At this point, save the main document again.
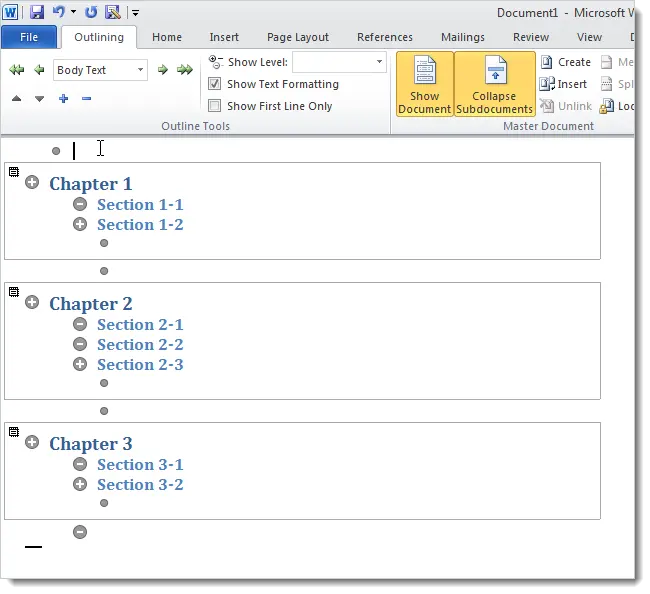
Each container in the main document becomes a separate file, as shown below. The name of the first heading in each container of the main document is used as the filename for the corresponding subdocument.

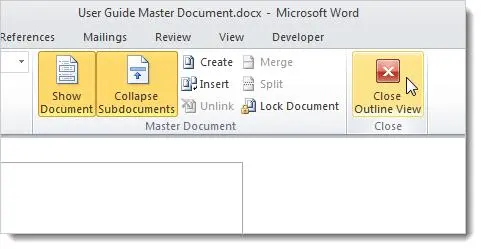
To return to a previous view, such as view Print Layout (Page Layout), click Close Outline View (Close outline mode) in the section Fermer (Closing).
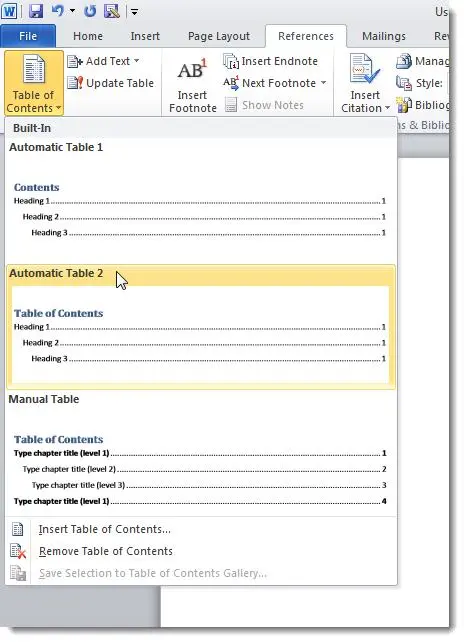
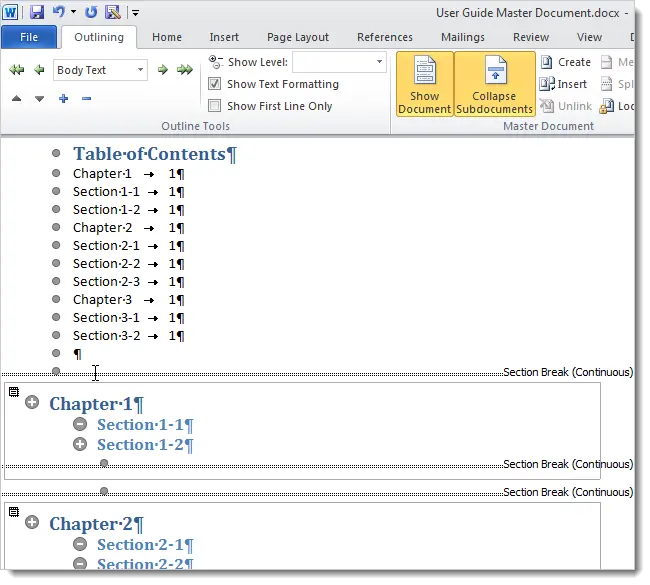
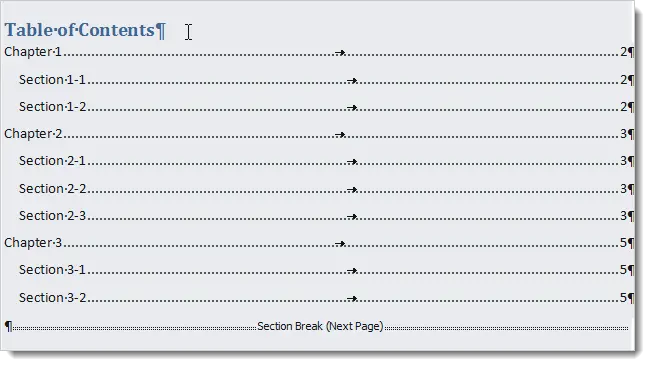
To add content to your main document, place your cursor at the beginning of the document and open the tab References (Links). Click on the drop down menu button Table of Contents (Table of Contents) and select one of the auto-assembled table of contents options to insert the auto-assembled table of contents at the selected location.
To see the section breaks inserted by Word when creating nested documents, go to the tab Home (Home) and click the line break character in the section Paragraph (Paragraph).
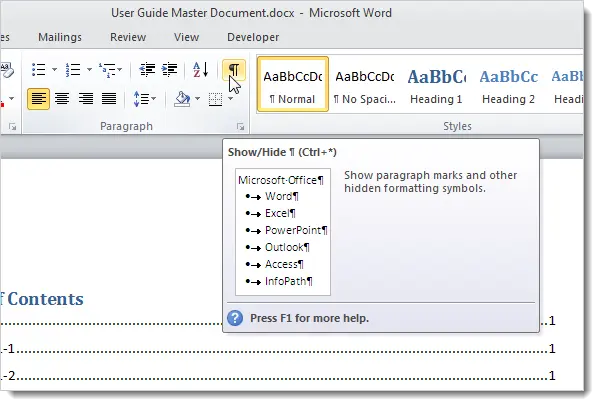
Word will show section breaks and their type.
When you create a master document from a sketch, Word inserts a section break (on the current page) before and after each subdocument you create. This means that there is no pagination in your document. However, you can easily change the type of each section break.

The following figure shows what your document looks like in outline view with subdocuments expanded.
Create a master document from existing Word files
If you already have some presets and you want to include them in the main document, you can create a new file for the main document and paste the existing files into it as nested ones. To do this, create a new blank Word document and save it as we did earlier when creating the main document from the outline.
Go to the tab View (View) and in section Document Views (View Modes) select Outline (Structure). An active tab appears on the Ribbon Outlining (Structure). Click Show Document (Show document) in the section Master Document (Main document) to activate additional functions. To add subdocuments to the main document, click Insertion (Insert).
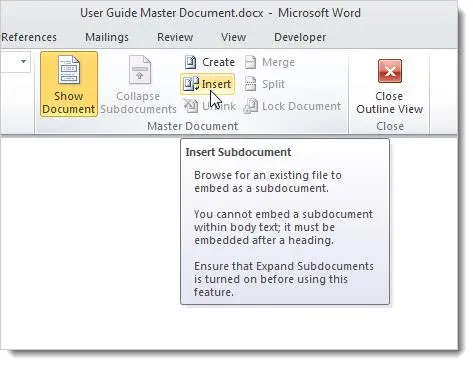
In the dialog box Insert Subdocument (Insert Subdocument) Find the location of the Microsoft Word documents you want to insert. Select the first desired file and click Open (Open).
For convenience, store subdocument files in the same folder as the main document file.

If a dialog box like this appears stating that a style is present in both the subdocument and the main document, click the button Yes to All (Yes for everyone). This will ensure that all styles in subdocuments will match those in the main document.

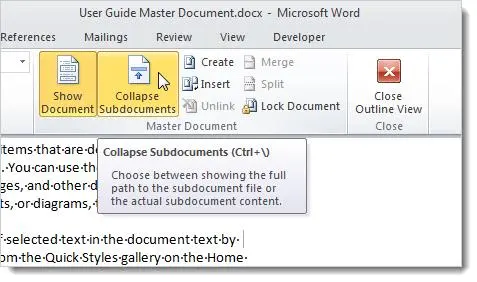
Repeat the same steps for all documents that need to be nested in the main document. When you’re done, you can collapse any nested documents if you like. To do this, click Collapse Subdocuments (Collapse Subdocuments) under Master Document (Main document) tab Outlining (Structure).
To collapse subdocuments, the main document must be saved. If you have not done this before, then the following dialog box will appear. Click OKto save the document.

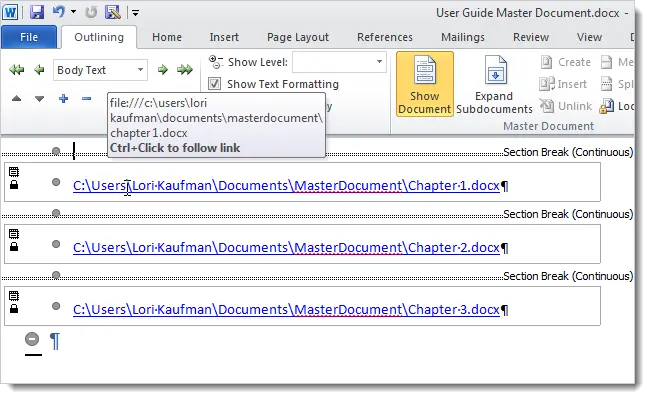
Note that each container in the main document shows the full path to the subdocument’s file. To open a nested document for editing, you need to double-click on the document icon in the upper left corner of the container or click on the link to the file with the key pressed Ctrl.
When you insert an existing file into a main document, Word adds a section break (from the next page) before each subdocument, and a section break (on the current page) after each subdocument. You can change the type of each break if you wish.
To view the main document in Outline View, click the View (View) and select the mode Print Layout (Page layout) or any other.

You can add content in exactly the same way as we did earlier when we created the main and subdocuments from sketches.
After inserting all subdocuments into the main one, you can add or edit headers and footers, create a table of contents (as already shown), an index, or work with other things that normally make up a finished document.
When you edit a subdocument, its content in the main document is updated. This is true when creating a master document in any of the ways discussed in this article.
Master documents in earlier versions of Word sometimes corrupted subdocuments. You may experience this issue in Word 2010 as well. For more information about this issue, visit the Microsoft Customer Support Services website.