


Contents
Sometimes it becomes necessary to change the intensity of lighting. They do this with the help of light dimmers, which are often called “dimmers”. Most of the devices are mounted instead of a conventional switch – directly into the same mounting box, and many look similar. How to connect a dimmer with your own hands? Simply – into the phase wire in series with the load. The installation schemes of the regulators are simple, you can handle it yourself.
Purpose and functions
Dimmers (in English dimmer) are used in everyday life to adjust the brightness of lamps, the temperature of heating devices (soldering irons, irons, electric stoves, etc.). These devices are also called dimmers or dimmers, although this is only one of the possible applications. They work most effectively with incandescent lamps, allowing them to extend their service life, since if there is a dimmer in the power circuit, the minimum current is supplied to the lamp when turned on. And as you know, it is the starting throws that cause them to fail.
Do not use dimmers with transformer or switching power supplies (TVs, radios, etc.). This is due to the peculiarities of the operation of the device – at the output, the signal does not look like a sinusoid, but only part of it (the tops are cut off with keys). When such power is supplied, the equipment fails.
Note! Conventional dimmers cannot be used with fluorescent lamps. Such a bunch will either not work at all, or the lamp will flash. To work with these sources, there are special devices with a different scheme. In general, conventional dimmers can only control incandescent or LED lamps. When energy-saving ones are connected to them, the “blinking” of light begins, and halogen ones are simply not regulated. But you can also adjust the brightness of the light for these types of lamps – there are special dimmers, but they are more expensive.
The very first dimmers were electromechanical and could only control the brightness of incandescent lamps. Modern ones can provide a number of additional functions:
- turning off the light on a timer;
- turning on and off the lighting at a certain time (presence effect, used for long departures);
- acoustic control (by clap or voice);
- the possibility of remote control;
- various modes of operation of the lamps – flashing, changing the temperature of the light, etc.;
- the possibility of embedding in the “smart home” system.
The simplest dimmers still only adjust the brightness of the lighting, but this function turns out to be very useful.
Device and types
Dimmers are made on the basis of a different element base. All of them have their own characteristics and disadvantages. And in order to understand what a dimmer is and how it works, you need to figure out what a particular device is made of. So, there may be options:
- Based on a rheostat (in particular, a variable resistor). This is the simplest, but also the most inefficient way to control brightness. Such a device is very hot, so a cooling system is needed, it has an extremely low efficiency. Currently not mass-produced.
- Electronic dimmers based on triacs, thyristors, transistors. These devices cannot be used with equipment that is demanding on the form of power supply, since the output is something similar to a sine wave with cut tops. It is also worth knowing that such circuits can produce interference that interferes with the operation of radio receivers or equipment that is sensitive to electrical interference. Despite their shortcomings, it is electronic dimmers that are used more often – because of the low price, small size and the possibility of implementing additional functions.
Scheme of the thyristor dimmer - Dimmers based on autotransformer. Such devices produce an almost perfect sine wave, but they are large in weight and size, and a lot of effort is required to adjust. Another point: a more complex circuit leads to a rise in the cost of the regulator. However, they are also on the market, used in places where radio interference cannot be created or a normal form of supply voltage is required.
When choosing a device, it is not so important to know what type it belongs to, how important it is to take into account the nature of the load to which it will be connected (incandescent and LED or fluorescent and housekeepers).
By type of execution, dimmers are:
- Modular for installation in an electrical panel on a DIN rail. You can connect this type of dimmer with incandescent lamps, halogen lamps with a step-down transformer. For ease of use, they have a remote control button or a key switch. Such devices are convenient, for example, for controlling the illumination of the yard and the entrance gate from the house, the landing or the front door.
Modular dimmer and its connection diagram - Dimmers on a cord. These are mini-devices that allow you to adjust the brightness of the glow of lighting fixtures that are plugged into an outlet – table lamps, wall lamps, floor lamps. It is only worth knowing that they are compatible mainly with incandescent lamps.
The dimmer on the cord can be installed on any table lamp, wall lamp, floor lamp (with incandescent lamp) - For installation in a mounting box. They are placed in the mounting box under the switch (in the same box). Compatible with incandescent, LED, halogen step-down and electronic transformer. They are controlled by a button that is placed on top of the device or connected to the smart home system.
Dimmer for installation under the switch Connection diagram for a dimmer under a switch - Monoblock. In appearance, it is very similar to a conventional switch, it is placed in the same mounting box, it is possible instead of a switch. They are included in the phase circuit break (diagrams below). This type has a large species diversity. Which lamps such a dimmer can be connected to should be indicated on the case, but if it is an electronic circuit, then they work with incandescent lamps and some halogen and LED lamps (which are written dimmable or have an appropriate sign). Can be managed:
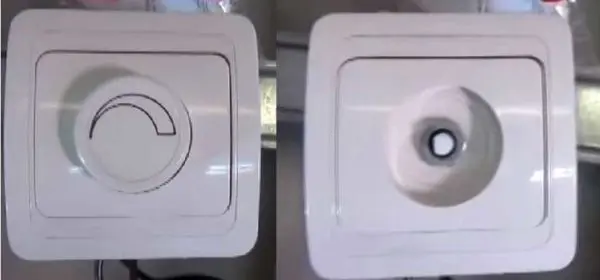
- By means of a rotary disk (rotary dimmers). Turning off the light occurs by turning the disk to the leftmost position. The disadvantage of this model is that it is impossible to fix the last illumination value. When enabled, the brightness is always set to the minimum.

Rotary and rotary-push models do not differ externally - Swivel-push. In appearance they are similar, but on / off is done by pressing the disk, and adjustment – by turning it.
- Keyboards. In appearance, they are very similar to conventional switches. Turning the light on/off is standard – by flipping the key, and the adjustment starts after holding the key down for more than 3 seconds. There are models in which switching on and off is done with one key, and adjustment with another.

Keyboards are like switches - Touch. All control is done by touching the screen. These models are the most reliable – no mechanical parts, there is practically nothing to break.


Touch dimmers are good because they can be remote controlled
- By means of a rotary disk (rotary dimmers). Turning off the light occurs by turning the disk to the leftmost position. The disadvantage of this model is that it is impossible to fix the last illumination value. When enabled, the brightness is always set to the minimum.
In private houses and apartments, monoblock dimmers are most often installed. In the house, a modular design can still be useful – to change the brightness of the lighting in the local area with the ability to control it from home. For such cases, there are models that allow you to control the illumination from two places – pass-through dimmers (they work on the principle of a pass-through switch).
Monoblock dimmer connection diagram
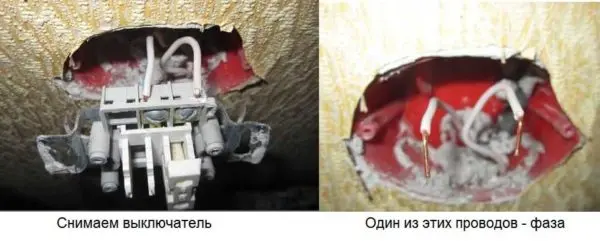
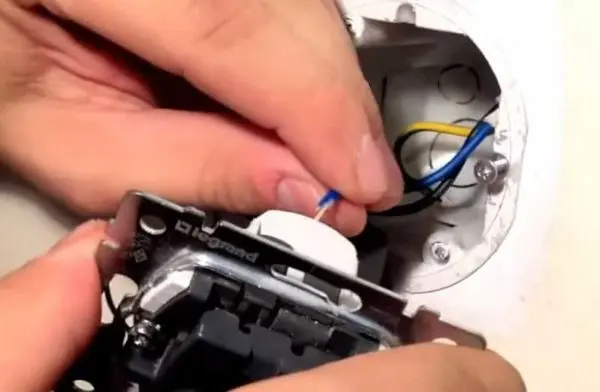
Most often, monoblock dimmers are independently connected. They are put in place of a switch. With a single-phase network, the connection diagram is the same as on a conventional switch – in series with the load – in a phase break. This is a very important nuance. Dimmers are placed only in the gap of the phase wire. If you connect the dimmer incorrectly (into the neutral gap), the electronic circuit will fail. In order not to be mistaken, before installation, it is necessary to determine exactly which of the wires is the phase and which is the neutral (zero).
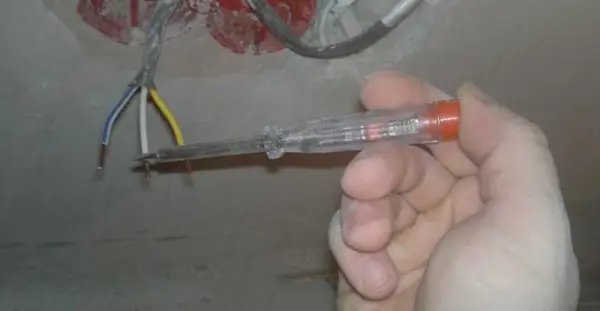
If we are talking about installing a dimmer in place of the switch, then you must first disconnect the wires from the switch terminals (with the power turned off on the panel), turn on the machine and use a tester, multimeter or indicator (screwdriver with LED) to find the phase wire (when touching the probe to the phase on the device some readings appear or the LED lights up, and there should be no potentials on the neutral (zero) wire).
The found phase can be marked in some way – put a line on the insulation, stick a piece of electrical tape, colored tape, etc. Then the power is turned off again (the input switch on the shield) – you can connect a dimmer.
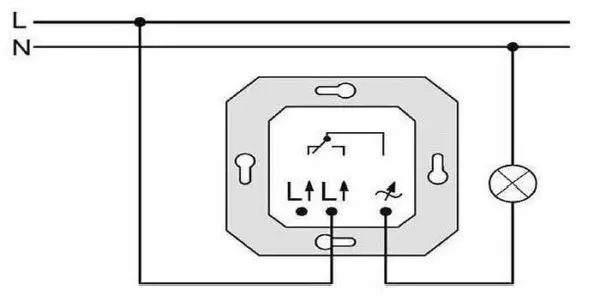
The connection diagram of the dimmer is simple: the found phase wire is fed to the input of the device, from the output the wire goes to the load (in the figure to the junction box, and from there to the lamp).
There are two types of dimmers – in one, the input and output contacts are signed. In this case, you must follow the instructions and apply the phase to the signed input. On other devices, the inputs are not signed. In them, the phase connection is arbitrary.
Consider how to connect a dimmer with a rotary dial. First you need to take it apart. To do this, take out the disk – you need to pull it towards you. Under the disc is a button, which is fixed with a clamping nut.

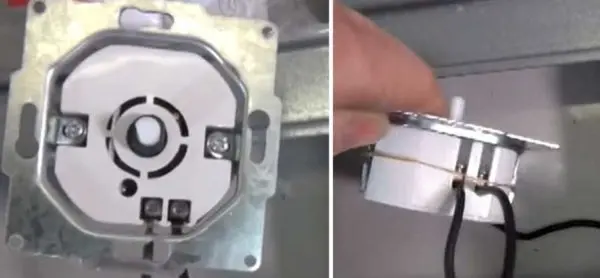
We unscrew this nut (you can use your fingers) and remove the front panel. Under it is a mounting plate, which we will then screw to the wall. The dimmer is disassembled and ready for installation.
We connect it according to the scheme (see below): we start the phase wire at one input (if there is an input marking, then to it), we connect the conductor to the second input, which goes to the lamp / chandelier.
It remains to fix. We insert the connected regulator into the mounting box, fix it with screws.

Then we impose the front panel, fix it with the nut removed earlier and, last of all, install the rotary disk. Dimmer installed. Turn on the power, check the work.
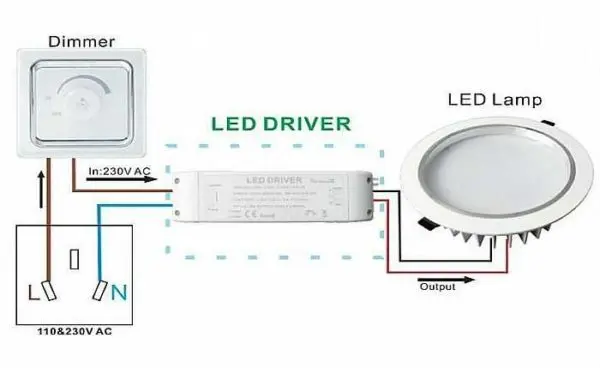
How to connect a dimmer to an LED lamp or strip
There are no fundamental differences in the connection method. The only peculiarity is that the dimmer is placed in front of the controller for LED lamps or strips (see diagram). There are no other differences.
Everything is exactly the same: the dimmer is placed in a break in the phase wire, but its output is fed to the input of the led lamp or tape controller.
Setting the dimmer Fibaro FGD211 with switch
The peculiarity of this model is that it is compatible with the “smart home” system and is controlled from a computer. There are devices that are controlled with a regulator installed in a convenient place.
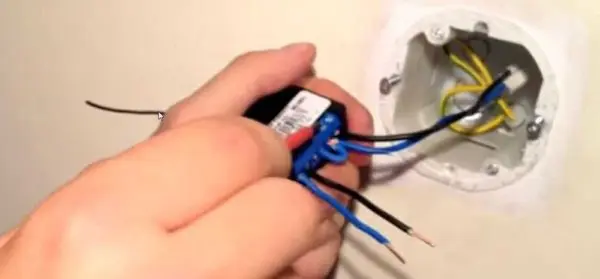
Dimmers that are installed in the junction box to the switch are also placed in the gap of the phase wire, but the installation process itself is slightly different. The switch is also removed, we find the phase, we mark the wire. Next, we take a dimmer, connect the terminals 0 and N with a jumper (a piece of copper wire in a sheath). We connect wire segments 1-7 cm long to contacts S10 and Sx.
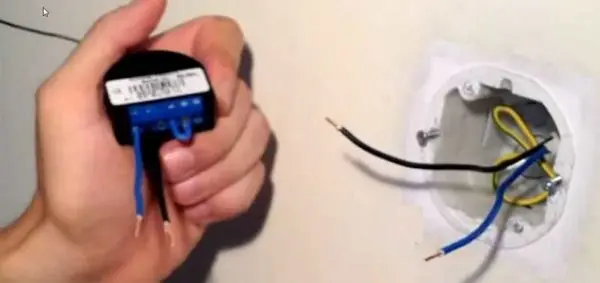
The next step is to connect the regulator to the wiring. We install the phase wire on the connector with the letter L, zero – on N. We fill the connected device into the mounting box (we bend the wires).

Next, the wires previously installed in sockets S1 and Sx are connected to the terminals on the switch (any order).

We screw the switch frame into place, then put on the front cover and keys, program the system and check the operation.
If you need to connect a dimmer controlled by a button, there will be two more contacts in it, to which you will need to connect a remote button.
Features of selection and operation
When choosing a dimmer, you need to pay attention not only to what lamps it can work with and what functions it has. It is also necessary to look at what total load it is designed for. A maximum of one light dimmer can “pull” 1000 watts of load, but most models are designed for 400-700 watts. Eminent manufacturers, depending on the power, have a significant difference in price. Chinese products do not have a tangible difference in cost.
| Naming | Power | Maximum current | Compatibility | Price | Manufacturer |
|---|---|---|---|---|---|
| Volsten V01-11-D11-S Magenta 9008 | 600 W | A 2 | Incandescent lamps | 546 rub | Russia/China |
| TDM Valdai RL | 600 W | A 1 | Incandescent lamps | 308 rub | Russia/China |
| MAKEL Mimosa | 1000 W/IP 20 | A 4 | Incandescent lamps | 1200 rub | Turkey |
| Lezard Mira 701-1010-157 | 1000 W/IP20 | A 2 | Incandescent lamps | 770 rub | Turkey/China |
The second point to remember is that dimmers work with a minimum load. Those, in most cases, have a minimum of 40 watts, some thousanders have 100 watts. If the connected lamps are of lower power, they may flicker or not light up. This happens when LEDs are used instead of incandescent bulbs. In this case, one of the lamps is left old (incandescent), which will provide the required minimum load.
Other features of operation are related to compatibility. As already mentioned, conventional dimmers cannot work with fluorescent lamps (including energy-saving ones). Halogen ones simply do not react to changes in the shape of the pulse. And if you decide to replace incandescent bulbs with more economical ones, most likely you will have to change the dimmer as well.