


Contents
- Features of the manufacture of houses for wells
- Types of well houses
- How to sheathe a house for a well
- Which house for a well is better
- Do-it-yourself house dimensions for a well
- Do-it-yourself drawings of houses for a well
- How to build a house for a well with your own hands
- How to install a house on a well
- How to make a canopy over the well with your own hands
- Photo of houses above the well
- Conclusion
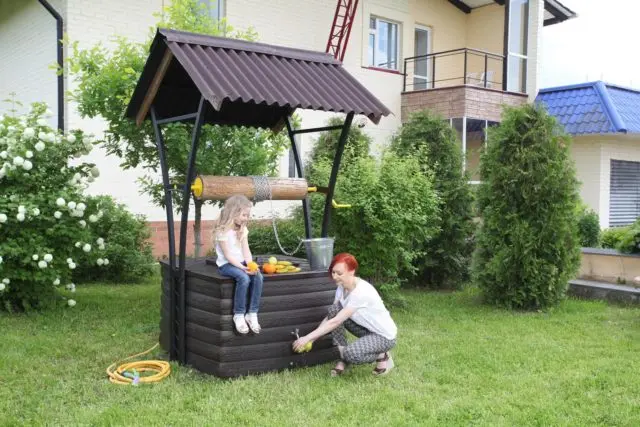
A well on a site without an appropriate design looks quite prosaic – a gate with a bucket on racks. Everyone can turn such an unsightly structure into a beautiful part of the landscape. To make a house for a well with your own hands, you need to have a minimum of skills in construction, imagination and suitable materials.
Features of the manufacture of houses for wells
Features of making a house for a well with your own hands directly depend on its functionality. The structure above the mine with water performs the following options:
- Debris protection. The house eliminates the ingress of precipitation, dust, leaves, insects, small rodents, preparations into the source when spraying and processing plants on the site.
- It does not allow water to freeze in winter, this is especially true for northern regions with a harsh climate.
- Serves as a barrier against the aggressive effects of sunlight.
- Prevents children and pets from entering the well shaft.
- Decorates the site, being an addition to the landscape.
Beautiful houses for a well with a minimum of effort and materials become not only a practical solution, but also delight the eyes of the owners and guests of a country house.
Types of well houses
The design of the upper part of the well can be different in appearance and type of construction. You can cover the mine with your own hands with a simple shield box or make a real house with many elements. The roof of the structure is made in the form of an umbrella, single-pitched or gable with a sharp or gentle slope.
Doors for access to water can be:
- single-leaf;
- bivalve;
- sliding.
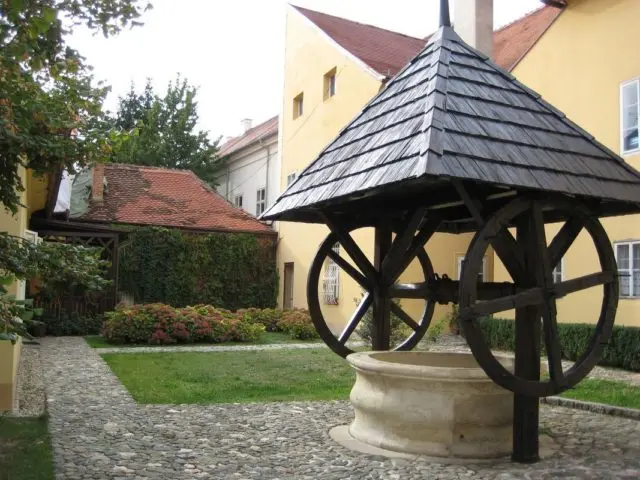
According to the type of houses for the well, open and closed options are distinguished. An open house is a roof construction on the supports of a lifting mechanism.
A closed structure is a building with walls, a roof, and a door for access to water.
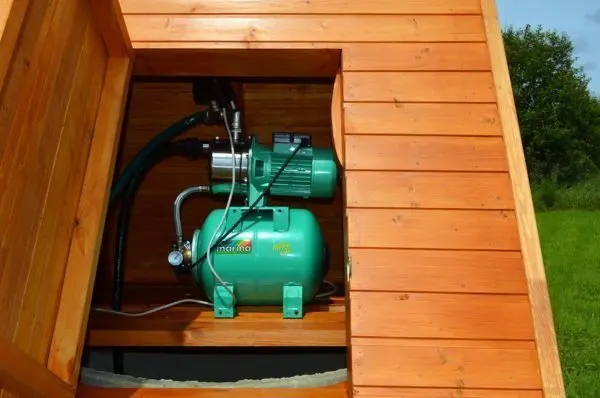
Closed options are relevant if a pump is used to draw water. To protect equipment, many summer residents build closed houses for the well with their own hands with a door that is locked.
How to sheathe a house for a well
For the design of the well, materials are usually used that are in harmony with the rest of the outbuildings on the site.
To do this, they buy the necessary components in stores, or you can use those fragments of material that remained after building a house, bath, garage with your own hands. For the design of the ring above the shaft, sometimes it is enough to simply apply cement mortar to it and, having drawn a relief outline, decorate it with small stones or fragments of tiles. For a more solid construction, suitable building materials are used.
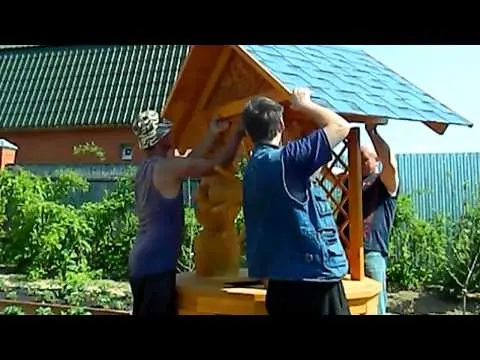
House for a well from a bar
Wood blocks are the most popular materials in the manufacture of structures for a water shaft. A frame, racks and a canopy over the well are made of wood with their own hands.
A tree is chosen not only for the ease of working with it, but also for its durability, environmental friendliness, availability of material and the beauty of the design.
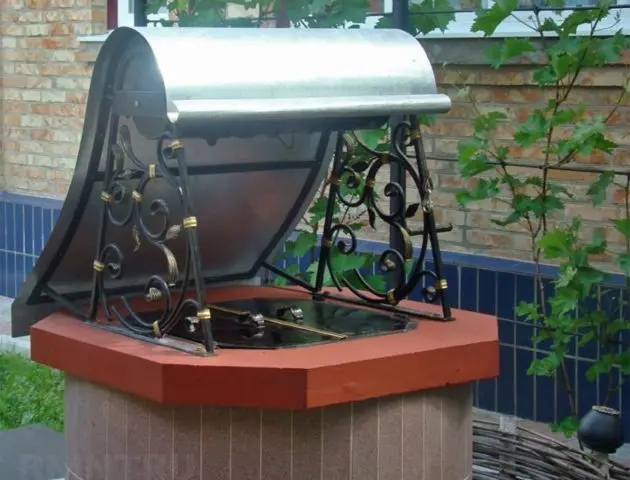
metal well house
Houses for a well, made of metal, are characterized by maximum resistance to environmental influences and damage. Metal as a durable and reliable material is used to form the frame or the entire structure.
Iron buildings can be the simplest structures in the form of a galvanized box above the mine.
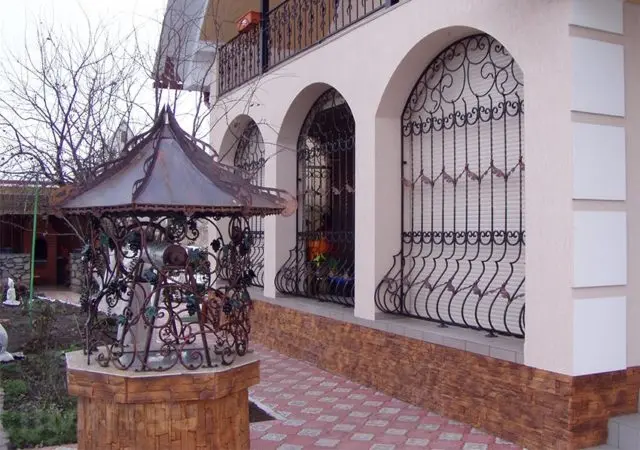
When decorating with your own hands with forged elements of iron structures, they become design compositions.
When choosing iron to protect the mine on the site, builders recommend using special preparations to prevent rust.
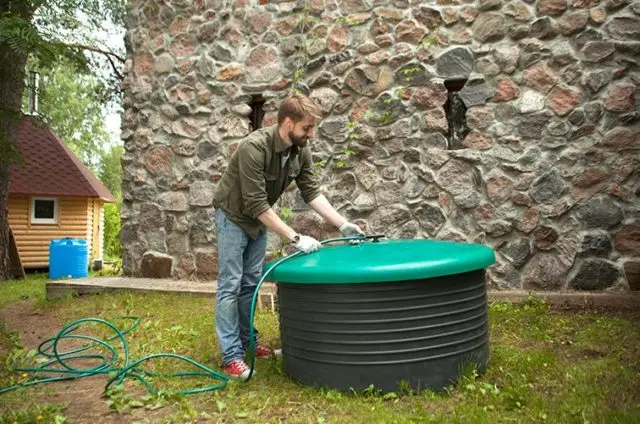
plastic well house
Plastic is short-lived, but lightweight, so it is often used to finish moving structural elements. For example, a molded plastic cover that closes the shaft performs a lightweight building function.
When you need to make a light roof on a well with your own hands – plastic is a good material for sheathing an opening structure:
House on a well from siding
Siding is convenient in finishing the well due to the ease of assembly of elements and the variety of colors. A large number of original colors helps to make a house for a well with your own hands in any tone, for example, as the main building on the site.
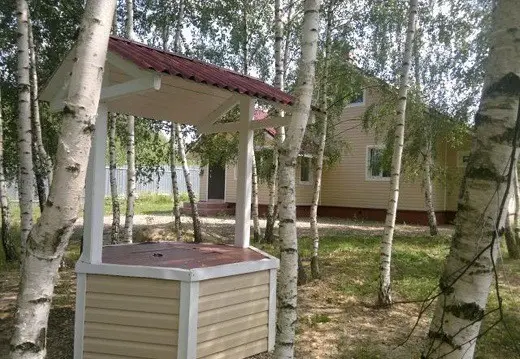
Siding allows you to make small houses on the well neat and functional.
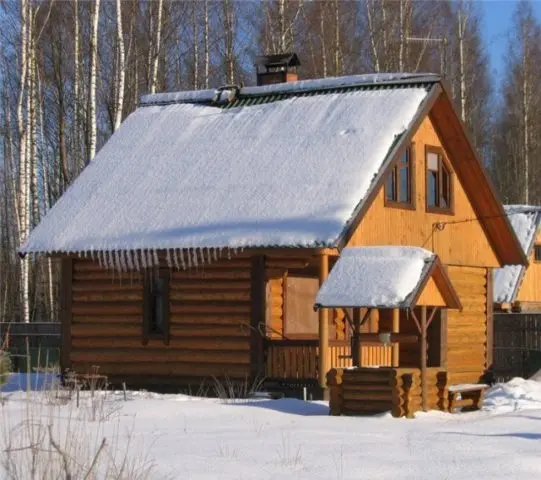
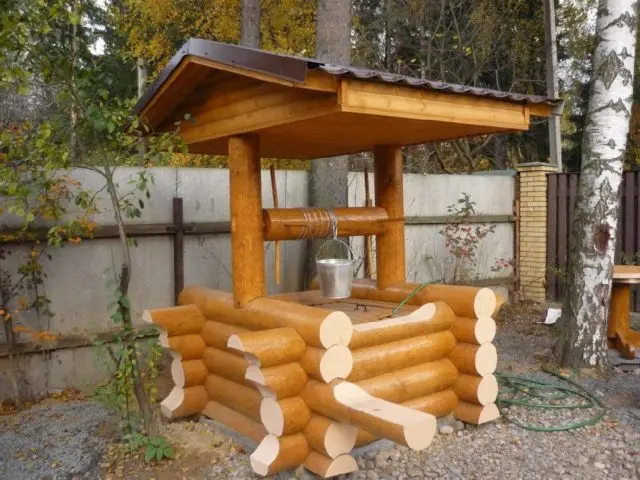
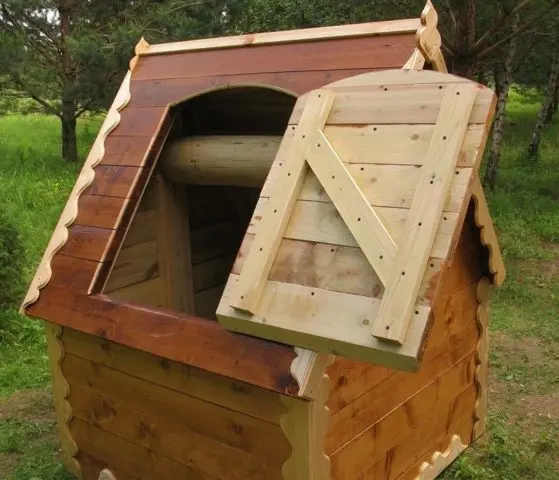
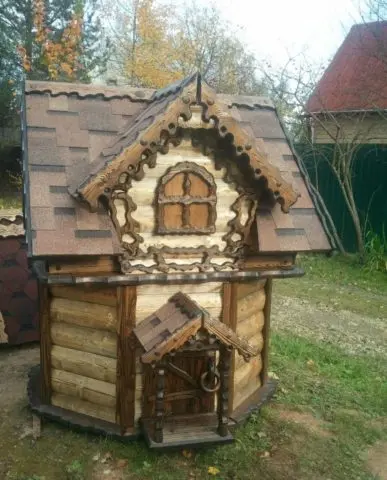
House for a well made of logs
When constructing a structure, solid beams are popular. A do-it-yourself house for a well made of rounded logs turns out to be solid and massive. Typically, such structures are placed in a quadrangular shape, the corners are aligned with or without the remainder.
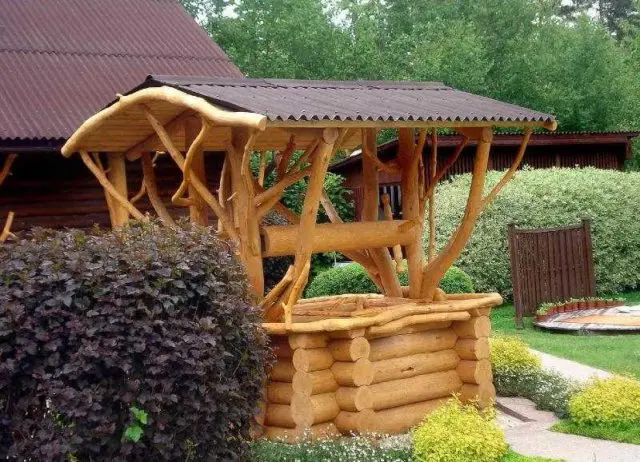
In this version, the log house smells of antiquity and the presence of ancestors, especially if the house is complemented by an openwork cornice.
Houses for a well from a professional pipe and a professional sheet
Profile pipes allow you to make the frame of the house for the well with your own hands durable and of high quality. Profiled sheet as an economical and stainless material is a popular choice of base when forming the roof of a structure.
The owners of the site use corrugated board and profile pipes as the main material for the construction of a water house, most often due to the fact that, as a rule, as many scraps are enough for a well as remain from the roof or fence.
Which house for a well is better
In order to choose the best option for a house for a well, several factors must be considered:
- Reliability and durability of a design. As a rule, a well on a site is not made for one year. For the same reason, the house for the well must be durable, especially since it is located in the open air and is constantly exposed to natural factors.
- Event budget. Some materials and possible additional services of a narrow profile (forging, welding, woodcarving) are quite expensive. There are design options that can be made from existing construction residues with your own hands – this can be a decisive factor when choosing a house for a well.
- The combination of a well structure with the main buildings on the site. Landscape designers recommend that when choosing a sheathing for a house, focus on other elements of the yard and maintain the entire design in the same style.
- Ease of use. Drinking water is a constant need, so a well house should be comfortable. It is necessary to provide a place for a bucket, a canopy from possible rain.
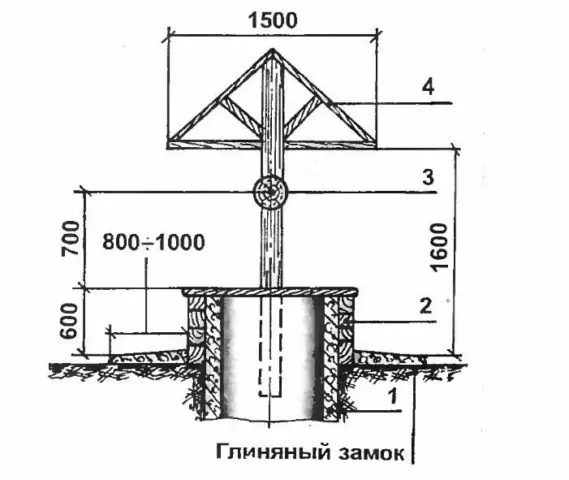
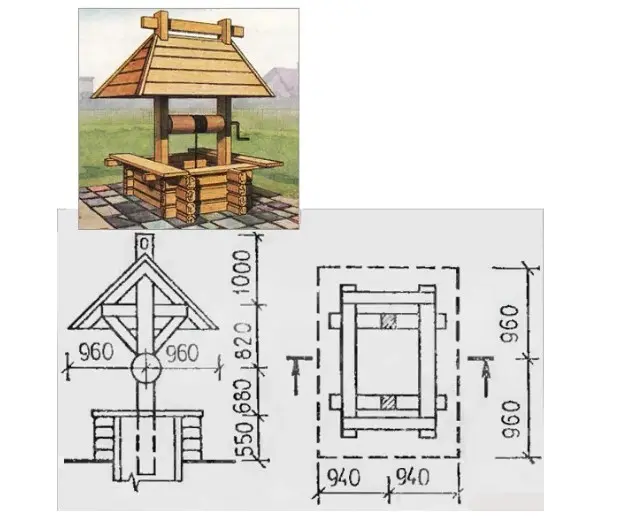
Do-it-yourself house dimensions for a well
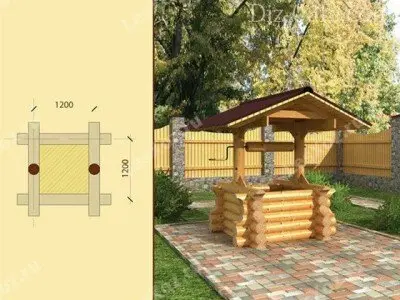
The size of each individual house depends on the width of the shaft and the cap. If the well is lined with concrete rings, then their size can vary from 70 cm to 1,5 m. The frame parameters should be based on the outside diameter of the head. It is believed that the optimal height of the house above the well is about 120 cm. It is better to choose a roof slope of at least 60 °. With this indicator, the roof will withstand wind loads and will not accumulate snow. The best option for calculating parameters when making a do-it-yourself house for a well is a simple drawing with dimensions based on the existing head.
Do-it-yourself drawings of houses for a well
After the initial dimensions of the well are recorded, a design drawing is drawn up taking into account the material.
Schematic transfer of the model to paper and application of parameters can be performed in any format – the main thing is that it is clear and convenient for the performer to work with such a plan.
If the dimensions of the head are suitable, then you can use the ready-made drawings of the well house with your own hands by choosing the appropriate option in the photo.
How to build a house for a well with your own hands
In order to put a house for a well with your own hands, you can use proven master classes with step-by-step instructions.
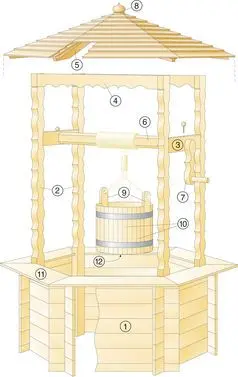
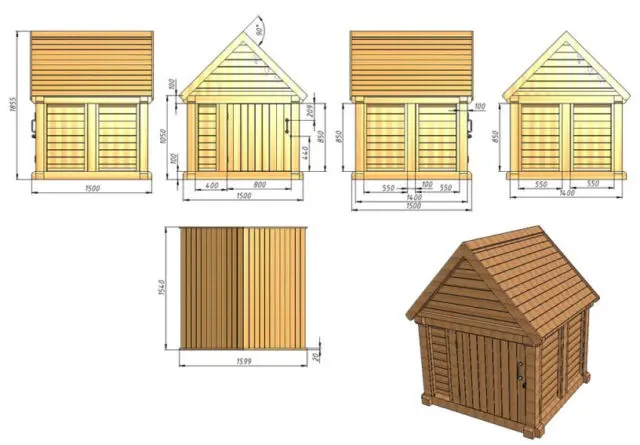
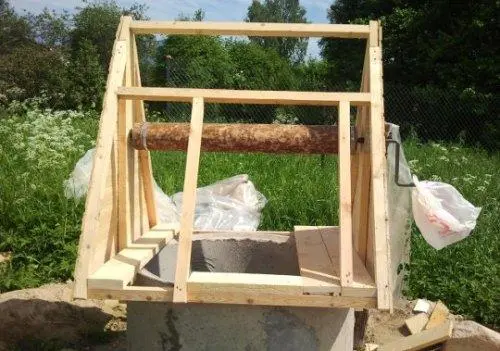
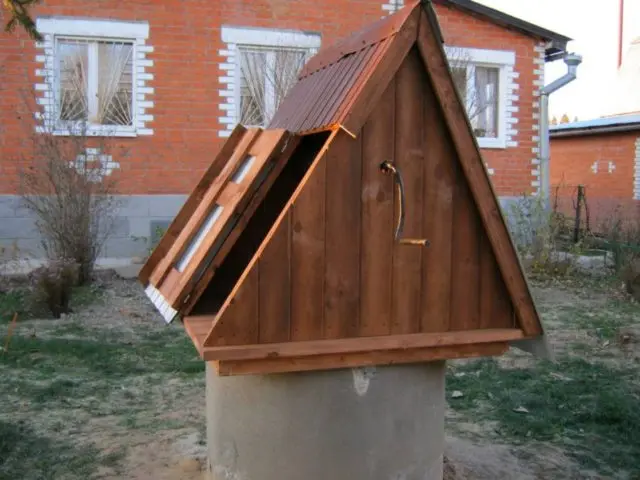
Double wooden house
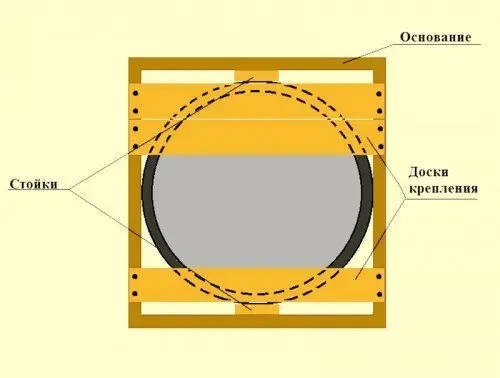
This option is suitable for a novice master and does not take much time to manufacture. First, the diameter of the shaft head is measured. Based on these data, the basis of the structure will be made.
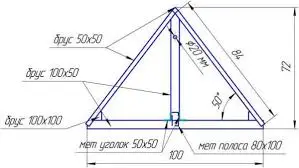
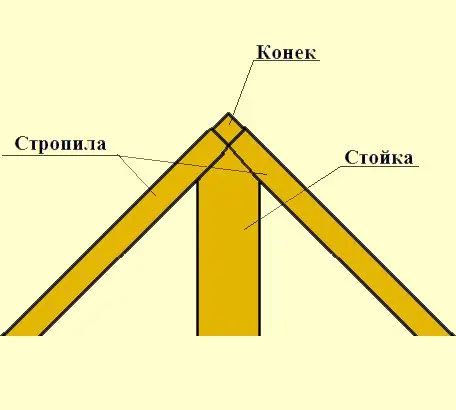
A wooden frame is made from a bar 50 * 100 mm, fixing with corners. The correctness and evenness of the structure will allow you to check the building level, for this you need to find a flat place. From bars of the same section (50 * 100), racks 70 cm long are placed perpendicular to the base, fastening the structure with iron corners. At the top they are connected with a ridge – a beam of 50 * 50 mm.
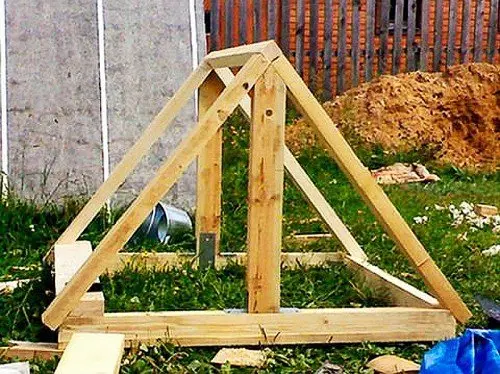
After that, rafters are attached to the racks and corners of the base. In order for all parts of the structure to fit together, the top of the racks is cut at an angle of 45 °.
A wide (at least 30 cm) board is attached to one of the sides of the frame, on which it will be possible to put a bucket in the future. Narrow boards are stuffed on the other sides for structural strength and as a frame that will hold the house on the head. The finished base is placed on the well ring and bolted.
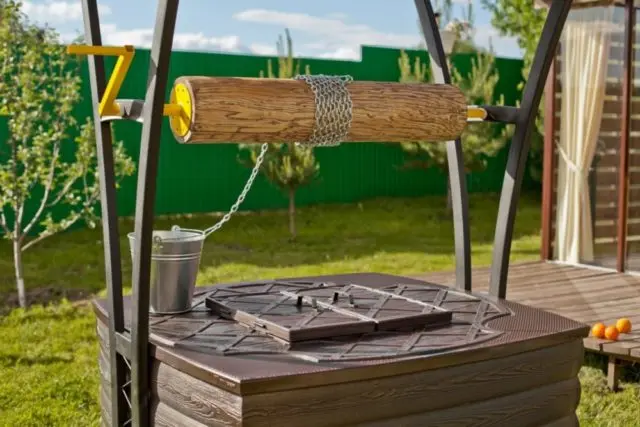
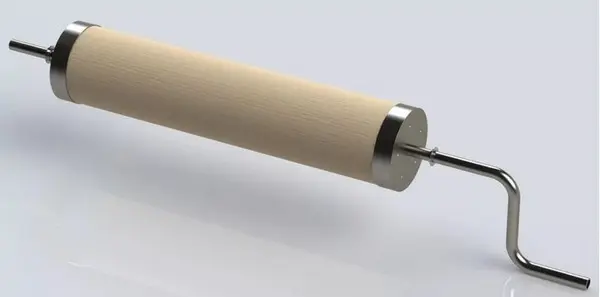
You can start making the gate. In order for the set of water to pass comfortably for the user, it is necessary to take into account the features of the wrench:
- The wider the drum, the fewer rotations you need to do to get the container out of the shaft.
- The length of the handle affects the effort applied to lift – the larger the radius of rotation, the easier it is to collect water.
To form a gate with their own hands, they take a log with a diameter of at least 20 cm along a length less than 10 cm from the distance between the posts.

Rings 35 cm long are cut off from a metal pipe with a cross section of 5 mm and driven into the ends of the log to protect against splitting. Drill holes in the rings up to 10 cm each. Two blanks are made from a metal rod with a cross section of 35 mm: a short one 20 cm and a long one for a handle 100 cm.
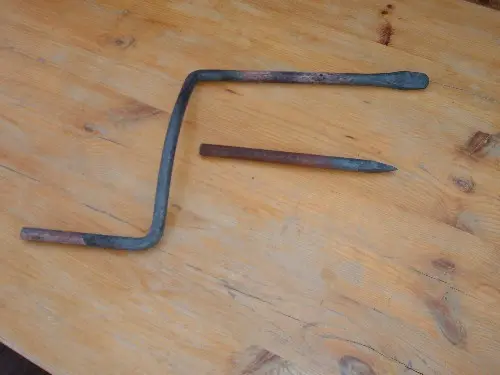
All parts of the collar are assembled into a single element, for strength they are welded to metal disks.
Now you can install and tightly fasten the gate in vertical posts.
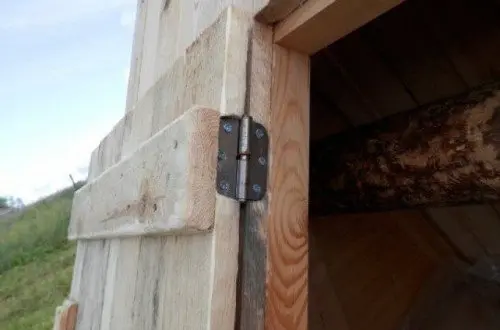
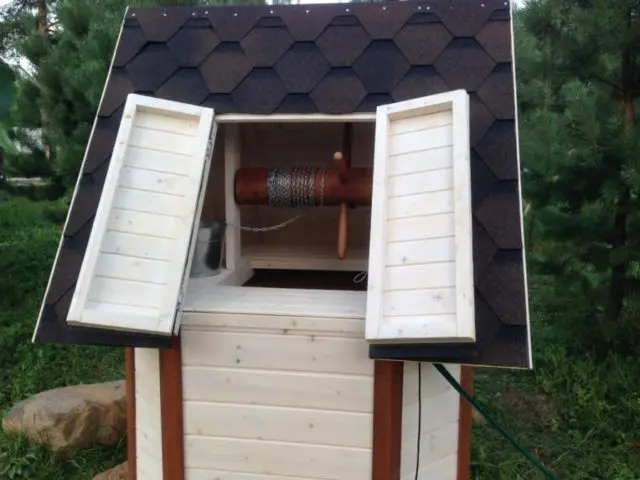
The door can be made from 2-3 boards of the selected size, connecting them on the back side with two transverse bars and one diagonal one. The door is attached to the frame with hinges on screws or nails.
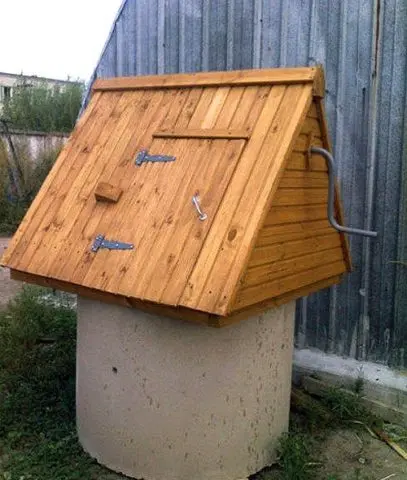
The base of the house is sheathed with boards or clapboard as desired.
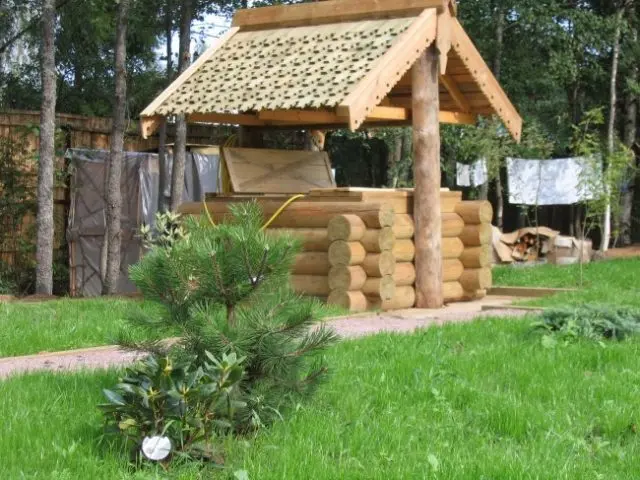
Log cabin
The log cabin is made of rounded logs in a classic rustic manner. To make a house for a well with your own hands, you should use a simple drawing that shows the dimensions of the material and the places where the racks are attached.
According to the size of the head, logs of the same length are sawn and laid out in a log house around the shaft. The protruding edges may have figured cutouts as a decor for the structure. Vertical racks are attached to the massive structure, which are provided with props for strength. A gate with a chain and a bucket is attached to the supports, a roof frame is erected. Due to the solidity of the structure, the roof can be sheathed with any material – slate, roofing material, tiles.
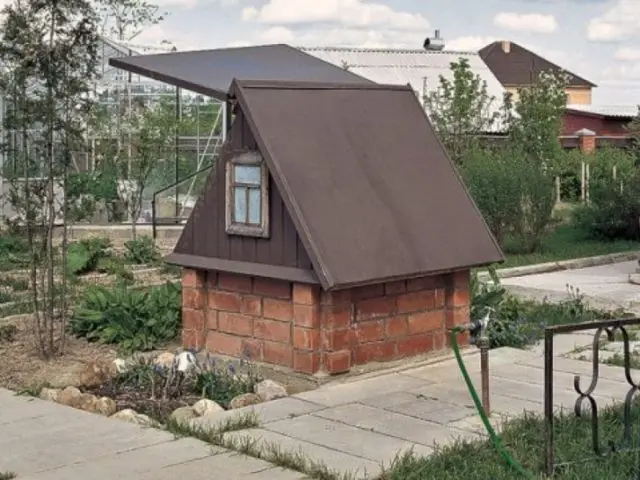
Solid house from the ground
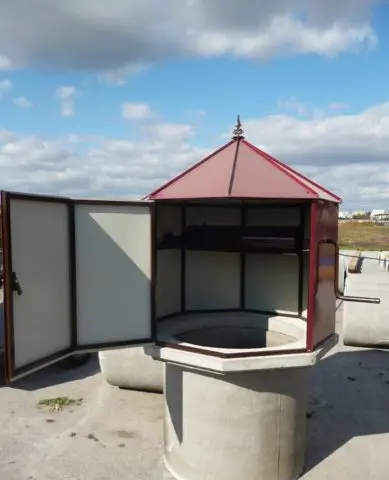
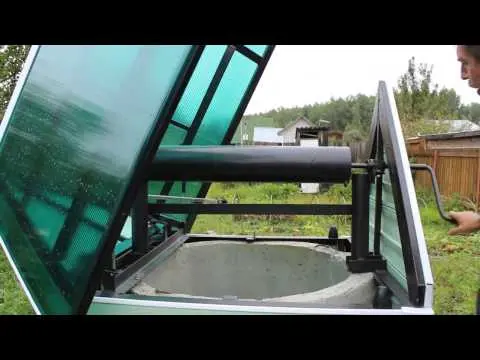
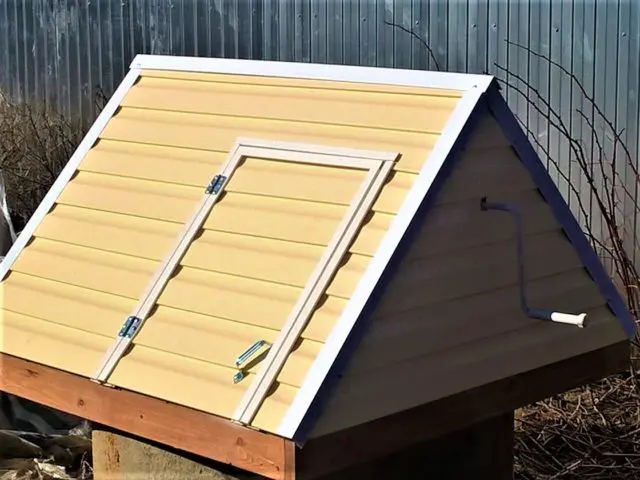
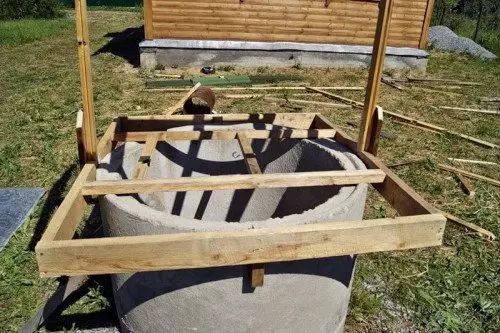
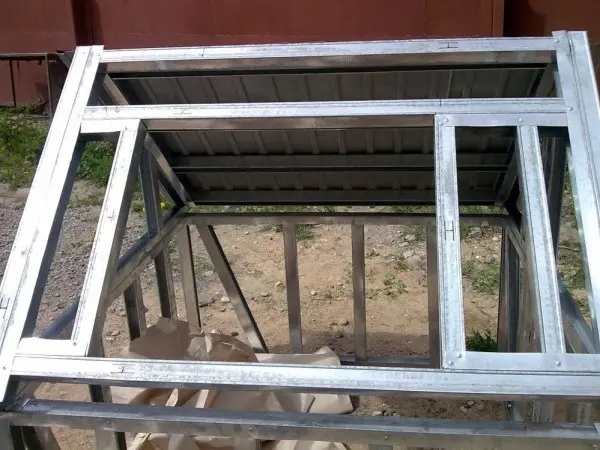
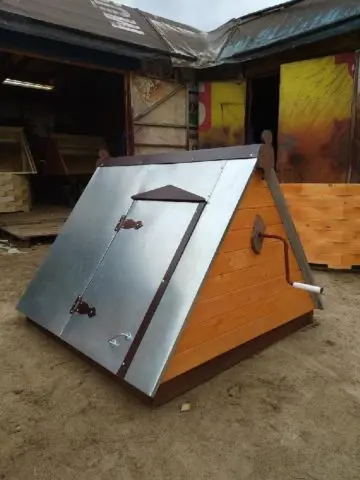
There is an option for making a closed structure from a metal profile with your own hands, when the concrete ring is hidden in the house. The dimensions of the frame must be such that the structure can be freely put on the head. The height is selected individually – so that you can bend over and get a bucket.
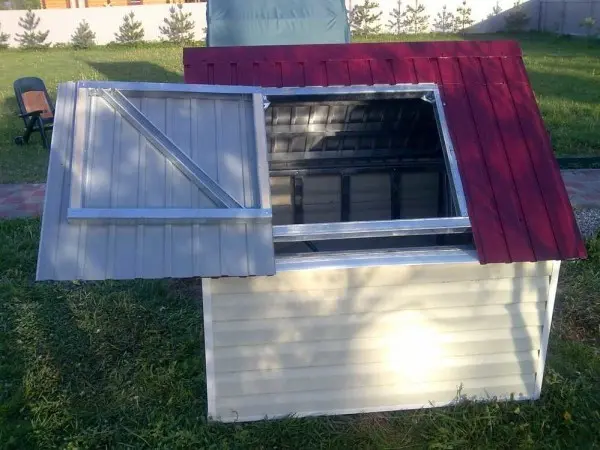
The profile must be taken from thick galvanized metal. Two identical frames are assembled from the guides – one will go to the floor, and the second will be above the head.
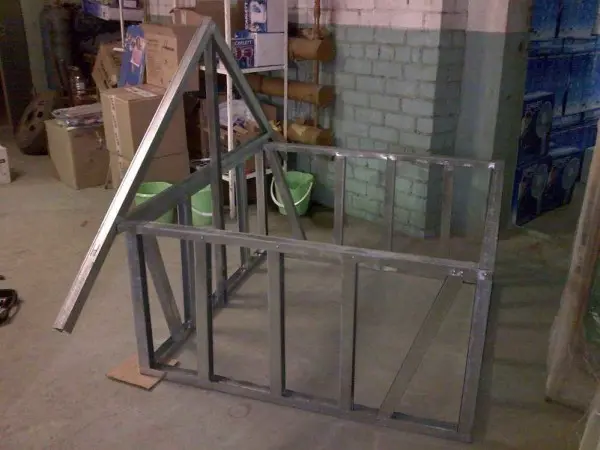
To make a triangle, the sidewalls of two profiles are cut and, having attached a vertical rack in the middle of the frame, the notched corner is fixed to it. The same is done on the other side of the base. Two triangles are connected by a crossbar.
On the side of the base where the door is supposed to be, additional racks are placed.
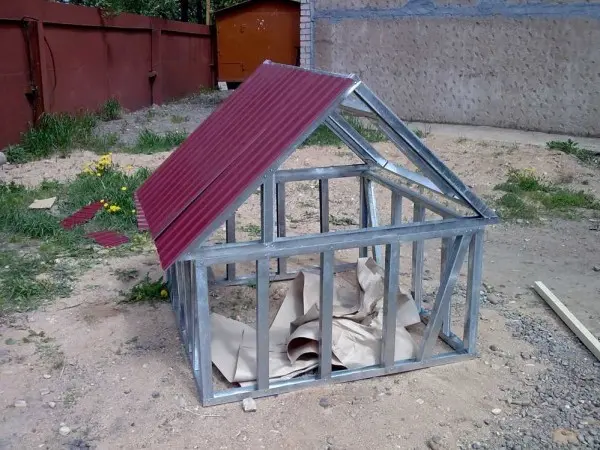
A roof is attached to the finished frame – a professional sheet or, having previously fixed the base with plywood, soft tiles. The sides are sheathed with the available material – siding or clapboard.
How to install a house on a well
A do-it-yourself house for a well or bought from a manufacturer is installed on the head without much effort, if the dimensions of the shaft and the outer ring are taken into account. The shape of the house does not matter – whether it is a square frame or a round base, it is simply put on the concrete base of the well.
A mandatory step in installing the house on the well is the final fastening of the frame, roof and other elements. This is done with a screwdriver or welding, if the structure is forged.
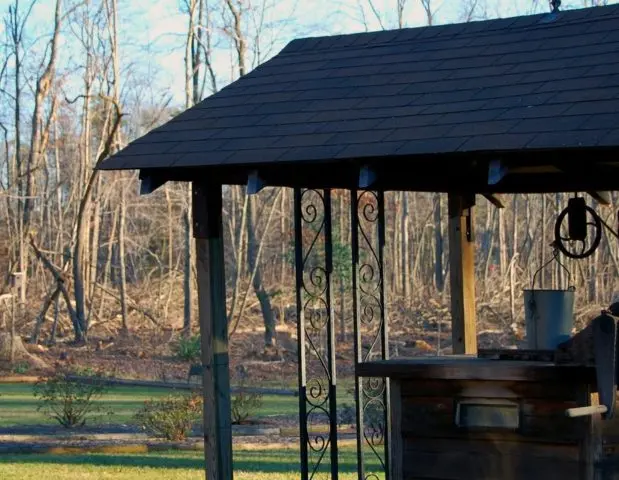
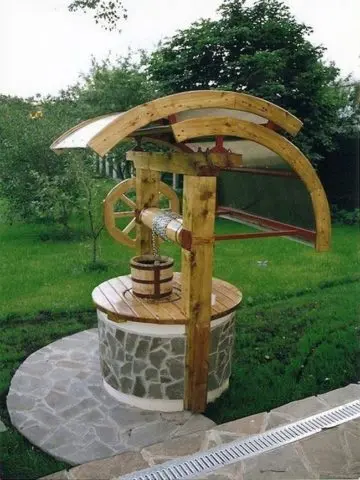
How to make a canopy over the well with your own hands
Sometimes it is better to do without building a house – to protect the water and decorate the well with a canopy.
The choice of material for the canopy is diverse:
- tree;
- forging;
- plastic;
- profile
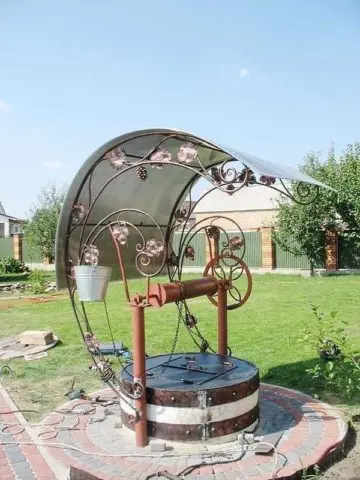
Often, a beautiful stone head is completed with this method, making a decorative canopy from a suitable material with your own hands. When choosing this option, the following conditions must be met:
- Access to water must be hermetically sealed with a lid to prevent debris from entering the shaft.
- The canopy should protect from atmospheric precipitation, especially from slanting rain.
- The structure must be made in the same style as the house and other buildings.
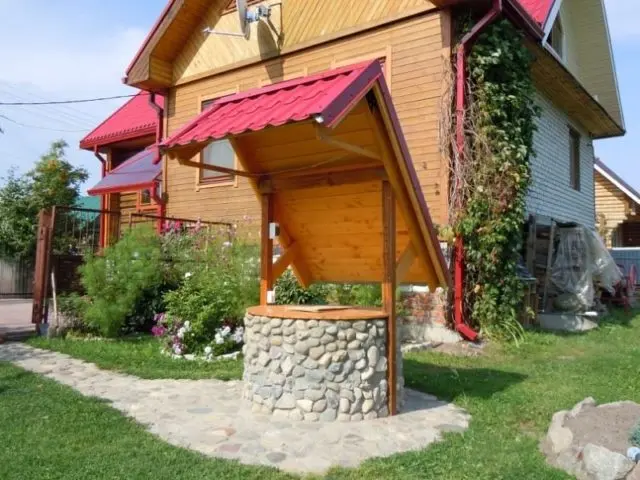
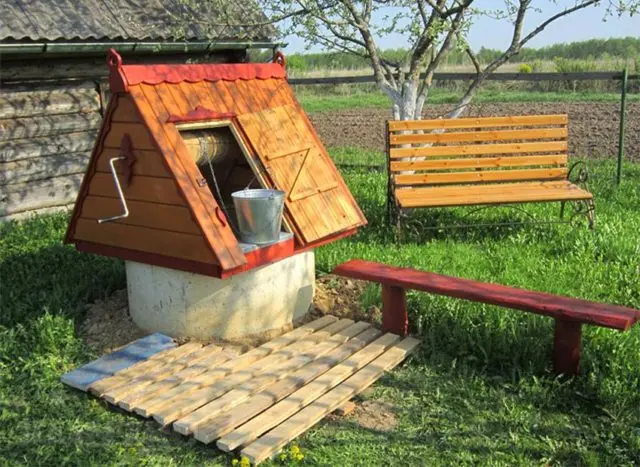
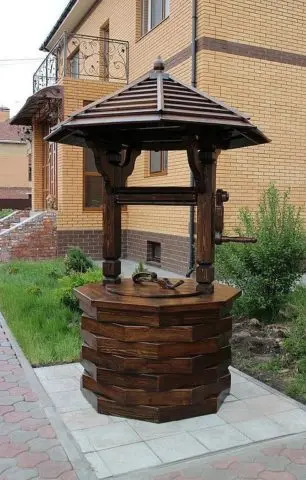
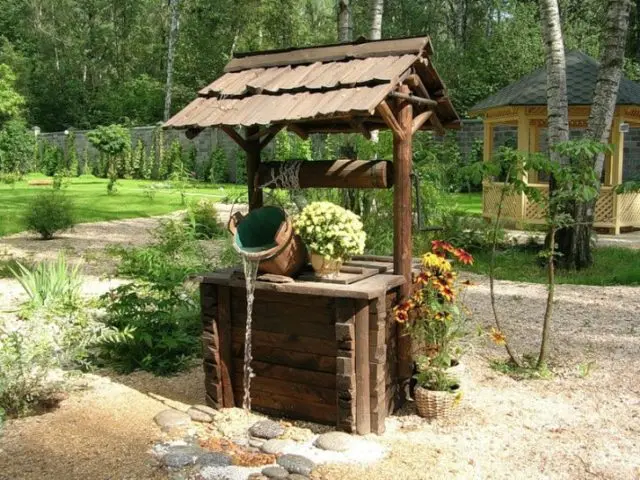
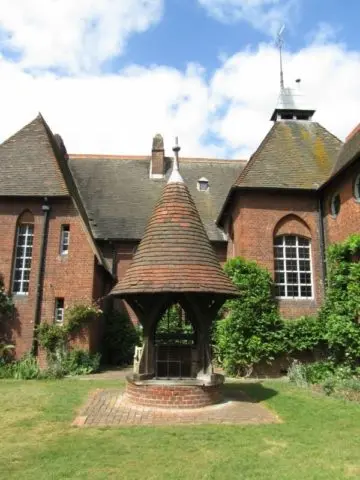
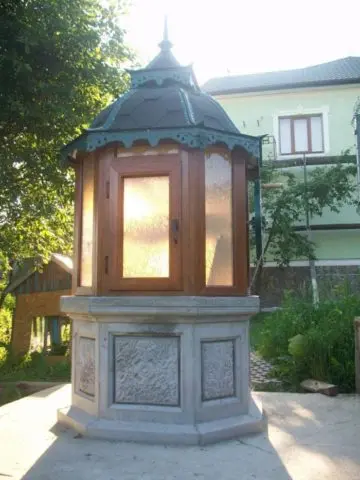
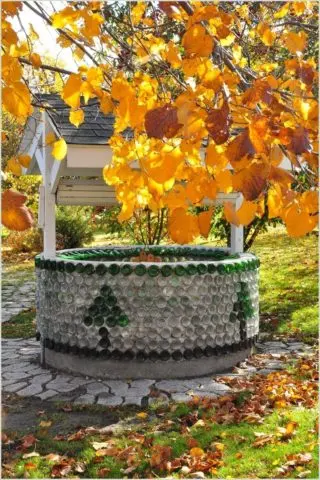
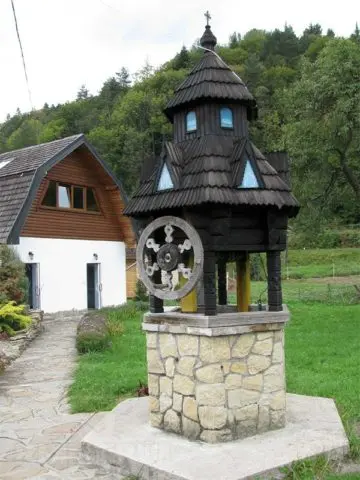
Photo of houses above the well
In order to make the design of the well with your own hands, you should use a photo with ready-made models or, inspired by the idea, create an individual unique design.
Oriental-style houses are an unexpected and bold version of the design.

With the addition of elementary LEDs, such structures look breathtaking at night.

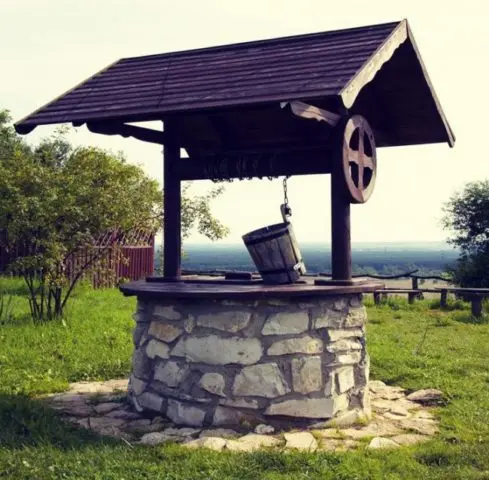
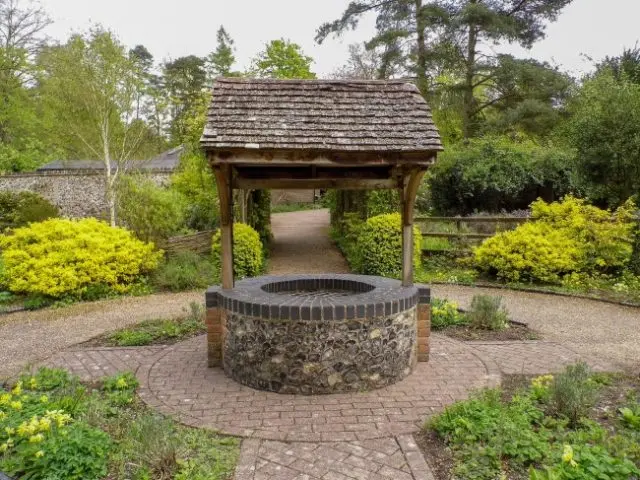
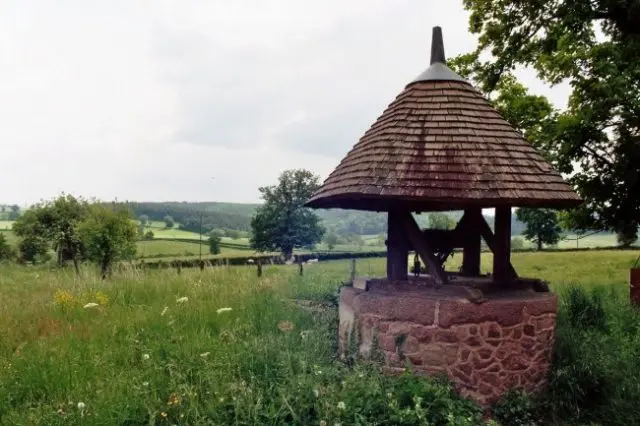
Simple do-it-yourself buildings according to classical standards do not take much time to install and look neat.

Conclusion
A do-it-yourself house for a well is a competent completion of the arrangement of a water intake on the site. Due to the simplicity of execution and variations of functional models, such a design will effectively save water and become an individual design decoration for any landscape.