Contents
Rum. How much of this word. Tropical fruits, caramel, vanilla, oiliness, density, complexity, depth. Dozens and hundreds of subtle flavors. No, this essence cannot be faked. And why, when there is cane molasses? In recent years, the domestic market has absorbed it in full. But there is no detailed, complete and comprehensive guide to making real molasses rum yet. Or is there?
You can make real rum at home. Moreover, unlike whiskey, cognac, calvados and other distilled “elites”, each of which is pulled by a strict regulator, usually represented by the state, you can safely call your homemade rum rum without infringing on the rights of this many-armed puppeteer . It’s nice, isn’t it? But it’s too early to rejoice, because the preparation of rum is a complex and rather time-consuming process that requires attention to detail and a real passion for experimentation. We hope our guide will help you in this difficult task.
Keep dry and to the point!
Anatomy of Roma in the context of production
So that there are no unnecessary questions that distract from the main thing, let’s first figure out what is what in rum production technology and how to handle it all. To further minimize banal questions, we advise you to read our material on the essence of rum and its types, where you can learn a lot of useful information applicable to the preparation of this drink.
No rum without molasses
Molasses (from French mélasse, English molasses, Spanish melaza) is molasses, a by-product of sugar production. It is a syrupy, viscous liquid of dark brown color. It is cane molasses, as a waste product of cane sugar, that is the main ingredient in most rums (with the exception of the French rhum agricole and cachaça, which are made directly from cane juice).
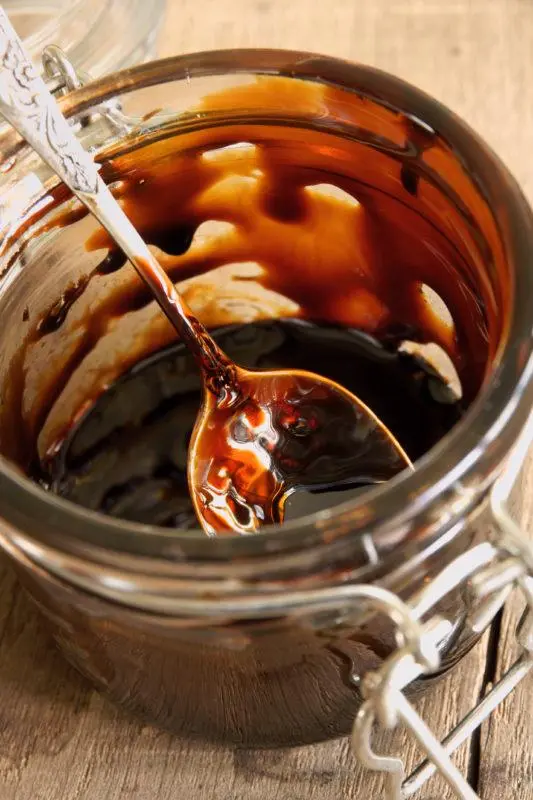
Molasses can be different, but only two are used for home-made rum:
- Blackstrap – molasses obtained in the manufacture of raw cane sugar. Has a bitter taste. Enriched with a lot of nutrients that yeast “likes” – this is one of the factors for the very rapid fermentation characteristic of the hot Caribbean climate (high fermentation temperatures also increase the concentration of volatile acids in rum, which make a significant contribution to the flavor profile of the drink). With the classic “pot still” scheme, it gives a powerful, expressive rum, characteristic of the Jamaicans and Guyanese.
- Меласса High Test (Fancy) – molasses obtained by evaporating sugar cane juice. Compared to blackstrap, molasses contains more sugar and less solids. Gives rums with a cleaner, fruitier flavor characteristic of the Spanish “ron’a”. It costs noticeably more.
In the CIS, only blackstrap molasses is widely available (and there is nothing wrong with that, because it is this molasses that most commercial rum producers use), so we will not dissipate attention and focus on it. If you have access to cheap fancy molasses, make rum from it according to any of the recipes below, but without the addition of sugar. The rest of the ingredients and technical details remain unchanged.
Commercial distilleries usually clarify molasses before using it. On an industrial scale, this is a rather technically complex process, but easily adaptable to home conditions. Add 2 parts water to 1 part molasses, stir well and then heat to 85оC with constant and very thorough mixing. Cover the brewing vessel with a lid and let stand for a couple of hours until a precipitate forms, after which it will be easy to separate a fairly clear liquid from a dark precipitate. According to reviews, clarification of molasses significantly improves the taste of rum, and also minimizes contamination of the still and moonshine equipment. Another option for clarification, more practical, is described in the first recipe.
Molasses has a huge impact on the flavor profile of rum. Try to order molasses from a seller who knows at least a little about its origin. Having a certificate of conformity with physical and chemical parameters will be a big plus. It was found that fresh molasses with low viscosity, high content of total sugar (over 52%), nitrogen (1-1,5%), phosphorus and low content of sulfated ash (less than 8%) gives a drink with a cleaner and more powerful organoleptic. Poor quality feed molasses can contain a large amount of gums (more than 2%), which can be thrown into the distiller’s refrigerator and get into the selection. If you find small black particles in the distillate, cover the container with filter paper. Before buying, be sure to make sure that molasses does not contain preservatives, otherwise fermentation will not take place.
Sugar-free rum to be, but not enough
The standard water ratio for molasses is 0,8-1:5. The output is scanty, on average 5-6% alcohol in Braga. Fortunately, the taste of cane molasses is so pronounced that even adding a fair amount of sugar (no more than 1:1 is recommended) gives a good result. Pure dextrose (glucose) is always preferred over standard sucrose. A few numbers on the types of rum:
- Traditional (“industrial”) rum: 4 kg of molasses per 20 liters of water. Equivalent: 100 g sugar/litre.
- Traditional (“industrial”) rum with an increased yield (a good option for a careful moonshiner): 4 kg of molasses and 4 kg of sugar per 20 liters of water. Equivalent: 300 g sugar/litre.
- “Agricultural” rum (French rhum agricole, Brazilian cachaca): 3 kg of sugar and 1 kg of molasses in 20 liters of water. Equivalent: 175 g sugar/litre.
- “Agricultural” rum with an increased yield (for experiments, but on the verge): 5,5 kg and 1,5 kg of molasses per 20 liters of water. Equivalent: 310 g sugar/litre.
Our recommendation for making your own wort is 1 part molasses/0,5 parts sugar/4-5 parts water. The output drops noticeably, but the pleasant organoleptic properties of the feedstock remain. If the aim is for a high yield, it is better to add sugar not immediately, but after the fermentation of molasses sugars is completed, so that the yeast does not have to withstand high osmotic pressure.
There is nothing without yeast
There is no need to invent anything – almost always a good result is shown by the so-called turbo yeast for rum. The composition of such yeast, in addition to a strong yeast strain with high tolerance to alcohol, includes top dressing for yeast and the enzyme glucoamylase, which breaks down dextrins (complex sugars) contained in molasses to monosaccharides. Such yeast provides a fairly fast fermentation, slightly increases the yield of the product and, as practitioners note, gives an acceptable organoleptic.
If for some reason you don’t have access to turbo yeast or don’t trust the manufacturer, you can make something similar yourself. In the West, this “sourdough” is called a “yeast bomb” and, according to many distillers, this is one of the best ways to ferment molasses:
- 60 ml by volume dry baker’s yeast
- ¼ tsp Epsom salts (magnesium sulfate)
- 2 vitamin B1 (thiamine) tablets – crushed in a mortar
- 2-4 h. l. diammonium phosphate (DAP)
- 3,7 liter of clean water
Boil for 15 minutes, strain and cool.
Do not rush to dispose of the yeast sediment after making the mash. This is the best source of yeast adapted to difficult fermentation conditions, moreover, it is absolutely free. Just don’t forget to feed them. The same strain is not recommended to be used more than 7 times, as over time it mutates and begins to adversely affect the organoleptic of the drink. By the way, you can feed the yeast with them.
Without yeast bruh to be everything
Bruch (eng. Trub) is a term from brewing, meaning a dense yeast sediment at the bottom of the fermenter after fermentation of the wort. It consists of dead yeast cells (mainly protein), fatty acids and other elements that work as a very effective and natural yeast food. To prepare the yeast bruh for use, collect the yeast sediment from the fermenter where the molasses was fermented into a smaller container. Wait a few hours for a thicker precipitate to form, then drain the liquid from the top and heat the precipitate to 65оC or higher for disinfection.
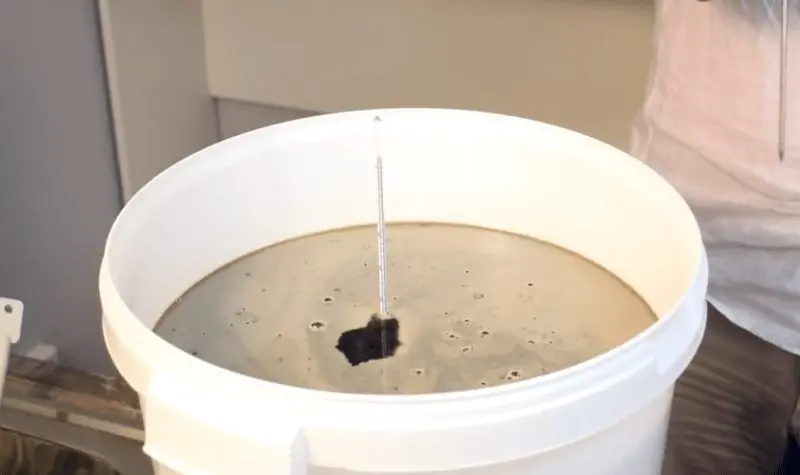
Bruh is recommended to be stored in a fairly warm place (30-50оC), for example, in the attic or in the trunk of a car. This is how enzymes inside yeast cells break down their membrane, releasing nutrients and making them even more available to the yeast during fermentation. Before use, it is recommended to heat the yeast bruh to 65оC for its re-disinfection. This can be done at the stage of preparation of the wort – most options for dissolving molasses involve heating it, or at least pouring boiling water into which the bruh can be placed first.
Yeast lees can be creative. For example, use it 3-4 times as a starter to start fermentation, and then as a bruh.
Nothing without a dander
Dunder (from the English dunder) is the liquid left in the distillation boiler after the distillation of mash from molasses, that is, bard (we will call this option “dead” dander). It contains many components that help the yeast in future fermentations, including dead yeast cells. It also makes the rum taste more complex and richer. It is considered an essential ingredient in the production of expressive Jamaican rums. And Roma in general. It is recommended to store the stillage in the refrigerator or in a rather cold place (up to 8оC) to prevent spontaneous fermentation, which will lead, due to difficult conditions, to mutations in the yeast strain, which, as we have found out, is very bad. If you are making rum for the first time, just use water instead of dander. In subsequent times, let the bard settle, remove it from the sediment and send it to storage in a cold place.
If you dig deeper, then dunder is not just bard, but sour bard, more precisely, sour bard in a tropical climate, where a completely different microflora lives in the air (and whoever prepared real whiskey knows firsthand the importance of additional bacterial fermentation). It is known that the aroma characteristic of rum is given by two esters that arise when ethanol reacts with the corresponding acid: ethyl formate – ethyl ester of formic acid (basic rum ester) and ethyl butyrate – ethyl ester of butyric acid (pineapple aroma). We, unfortunately or fortunately, do not have a tropical climate (and the corresponding microflora in the air), but we can cook a real dander as a source of butyric acid bacteria. From … potatoes. Yeah, potatoes have long been used to start butyric fermentation.
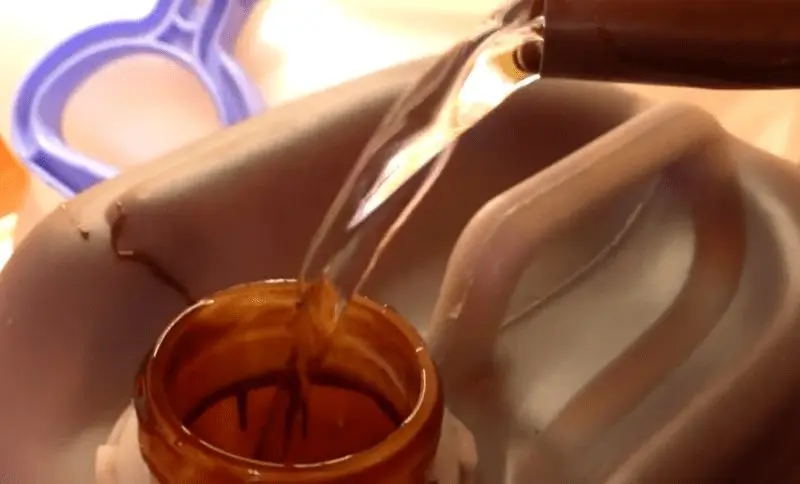 To prepare a “live” dander you will need (the method of Yuri Gavrilenko, known on the forum.homedistiller.ru forum as Gabriel61): 5 potatoes (peeled only) and 1 glass of water. Pour unwashed peelings of fresh potatoes with a glass of boiling water and after 10 minutes pour into a container with 10 liters of fresh bards from under molasses mash. Put a closed (tight, but not airtight) container in a warm place (30-33оC), for example, near the battery. Watch for changes in odor. When from a completely unbearable he comes close to the smell of shoe glue, which usually happens in 1,5-2 months, the dander is ready.
A much more humane (probably your wives and other household members will not like the smells that a “live” dander exudes) and a reliable way to enrich the mash with the necessary esters, use strains of bacteria bred in laboratories: Propionibacterium thoenii and Clostridium propionicum (according to Maza-Gomez) or Clostridium saccharobutyricum (according to Arroyo). True, with their purchase can be difficult.
Traditionally, 20 to 35% of a new rum brew is one or more dunders from previous batches. For the first experiments, we recommend using no more than 25%. In recipes where dander is not provided, the same amount of water is replaced with it. Keep in mind that vinasse is very acidic, so you don’t need to add citrus juice or other acidifiers when using dander (in fact, dander can be so acidic that the pH of the must needs to be increased for normal fermentation, for which, for example, calcium carbonate is used). Use not all of its volume at a time: after distilling the mash, return the cooled stillage to the remaining dander – the maturation of a new batch will occur much faster, usually in 10-21 days. Make sure that mold does not form on the surface of your dander. To do this, mix it regularly or, even better, keep two batches at once in different places and when one dander is infected, you can always use the second one.
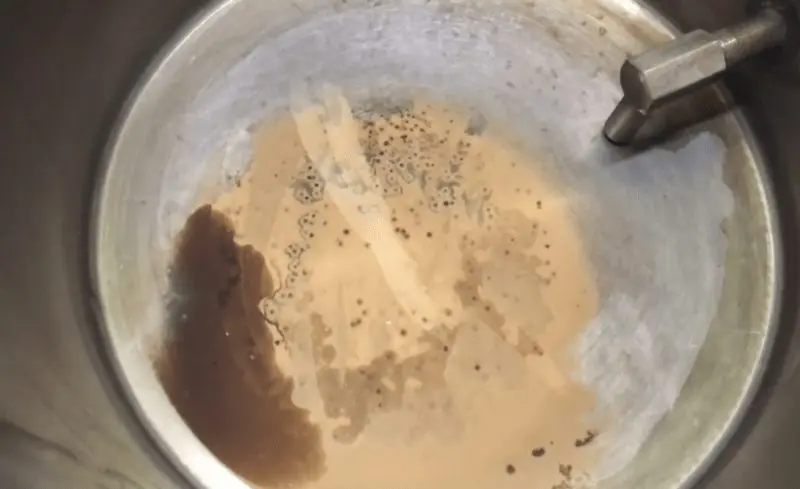
Use a real bacterial dunder or stick with frozen vinasse “dunder”, which is probably safer and less labor intensive, is up to you.
Still like without rum oils, but it’s interesting
A very important point! Rum oils are some of the tail fraction that is collected during the distillation of rum CC and added to the next cut of rum CC. The addition of this “fusel oil” portion has been shown to significantly improve the organoleptic quality of heavy, expressive rums. This is due to the content in these oils of higher alcohols (propyl, isobutyl, isoamyl, etc.) and other components, which, when re-distilled, form many interesting flavor compounds that penetrate into the middle fraction. Rum oils are a very important ingredient in most commercial rums and have been developed over decades.
In practice, when forming your own “rum oils”, it is very difficult to figure out some exact numbers. However, with standard pot still distillation, “rum oils” have been shown to come out somewhere between 40% and 20% alcohol in the stream. Thus, the algorithm for distilling rum SS in the pot still mode should look like this: distill SS with “rum oils”, after collecting the head fraction, select the “heart” to 50-55% alcohol in the stream, then change the receiving container and collect the “tails” up to 40% in the stream (dispose of or ring them), after which “rum oils” are selected up to 20% alcohol in the stream. Then select the “tails” at will. When distilling on a tray column, you will have to rely on your sense of smell.
Always add this fraction to SS before distilling it and always collect them during distillation. The more they are reused, the more concentrated they will become, and the more impact they will have on the organoleptic of the rum. This is the key to rich, high-end rum, although it’s fair to say that many moonshiners consider the role of “rum oils” overrated and emphasize the development of dander (mostly “dead”, with less fuss), which, in their opinion , affects the taste of rum much more. It’s up to you to decide, and we will offer a cooking scheme, both with “rum oils” and without them (of course, the differences in technology are minimal, so the recipes will differ slightly in other nuances in order to fully demonstrate the variability of rum to you).
Molasses rum recipes for every taste
You can draw up the proportions of rum mash yourself, guided by the information presented in this material, as well as the literature, a small list of which you will find at the end of the article. The main thing to remember is that you are not preparing sugar moonshine, and chasing quantity will be completely bad form. But since home-brewing, as well as making drinks at home, in principle, has some economic background, there is no need to suffer from waste either. Moreover, commercial distilleries, whose product we love so much, are not aware of such an ailment. And therefore, we will start with “profitable” rum, with a decent income and a reasonable expense. But the goal is the same: to get rum rich, dense and with expressive organoleptics of cane molasses. Jamaican rum!
Blackstrap molasses rum recipe “Buccaneer Bob”
Buccaneer Bob is an honorary user of the American forum homedistiller.org, who has done a titanic job of structuring information about making homemade rum. His rum is archetypal and innovative at the same time. On the one hand, he will intervene in himself all the experience that mankind has accumulated thanks to such characters as Rafael Arroyo. On the other hand, its author, like you and me, had limited resources and raw materials “as is”, because of which the technology of its production underwent some changes, although it remained, in the main points, untouched. Therefore, we will use it as a basis on which, in principle, any other recipe can be “strung”.
Of the features: clarification of molasses (optional), the development of dander and bruh (optional), the fight against oils directly in the SS and the finished drink (optional), as well as the preparation of the three main categories of rum from the resulting distillate (light, gold and dark). The main message of the author of the recipe: dander is the cornerstone of first-class commercial rum. Manufacturers add dander not only to the mash, but also directly to the distillate. Of the nuances: during fermentation, the emphasis is not on its speed, but on the yield without sacrificing quality. Let’s go!
Ingredients for 5 bottles of 750 ml rum with a strength of 40-50%, 20 liters of mash with a strength of 14%:
- 3-4 liters of blackstrap-molasses1
- 2,5 kg granulated sugar/dextrose2
- 2 liters of dander – “live” or “dead” to choose from
- 14 liter of clean water
- juice of 2-3 lemons or limes
- 1 l yeast bruh
- yeast for rum – according to the instructions
- oak chips for aging – from 15 to 40 g
1 – use 3 liters if the molasses behaves like a putty at room temperature, that is, it is very viscous, or 4 liters if it flows like a thick sugar syrup.
2 – molasses can contain different amounts of sugar. After fermentation, the mash should contain about 14% alcohol. Focus on hydrometer or product yield. If it is less than 5 bottles of rum, add 3 kg of sugar next time. If the mash after fermentation still remains too sweet, try adding 2 kg of sugar next time.
Stage 1: wort preparation and sanitation (2-3 hours of work, 2 hours of waiting)
- Laboratory sterility is not needed for the production of rum, but the mash will still be vulnerable on the first day after the introduction of yeast. We recommend treating the fermenter, stirring paddle, hydrometer and other items that will come into contact with the wort with a disinfectant solution.
- Pour the molasses into a clean fermenter with a volume of 20-25 liters, cover with a clean cloth and leave at room temperature for a couple of hours.
- Pour the yeast bruh, dander (only if it is a regular rum stillage, “live” dander is added later) and 1-3 liters of clean water into a large saucepan. Bring the mixture to a boil, stirring occasionally to prevent burning and excessive foaming.
- Pour the boiling mixture of bruh with water over the molasses and stir until it is completely dissolved.
- With clean cold water, bring the contents of the fermenter to about ¾ of its volume.
- Add lemon or lime juice and mix thoroughly again (if using a dander, skip this step).
- Let the wort stand for 2 hours, no more and no less, to allow sediment to fall out.
- Remove the wort from the sediment into another clean 20-liter fermenter, leaving about 2-3 cm of sediment in the previous one (use it as fertilizer or save for next time).
- If necessary, add water so that the fermenter is filled to ¾ of its volume.

The best solution to maintain the optimal temperature for rum fermentation in our climate is to use an aquarium heater. It can be ordered for a penny on AliExpress.
Stage 2: Fermentation of molasses sugars (30 minutes of work, 2-3 days of waiting)
- Check the temperature of the wort – it should not be higher than 35оC. Pour 500 ml into a liter jar, add yeast and shake until the yeast is completely dissolved.
- Pour the contents of the jar back into the fermenter and stir the must thoroughly to oxygenate it.
- Cover the fermenter with a lid, but not tightly, to ensure the release of CO2 – a water seal will not be needed during further vigorous fermentation.
- Leave the fermenter warm (+26..+30оC) in a dark place for 2-3 days until fermentation subsides, which will be characterized by abundant foaming.
It is very important that at the initial stage the molasses fermentation is stable and “healthy”, with light foam on the surface of the fermenter. If fermentation has not started within 12 hours, then the yeast has died or was already dead. In this case, you need to add a fresh batch of yeast. If, during the inactivity of the yeast, the mash has become infected with pathogenic microflora, which is usually characterized by a thick layer of pasty foam, it is urgent to add the juice of another lemon or lime.
Stage 3: Fermentation of granulated sugar (30 minutes of work, 7-10 days of waiting)
- Gently stir the wort to release excess CO2 (watch out for foam, there can be a lot).
- Slowly add sugar and mix thoroughly until it is completely dissolved.
- Add clean water up to about 3 cm from the top of the fermenter and cover it with a lid, but do not seal.
- Further fermentation, depending on the yeast, should last from 2 to 10 days at 20оC, faster at higher temperature, which is preferable. When fermentation subsides, add the “live” dander.
- Drain the fermented wort from the lees, saving the lees to replenish your bruh stocks.
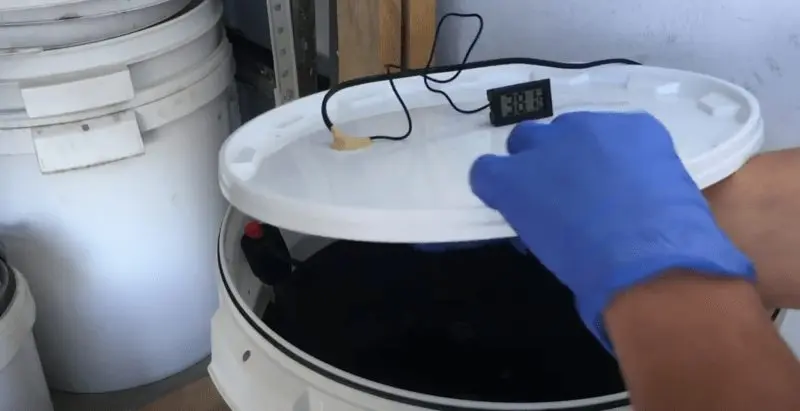
A water seal during the fermentation of molasses is a disastrous business.
Stage 4: Receipt of raw alcohol (4-6 hours of work and waiting)
- The first distillation should be carried out as quickly as possible in the “pot still” mode without crushing the distillate to 5-10% alcohol in the stream.
- It is recommended to stretch a piece of filter cloth over the receiving container – it will retain the suspension, which can be thrown into the distiller’s refrigerator.
- It is recommended to collect SS in liter jars in order to later examine the contents of each of them in the light. If any inclusions in the distillate or oil film are noticed, it is advisable to remove them by filtering or blotting with paper or a cotton swab.
- Depending on the distillation equipment, a distillate of 25 to 55% ABV should be obtained, equivalent to 5 liters of SS at 55% ABV.
- Sue the remaining bard in the cube. Save 250 ml of this dander vinasse in a tall XNUMX liter bottle. This will be the base for the “rum essence” that will later be needed to make golden and dark rums.
- The remaining distillation residue should be used to replenish the stocks of dander.
- Rinse the alembic and prepare for SS distillation.
Stage 5: Raw alcohol distillation (6-8 hours of work and waiting)
- Further we will talk about distillation in the “pot still” mode. Add the “rum oils” of the previous batch to the SS and dilute it with pure water to 30% (5 l of pure water for 5 l of 55% SS).
- Slowly select the “heads” at a rate of 2-4 drops per second. You need to select 1 liter within 1 hour – 250 ml in 15 minutes.
- Increase the heat to a steady thin stream at the outlet and take the “heart” of the rum. It is also recommended to collect the middle fraction in batches of 1 liter. Select up to 55-60% alcohol in the stream. Each jar with a “heart” should be examined for oil films and removed with a cotton swab if found.
- After the selection of the middle fraction, when fusel odors begin to appear in the distillate, select the tail fraction up to 40% alcohol in the stream – this part of the “tails” should be disposed of, added to the next shoulder strap of the mash or ringed on the column. The fraction collected in the range of 40-20% alcohol in the stream should be saved as “rum oils” and used during the next distillation of rum SS. Then select the “tails” at will – they can be used to strengthen the mash during the first distillation of the next batch of molasses rum.
- Depending on the equipment used, you should end up with about 3 liters of medium fraction with a strength of 65-70%. Roma is within reach!
Stage 6: Obtaining light, gold and dark rum
The following method for obtaining different types of rum is an innovation developed by the author of this recipe and is not a mandatory procedure. You can use the traditional scheme for refining rum with oak, described in the last chapter of this material. Obtaining light rum corresponds to the traditional technology, it should not be ignored.
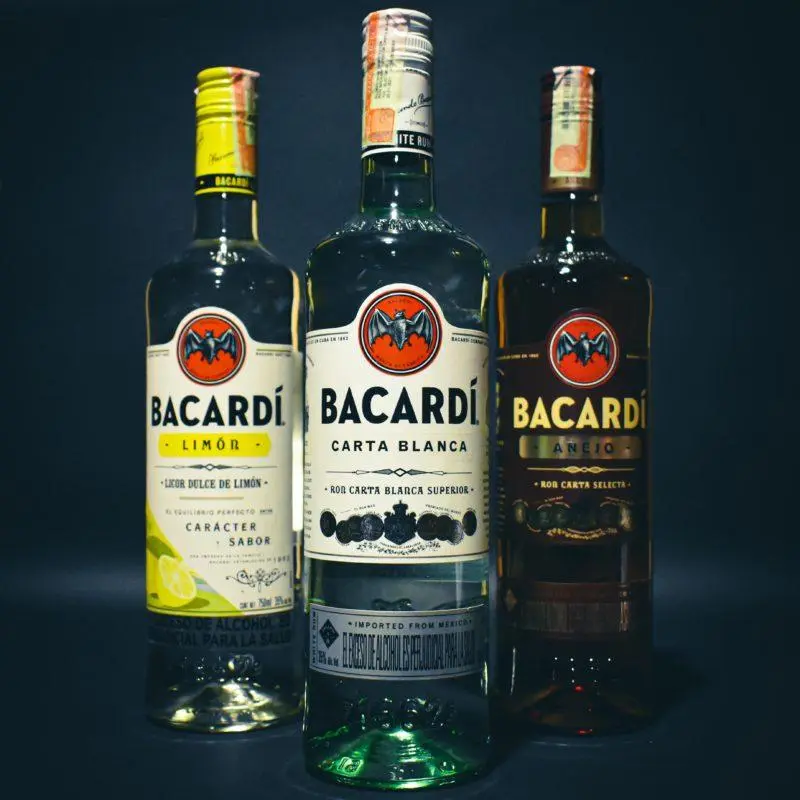
Light rum (optional):
- Dilute the distillate with clean water to a drinking strength, let it rest for 3-4 weeks and start tasting.
- Dilute the distillate with clean water to a drinking strength, pass through a coal column, let it rest for 3-4 weeks and start tasting.
- To smooth out all the roughness of homemade rum, it can be insisted on oak chips for a couple of days (the principles will be described below in the corresponding chapter). For discoloration, aged rum can be driven through a coal column, let it rest for 3-4 weeks and start tasting.
Golden and dark rum:
- Prepare essence for dark rum:
- Pour 250 ml of distillate into a liter jar and add 250 ml of fresh dander.
- Close the jar tightly and leave in a dark, cool place for 1-2 weeks. Do not shake the contents so that all the suspension from the dander precipitates.
- Remove the essence from the sediment, filter and use to flavor and color homemade rum.
- While the essence is being prepared, add oak chips to the rest of the distillate (principles will be described later in the corresponding chapter) until an optimal organoleptic is obtained.
- Dilute the molasses distillate to a drinkable strength.
- Add clarified essence to the distillate aged on wood chips: 30 ml per 1 liter of diluted drink – to obtain golden rum, 60 ml per 1 liter – for dark rum.
- The rum may be cloudy at first. It must be left in a dark, cool place for 1-2 weeks until a precipitate forms, then decanted, filtered through a cotton or coffee filter. Leave for another 1-2 weeks in a dark, cool place to make sure that the precipitate no longer falls.
- Pour into bottles, let rest for 3-4 weeks and start tasting!
Collective recipe for molasses rum with “rum butters”
And this is a completely different rum. More refined and extravagant, but still vibrant and Jamaican in character. Of the features: the development of a “yeast bomb” for extremely fast fermentation, characteristic of the Caribbean climate. The main message of the author: “rum oils” will save rum, they need to be worked out for years, but they are treated with reverence. We approve!
For 38 liters of mash with a strength of ≈10%:

- 7,5 l of blackstrap-molasses
- 1,8 kg brown cane sugar1
- 3,7 liters of “yeast bomb”2
- 15 liter of clean water
- 11-11,5 liters of dander or clean water3
- 1 cup baker’s yeast4
1 – Numerous experiments have shown that brown cane sugar, both on its own and in conjunction with molasses, produces a purer distillate than regular sucrose. Expensive, so replaces sucrose or, preferably, dextrose.
2 – if you decide to use dry turbo yeast for rum, replace the volume of the “yeast bomb” with clean water.
3 – if you are making rum for the first time, use water instead of dander; in subsequent times – a “live” or “dead” dunder to choose from.
4 – baker’s yeast exclusively for top dressing; instead, you can use yeast bruh from a previous batch of mash.
Cook according to the technology of the first recipe with amendments:
- At the stage of preparing the mash, baker’s yeast (or bruh) is boiled together with the dander (remember that we only do this with the “dead” dander to disinfect it) and a small amount of water.
- Add sugar immediately. Strive for the fastest possible fermentation, ideally within 36-48 hours at +26..+30оC (Turbo Yeast and Yeast Bomb can provide these rates).
- After the end of fermentation, wait 1-2 days, remove the mash from the sediment, save the sediment as bruh and immediately start distillation.
- Obtaining rum CC and its further distillation as described above.
- Keep the resulting distillate in a barrel or on oak chips, dilute to a drinkable strength, color with caramel if desired, let it rest for a month or two and you can start tasting.
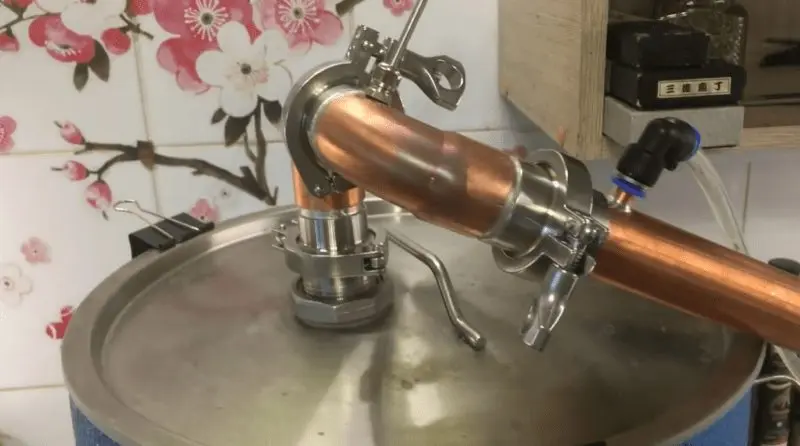
An ideal moonshine still for distilling rum SS should have copper components in the steam zone – they will significantly improve the organoleptics, make the rum cleaner and nobler.
Collective recipe for molasses rum without “rum oils”
With minimal differences, but still interesting. Of the nuances: the emphasis on baker’s yeast as the best option for fermenting molasses, when distilling SS, add a little fresh mash to the cube. The main message of the author: “rum oils” will not save rum, their influence on the distillate is minimal, but dander rum will save (in this case, it is the “dead” dander that is used, since the author was also not lucky enough to live in the Caribbean), the development of which you need to devote all your romodeling time. Worthy!
For 60 liters of mash with a strength of ≈10%:

- 7 l of blackstrap-molasses1
- 5 kg granulated sugar/dextrose
- 2 h. l. DAP
- 20 liters of “dead” dander2
- 1 hours. L. citric acid3
- ≈1/2 yeast bruh from last batch – optional
- water – as needed
- yeast for rum4 – according to instructions
1 – change the ratio of molasses / sugar to your taste; more molasses = stronger and more pronounced taste.
2 – replace with water if cooking for the first time; you can also play around with the amount of dander, 1/3 is a good option, but 25% is better to start with.
3 – add if water is used instead of dander.
4 – instead of turbo yeast, the author recommends using 100-150 g of dry baker’s yeast (with a margin, there will be top dressing immediately); the argument is in order – many baker’s yeast are bred on molasses.
Cook according to the technology of the first recipe with amendments:
- Dissolve the molasses and the rest of the ingredients in the fermenter along with hot dander or the same volume of hot water, place carefully for a few minutes, cover and leave overnight.
- Add water to 60 liters of the total volume of the mash, add yeast and loosely cover with a lid – no water seal is needed.
- At the end of fermentation, wait 2 days, remove from the sediment, wait another 2-3 days (longer if desired), and then send for distillation.
- When distilling SS, instead of “rum oils”, the author recommends adding fresh mash to the cube, about 10% of the SS volume. This should improve the taste. You decide.
- Further distillation as in the first recipe, only without the collection of “rum oils”. Ring all tails.
- For lighter rums tending towards Cuban light rums, a plate or packed column is recommended.
Aging of homemade rum in a barrel and on oak chips
There are many options for refining homemade molasses rum. For example, it can be infused with spices to make a wonderful cocktail ingredient. There are also a lot of fruit tinctures and liqueurs (raspberries, strawberries, cherries, blueberries, etc.) that just ask for rum. But since we have undertaken here to prepare a drink with a claim to authenticity and originality, the most logical decision would be to age it in an oak barrel or on oak chips, as they do all over the world.
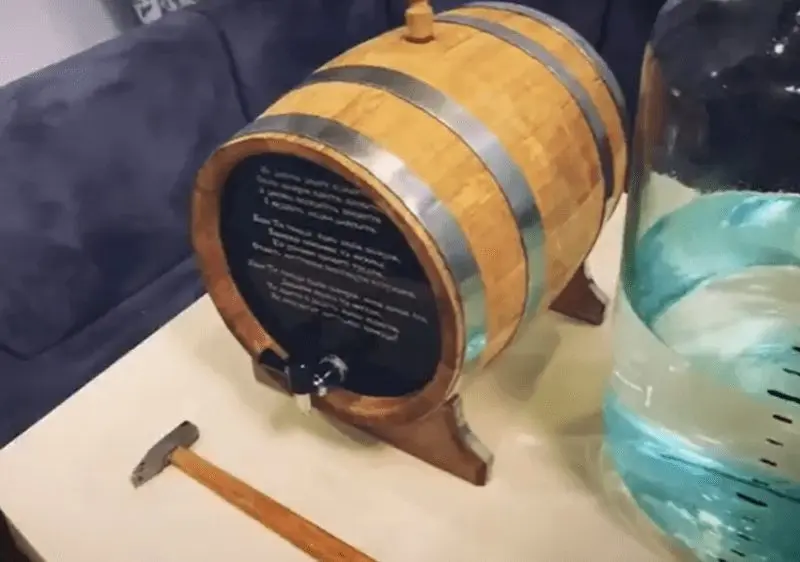
The main theses on the barrel:
- Traditionally, rum is aged in bourbon oak barrels, but this is not a paradigm. The legendary Guatemalan rum Zacapa is aged in sherry casks, and it is not alone. But medium, and preferably strong firing is a must. We do not recommend aging rum in new barrels.
- Before pouring, dilute the distillate to 60-65%.
- Following the recommendations from the material on the preparation of an oak barrel, you should start with 3-4 months of aging (for a volume of 5-10 liters, for a larger volume, the time can be increased). From the second month, every 2-3 weeks you need to try rum. When the taste, in your opinion, is closer to ideal, it’s time to drain.
- After the barrel, filter the rum through a cotton or coffee filter, tint the drink with caramel color if desired (read below) and bottle it. You can try after 3-4 weeks of rest.
It should be remembered that the taste and aroma of rum is largely the “heads” and “tails” of the distillate, which, during aging in the barrel, are transformed into a huge variety of esters and other flavor compounds. If you plan to age your rum in a barrel, cut off the heads and tails sparingly. Of course, for a distillate that you plan to drink immediately or stand on oak chips, this rule does not apply and you need to be extremely careful when crushing moonshine.
The main theses on wood chips:
- Most of the nuances of refining distillates with oak chips, including the process of preparing and preparing these chips, are described in Don Pomazan’s material on making “cognac” from moonshine.
- For the “aging” of rum, chips of medium (vanilla, coconut, almonds, caramel, spices) or strong (chocolate, smoke) roast are recommended. The proportions depend on the shape of the chips (chips, cubes, sticks, spirals, etc.), but on average it is 4 g / l.
- For example: add 5 liters of rum, strength 50-55% (considered the optimal strength for the extraction of aromatic substances), 4-5 charred oak sticks with a size of 10-15 mm square and a length of 150 mm. After a month of aging, you can take out 2-3 sticks and leave for another month or so.
- During the infusion, be sure to try the drink at least once a week, so as not to overdo it – you will not like the “skirting board”.
- It makes sense to experiment with other wood: apple, pear, cherry, etc.
- Following tradition, the wood chips can first be soaked in bourbon.
- After the chips, filter the rum through a cotton or coffee filter, tint the drink with caramel color if desired (read below) and bottle it. You can try after 3-4 weeks of rest.
- To smooth out all the roughness of homemade rum, which will be classified as light in the future, it is also recommended to insist on oak chips for a couple of days. For discoloration, aged rum can be driven through a coal column, previously diluted to a drinking fortress, let it rest for 3-4 weeks and start tasting.
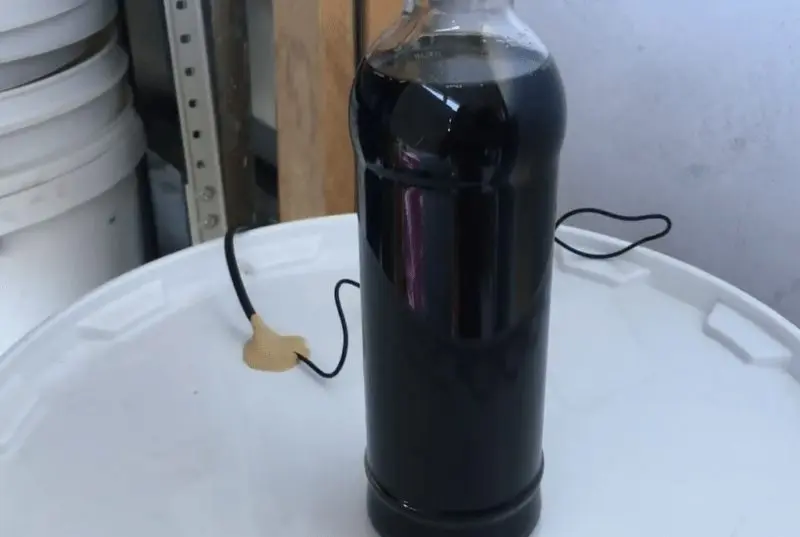
Coloring rum with caramel:
If you want to get a beautiful cognac-colored rum, you can tint it with caramel – this is allowed for almost any known distillate. To do this, prepare caramelized (zhzhenka) sugar and mix it with rum aged in an oak barrel or on medium-roasted wood chips (a barrel and such wood chips slightly color drinks). The most common proportion: 5-10 tsp / l. Note that the addition of burnt sugar will alter the flavor of the rum, introduce caramel and smoky flavors, and also make it sweeter (and therefore softer), up to about 2,5-5% sugar, which is the same sugar content as most caramel-colored drinks.
Good luck with your modeling!
Recommended reading:
- Rafael Arroyo, «Production of Heavy Rum» (патент # 2,386,924), 1945.
- Sabina Maza-Gomez, «Rum Aroma Descriptive Analysis», 2002.
- Rafael Arroyo, «Studies on rum», 1945.
- Jacques, Lyons and Kelsall, «The Alcohol Textbook: A reference for the beverage, fuel and industrial alcohol industries», 2 и последующие издания, главы 6-16, 1999.
- Homedistiller.org forum thread “Blackstrap vs Fancy Molasses” – comparison and discussion of blackstrap and fancy molasses rums.


