Contents
Growing osteospermum from seeds is carried out at normal room temperature and good lighting. At first, the plants are placed in a greenhouse, while the containers are covered with film or glass. Then they begin to ventilate and gradually reduce the temperature. And 10-15 days before being transferred to open ground, osteosperm seedlings are hardened at a low temperature.
Features of growing osteospermum through seedlings
Osteospermum (also called African chamomile) is a heat-loving plant, so it is advisable to transfer it to open ground at the end of May, and in Siberia and other regions with a cool spring – at the beginning of June. It has no fundamental differences from growing seedlings, for example, tomatoes or cucumbers.
Seeds are treated and sown in well loosened, fertile, light soil. Then they create greenhouse conditions, dive, feed, and 1-2 weeks before transfer to open ground, they begin hardening.
What do osteosperm seeds look like?
Osteospermum seeds (pictured) are shaped like sunflower seeds. They are narrow, with pronounced ribbing, have a pointed lower edge.
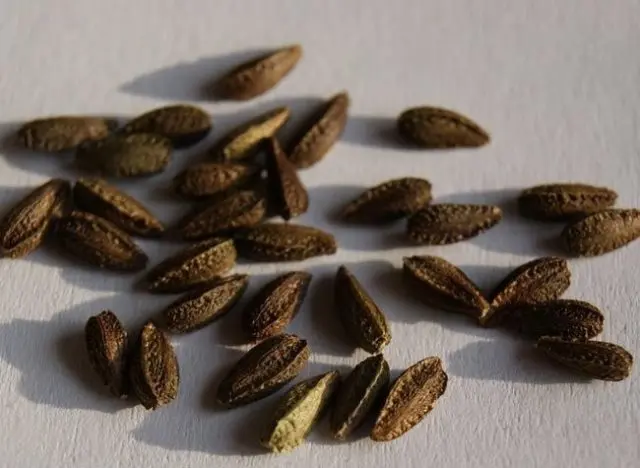
The color of osteospermum seeds is brown or brown, with a dark green tint.
When to plant osteospermum seeds
You can plant osteospermum seeds for seedlings in the spring. Too early transfer to the open ground can damage the plant due to recurrent frosts. The sowing period is from early March to mid-April, it mainly depends on the climatic features of the region:
- In the Moscow region and the middle lane, it is possible to sow osteospermum for seedlings in early April.
- In the North-West, the Urals, Siberia and the Far East – in mid-April.
- In the southern regions – in the second decade of March.
Planting osteosperm for seedlings
Planting seeds for seedlings is very simple, for this they prepare the soil and soak them 1-2 hours before planting (for example, on a napkin). You do not need to deepen it strongly – just press lightly with a toothpick.
Selection of containers and soil preparation
You can grow seedlings from osteosperm seeds in individual containers (peat pots, plastic cups) or in cassettes with drainage holes. A pick for this plant is undesirable – its roots are too tender, so they can easily suffer even with a small impact. Containers are pre-disinfected in a weak solution of potassium permanganate 1% or using other means.
The soil can be purchased at the store (universal soil for seedlings) or you can make it yourself based on the following components:
- sod land (surface layer) – 1 part;
- humus – 1 part;
- sand – 2-3 presses;
- wood ash – 1 cup.
Another way is to mix the following components in equal amounts:
- sod land;
- leafy land;
- sand;
- humus.
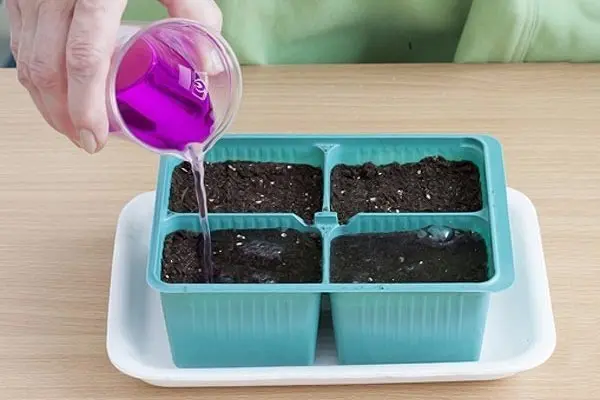
The soil is recommended to be disinfected
For example, soak for several hours in a solution of potassium permanganate, then rinse thoroughly under running water and dry. An alternative way is to hold the soil in the freezer for 5-7 days, then take it out and leave it for a day at room temperature.
Seed preparation
Seeds do not need special preparation. It is enough to put them on a damp cloth or towel on the day of disembarkation (for several hours). If this is not possible, you can simply place them in a glass of warm water. It is advisable to dissolve a few crystals of potassium permanganate in it in order to carry out additional disinfection.
Sowing osteospermum for seedlings
The soil before planting must be slightly dried and thoroughly loosened – osteospermum prefers a very light, “airy” soil. Then the earth is poured into containers, after which the seeds are buried literally by 5 mm and lightly sprinkled on top. If picking is not planned, you can plant one seed at a time, in other cases – 2-3 pieces per container.
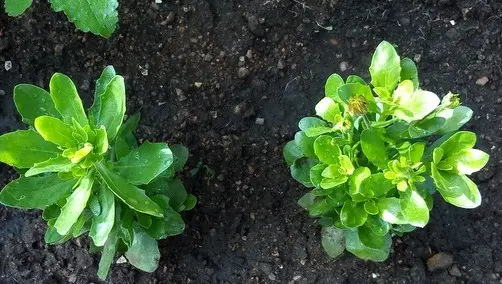
Growing seedlings of osteospermum from seeds
If you follow the conditions for growing osteosperm from seeds, the first shoots (pictured) will appear in a week.
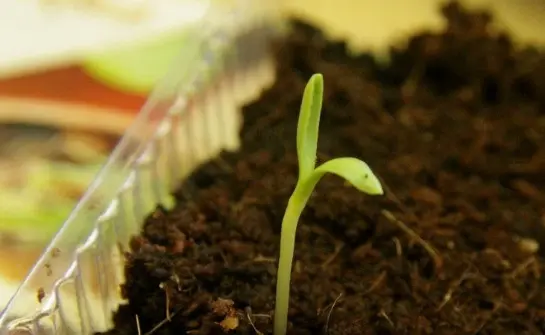
Seedling care is simple – the main thing is to ensure an acceptable temperature, watering and sometimes feed the seedlings
Microclimate
Osteospermum belongs to heat-loving plants, so its seeds should be planted at a temperature of 23-25 ° C. In the future, it can be slightly reduced, but in any case, the minimum temperature in the room should be 20 ° C (i.e., normal room temperature).
To maintain a constant level of moisture and heat, it is necessary to cover the boxes with glass or film, in which several holes must first be made. Periodically, the greenhouse will need to be ventilated – this is especially important in the case of glass.
Watering and top dressing
Watering should be regular, but moderate. Water is added in thin streams or plentifully sprayed on the soil from a spray bottle to evenly distribute moisture. Too much fluid is also harmful, so it is important to maintain a balance, for example, not watering every day, but 3-4 times a week.
You can feed the seedlings once – immediately after picking. A complex mineral fertilizer is applied to the soil, thanks to which the seedlings will begin to grow faster.
Picks
As already mentioned, when planting osteosperm seeds for seedlings, you can immediately use individual containers so that you do not plant plants in the future. However, picking is allowed, but you need to act very carefully. You can start the procedure after the appearance of three leaves. When transplanting, it is recommended to deepen the stem a little so that the seedling takes root in a new place.
Hardening
Hardening of the osteospermum is carried out in early May, approximately 10-15 days after transfer to open ground. The temperature can be periodically lowered to 15-18 degrees. To do this, they begin to open the window more often in the room, ventilate it with a draft for several minutes. You can also take the containers to the balcony or loggia – at first for 10 minutes, then gradually increase to 1 hour.
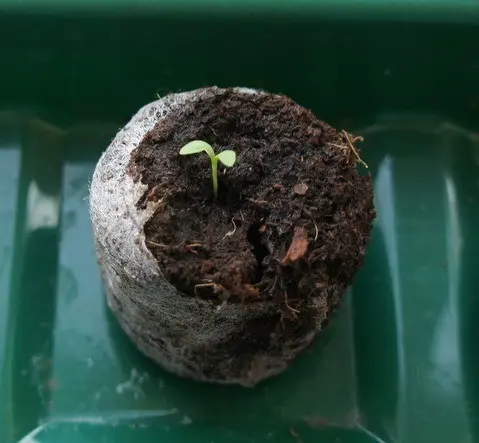
Another convenient way to help avoid picking is to grow osteosperm seeds in peat tablets.
Transplant into the ground
The cultivation of osteospermum flowers from seeds continues until mid-May, after which the plant is transferred to open ground. In Siberia and other regions with an unfavorable climate, this can be done at the end of May, and in the south – at the beginning of the month. The osteospermum is planted in an open, slightly elevated and well-lit place. At the same time, weak penumbra from taller shrubs and garden trees is allowed.
Landing is done in the traditional way. Drainage is laid in a shallow pit (diameter and depth up to 35-40 cm), then a mixture of humus with garden soil in equal quantities. Plants are planted at intervals of 20-25 cm, sprinkled with soil and watered abundantly. It is recommended to immediately mulch the soil – then it will store moisture much longer. In addition, a layer of mulch (sawdust, hay, peat, straw) will not allow weeds to grow actively.
Bushes are planted at a small distance of 20-25 cm
Possible problems and solutions
It is easy to follow the rules for caring for seedlings. But sometimes gardeners get carried away with watering, because of which the soil becomes too wet. If this is abused, the roots will rot and the plants will quickly die.
Therefore, watering can be divided into morning and evening (give a small volume). And it is better to spray the soil or pour under the root so that the drops do not fall on the leaves. It is recommended to pre-defend water.
Another problem is that osteospermum seedlings begin to stretch. In this case, it is necessary to pinch the top – and the side shoots will confidently begin to grow.
How to collect osteospermum seeds
Collecting the seeds of this plant is beneficial because it allows you to breed a particular variety. In addition, there are only 8-10 grains in the purchased bags, while at home you can collect an unlimited amount.
Seeds ripen in boxes, and unlike asters, they are on the outer (reed) petals, and not on the inner ones, which have a tubular shape. Harvesting starts at the end of August or at the beginning of September. The boxes should dry completely, and the seeds themselves should turn brown-green.
After harvesting, the seeds are dried and stored in paper or canvas bags made of natural fabric. You can use other bags, but not plastic bags or containers. For example, it is allowed to place the seeds in a candy box and make several holes in it.
The container is placed in a refrigerator and stored all winter at a temperature of 0 to +5 degrees. It is advisable to plant the next season, because after 2 years the germination rate drops sharply, and after 3 years it is zero.
Conclusion
Growing osteospermum from seeds is not as difficult as it seems. Despite the fact that African chamomile is thermophilic, loves moisture and light, you can provide such conditions at home. It is important not to give excess water, to highlight regularly (especially in the early stages) and not to sow the seeds too early.