


Contents
When a stationary greenhouse does not fit in a small summer cottage, the owner tries to build a small greenhouse. A common option is a stretched covering material on arcs driven into the ground. If you approach this issue creatively, then such a simple design as a butterfly greenhouse will greatly facilitate the care of plants. The product can be bought in a store or made independently. To help summer residents, we have prepared drawings of a greenhouse, and user reviews will help you figure out if a butterfly is suitable for your site.
What is a butterfly design
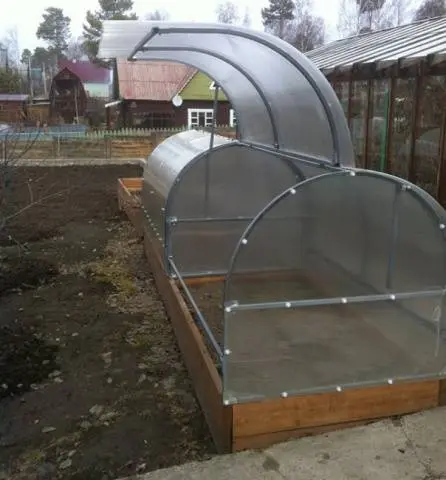
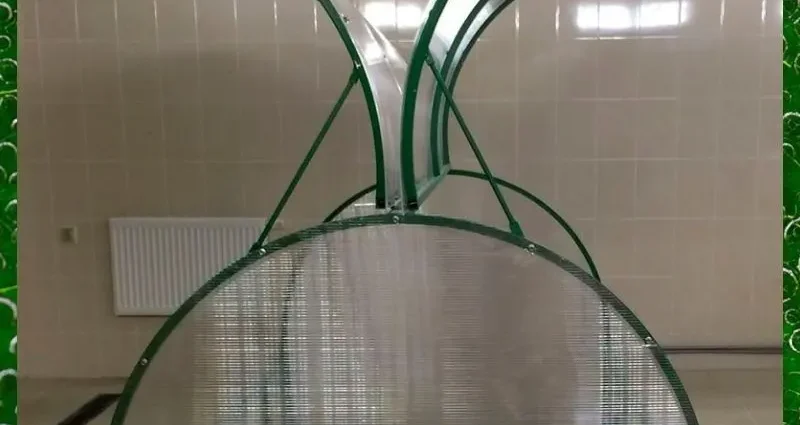
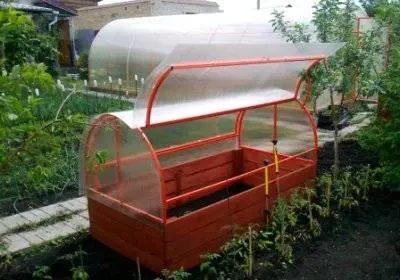
The appearance of a butterfly greenhouse with closed doors resembles a chest with an arched top. Side doors open up. Depending on the length of the greenhouse, one or two sashes are installed on one side. When fully open, the doors resemble wings. Hence the greenhouse got its name – a butterfly.
The scheme of factory-made products from different manufacturers is almost the same, but the size of the butterfly may vary. The hotbeds are considered to be the most popular greenhouses with a height of 1,1 m, a width of 1,5 m, and a length of 4 m. The total mass of a butterfly is approximately 26 kg.
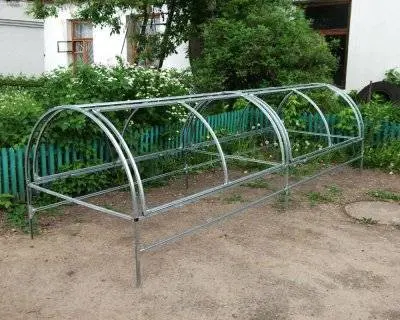
The butterfly frame is made from a profile. The most reliable frame is considered to be made of metal-plastic elements. The polymer coating prevents rapid corrosion of the metal. A good option is a frame made of galvanized profile. However, zinc coating is less durable than polymer. The framework from a plastic profile is completely not subject to corrosion. The design is lightweight, but inferior in strength to its metal counterparts.
With regards to the covering material, a butterfly greenhouse is usually made of polycarbonate, although in rare cases there is a film or non-woven fabric. It is best to attach polycarbonate sheets to the frame. This material is durable, well fixed with hardware to the profile, allows you to provide an optimal microclimate inside the greenhouse. In addition, polycarbonate gives additional rigidity to the structure.
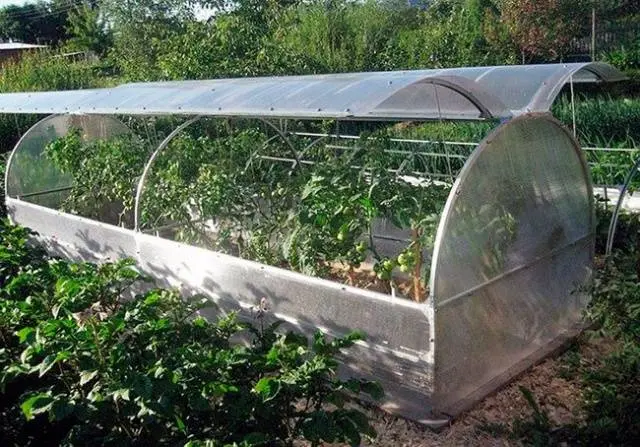
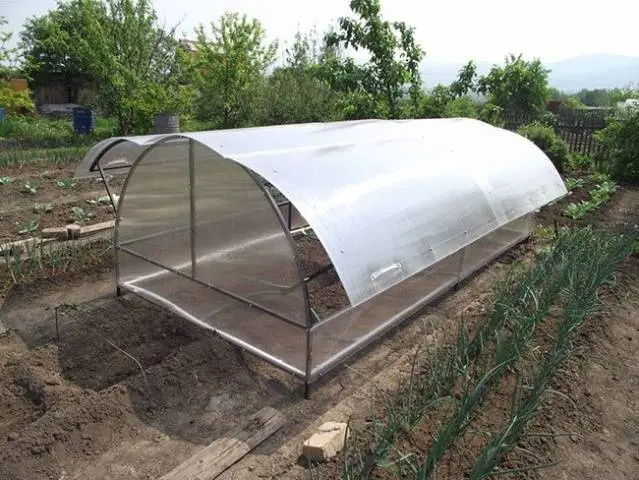
A butterfly sheathed with polycarbonate is the same greenhouse, only smaller in size. Naturally, growing tall plants in a greenhouse will not work due to the limitation of its height. Butterfly holds a large amount of soil, so it is ideal for growing seedlings. Under polycarbonate, the soil warms up quickly, which speeds up plant growth.
A greenhouse of this design is suitable for growing early watermelons, melons, root crops and all undersized vegetables. Sometimes housewives adapt a butterfly for growing flowers.
In summer, in hot weather, the greenhouse doors are kept open. They begin to close in late autumn with the advent of frost. This allows you to extend the fruiting time of vegetable crops. In early spring, the sashes are covered at night to provide seedlings with comfortable conditions and protect them from night frosts.
If desired, a butterfly greenhouse sheathed with polycarbonate can be equipped with heating using a heating cable. Such a greenhouse is ideal even for growing early cabbage and undersized tomatoes.
Pros and cons of a butterfly greenhouse
Studying numerous user reviews, we tried to collect the main disadvantages and advantages of the greenhouse. In recent years, a small butterfly greenhouse has settled in many summer cottages, and first let’s touch on its advantages:
- The manufacturer and vegetable growers, who have had a butterfly on their farm for a long time, assure that the service life of the product is at least 10 years. Naturally, this indicator is achievable provided that the frame is sheathed with polycarbonate.
- Opening butterfly doors on both sides allow you to serve a garden bed with plants. This approach allows you to expand a homemade greenhouse for a larger plant capacity.
- The greenhouse is light and compact. It can be placed anywhere in the yard, if necessary, dismantled for transportation and quickly assembled.
- Ideally, when such a small greenhouse is installed permanently on the foundation. Durable polycarbonate on the arched roof will not fail during heavy snowfalls and gusts of wind. In the summer, with fully open doors, long lashes of cucumbers can be released from the greenhouse. That is, the butterfly can be used year-round, without disassembling and rearranging it from place to place.
With regards to the shortcomings of the butterfly, user reviews are more often directed precisely at factory-made designs. Greenhouses of different manufacturers differ in size, quality and material. Here’s what vegetable growers don’t like about such products:
- There is a greenhouse on sale, the frame of which is made of a conventional metal profile coated with paint. Over time, it exfoliates, and in the places where the bolts are fastened, it is peeled off immediately. Users say that the paint quality is always poor. The frame begins to rust if it is not periodically tinted.
- Bolt holes often contain large burrs. They have to be removed with a file.
- Some manufacturers recommend that, in the absence of polycarbonate, sheathe the butterfly with a film. This is very bad advice, as it reduces the rigidity of the structure. In addition, the rigid edge of the polycarbonate is able to provide additional support to the closed sashes in the lower trim.
- Commercially produced butterflies often have large gaps between the closed flaps and the body. Sometimes there are weak loops that unbend when the valves are opened.
- The lack of collapsible butterflies in the constant sealing of joints. Each season, when assembling a greenhouse, you need to spend money on buying silicone.
You can avoid the shortcomings of the factory design with the independent manufacture of a greenhouse.
We collect a factory-made butterfly
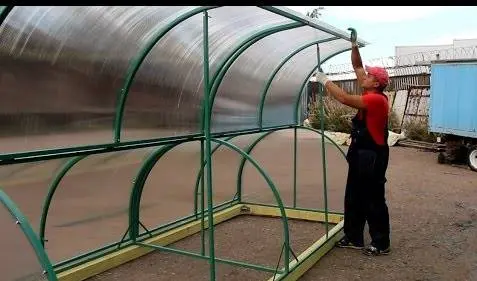
At home, a factory-made butterfly greenhouse is assembled according to the manufacturer’s instructions. The attached diagram indicates the sequence of connection of all elements of the frame.
The assembly instructions look something like this:
- According to the attached drawing, use the hardware to assemble the frame of the greenhouse. Each element must be connected with a T-shaped or corner mount.
- Reinforce supporting elements with a length of more than 2 m with a cross-shaped fastening.
- Sheathe the assembled frame of the greenhouse with polycarbonate or polyethylene.
Each manufacturer’s instructions may differ, but in general terms, all frame assembly points are the same.
Self-made butterfly greenhouse
Making a butterfly greenhouse with your own hands is not so difficult. To verify this, we now consider the main stages of this process.
Preparatory work
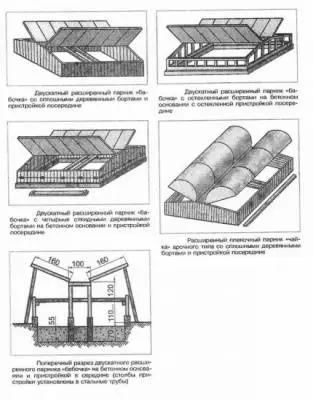
To make a neat greenhouse with an aesthetic appearance, you need to draw a diagram of it. It is important to indicate on it all the elements of the frame, their dimensions and bolting points. Immediately you need to decide on the shape of the valves. They can be made semicircular or even.
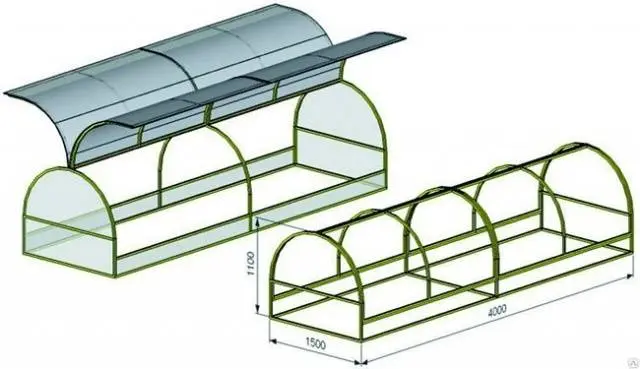
With the independent production of a drawing, a problem will similarly arise. For reference, we provide a photo depicting different schemes of butterflies.
Choosing a place for installing a greenhouse on the site
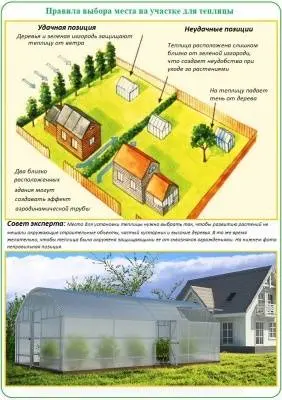
Any greenhouse or greenhouse is located from north to south. It is better to choose an area that is not shaded or at least well-lit before lunch by the sun. The butterfly will fit in any corner of the yard, but it is necessary to ensure a free approach to the doors on both sides. It is important to consider that a shadow will fall from tall trees and buildings, but a thick green fence will protect the greenhouse from the cold wind.
Foundation laying
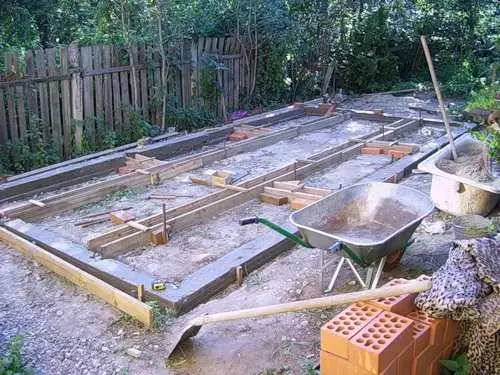
Collapsible greenhouses are rarely installed on the foundation. If the butterfly sheathed with polycarbonate will be used as a stationary greenhouse, it is best to put it on the base. Under a light structure, a strong foundation is not needed. It is enough to deepen it into the ground by 500 mm. As a base, you can put together a wooden box, but it will quickly rot in the ground. It is optimal to lay out a base of red brick, hollow blocks or, in extreme cases, knock down formwork around the trench and pour concrete.
Making a wooden frame
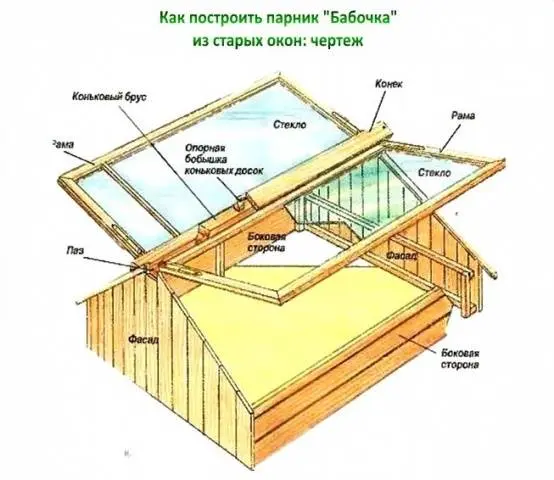
At home, the simplest version of a butterfly can be made from wooden slats and old windows:
- From the prepared drawing, the dimensions are transferred to wooden slats with a section of 30×40 or 40×50 mm. Saw off all the marked elements with a hacksaw.
- Guided by the scheme, they assemble the frame of the greenhouse. The roof will be triangular and flat. Arcs made of wood cannot be bent, so it is better to stop at even doors.
- From above, to the finished frame, with the help of loops, the frames of the sashes are fixed. From above they are covered with a film. If the farm has old window frames, they will play the role of ready-made sashes. Window glass will remain as a skin.
- The sides of the frame can be sheathed with a board, but they will be opaque. Not bad here is reinforced polyethylene, plexiglass or polycarbonate.
If desired, the wooden frame of the butterfly can be upholstered with non-woven covering material.
Production of a frame from a metal profile
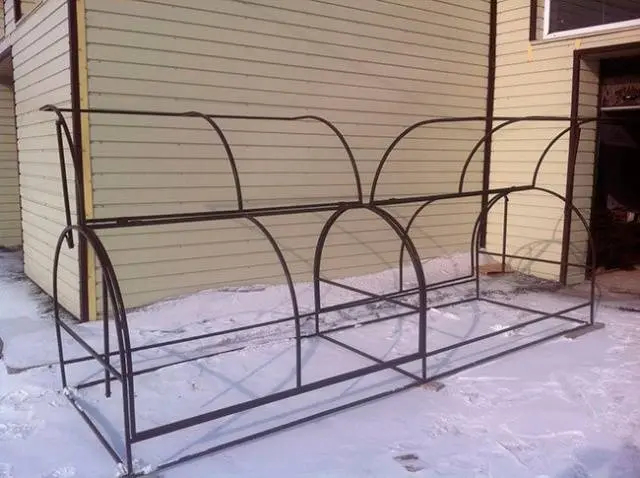
The principle of assembling a frame from a metal profile is the same as for a wooden structure. The only difference is the semi-circular sashes. For them, it is necessary to bend the arcs at a specialized enterprise.
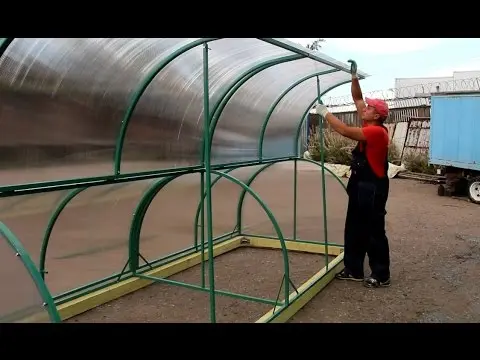
The greenhouse will be stationary, so it is better to weld all the elements of the frame. First, according to the drawing, a common frame is made with a central jumper for attaching the wings. It is better to fasten the hinges to the jumper and doors with bolts. The finished frame after installation on the foundation is sheathed with polycarbonate. The cut fragments are fixed with special hardware with sealing washers. Film and agrofibre for a metal frame is not suitable.
The video shows the assembly of the butterfly:
Reviews
Reviews of many summer residents say that a butterfly greenhouse is the best solution for growing seedlings and early vegetables. Let’s read what growers think about it.