Contents
Used plastic and glass bottles can find a new life if you try to make flower beds from plastic bottles with your own hands. Of course, a large “army” of bottles should not be kept at home, because with their help you can make flower beds and crafts for the garden with your own hands in a couple of days. You will learn how to decorate a garden or make a path to the house from plastic bottles below.
The advantages of bottle beds
Flower beds from used raw materials have many positive aspects. The most important thing is the availability of the material, because almost every family buys drinks in plastic or glass containers. Secondly, the craft made does not allow perennial plants to grow randomly, that is, beyond strictly allotted limits. Weeds also have a hard time getting past the plastic barrier. This will save you time on spring work when planting and weeding a garden or flower bed. Thirdly, a flower garden with a plastic fence does not allow the soil to dry out.

Another very important advantage of such a fence is the ability to replace any fragment of the structure when it fails. Plastic is a material that does not decompose naturally, so reuse is more of an advantage than a disadvantage. It is not difficult to make such a structure in the garden with your own hands, since plastic is easily cut and dug into the ground.
What are the types of structures
To date, there are a lot of options for decorating the border of a flower bed or flower garden with plastic bottles. Using PET raw materials and your imagination, you can make a fence of almost any shape and size. Most often, crafts are made in the form:
- circle;
- rectangle
- square.

Of course, you can get more creative and make something in the form of a designer in the shape of a butterfly, sun or any other shape, since plastic will endure everything.
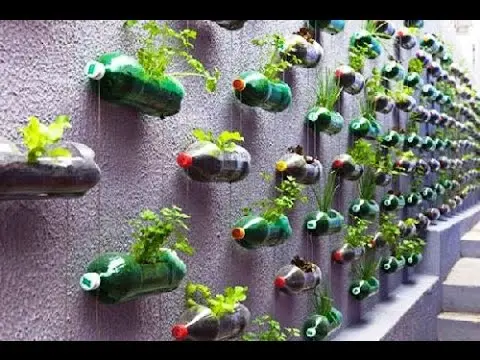
It is easiest to work with bottles of the same shape and color. However, you can also make a multi-colored flower garden by alternating PET bottles in a certain sequence so that the design is neat and attractive. Types of placement of plastic bottles to form a flower garden: vertical crafts, horizontal crafts.
Video “Instructions for making a flower bed”
Video instruction on how to make a flower bed yourself.
Flower bed installation process
A vertical fence is most often used as a border for an existing flower bed, while a horizontal structure is created along with the flower bed. Making a vertical craft is much easier as the shape of the bottle matches the overall theme of the design. Before installation, stickers are removed from the bottle, then it must be washed and dried. To make the structure more stable, sand can be poured into the tank. The installation of the fence takes place in two stages:
- Determination of boundaries and their marking. At this stage, we determine the shape and boundaries of the flower garden, make a sketch on paper, and then measure the required distance along the perimeter and form a groove 8-10 cm in depth. The width must correspond to the diameter of the bottom.
- Filling a PET bottle. The container is filled with sand, pebbles or any other filler and set butt to each other along the marked contour. Thus, do-it-yourself flower beds are formed from plastic bottles of a vertical type for a garden.

Placing PET bottles horizontally is a little more difficult than the previous option, as it will require some skills and auxiliary materials. Such a barrier looks very beautiful, and its protective functions are much stronger. As additional materials for registration, you will need a base and fasteners. A cement substance is often used as a fastening material, and an old leaky barrel or a used tire can be taken as a base. The boundaries of the flower bed in this case are determined by the diameter of the base. The base is covered with fastening material to the thickness of the neck, while the plugs must be removed.
The cement substance is prepared from cement and sand in a ratio of 1 to 2. If possible, you can use ready-made assembly adhesive. We start to apply the solution and fix the bottles from the bottom, gradually rising to the top, since each circle acts as the basis for the next row. Strive to do everything carefully and carefully, especially with the first bottom layer. We form each row of crafts after the previous one dries. To decorate the last row of bottles, use moss, pebbles, or special decorative elements for the garden and flower beds. So, like a designer, you can decorate the backyard with used plastic bottles with your own hands.

How to arrange a decorative component
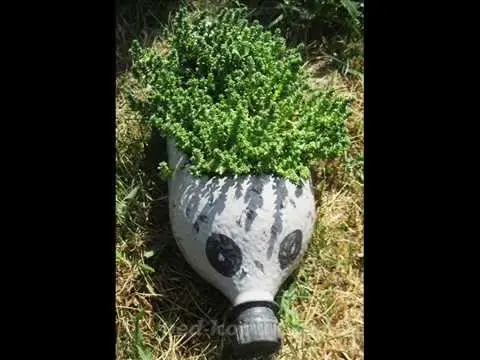
Once the fence is installed, the main part of the work can be considered completed. In principle, such a flower garden will more than fulfill its protective and enclosing function, however, you can show your imagination and decorate the resulting structure. To do this, you can use multi-colored paint, pebbles, or make various figures from plastic with your own hands, for example, tulips. To do this, the neck of the bottle is cut off in the form of a flower petal, and then each flower is painted with acrylic paints. With such a decor, hand-made flowers will look bright both in warm weather and in winter.
Video “Master Class”
A master class on how to make an original flower bed with your own hands using plastic bottles.