


Everyone loves plants. Someone is fond of tropical species, others are fans of meadow herbs, others prefer conifers. But, most importantly, I really want these pets to be around all year round. It turns out there is a way out. We create a florarium or a small home mini-greenhouse, and now the winter climate is not at all an obstacle to growing a tropical garden in an apartment.
Exotic plants in such a plant terrarium will delight the eye regardless of climatic conditions.
Florarium has a great external resemblance to an aquarium. It is also placed inside a glass container, but there is no water and no fish in it. Florariums appeared as mini-projects of winter gardens. As soon as such a piece of furniture settles in your house, the place for rest and relaxation is ready! With it, you will always succeed and surprise your guests. In addition, there is an opportunity to get away from traditional flower pots. Plants in a mini-garden can bring such peace and tranquility that everyone wants to create such a florarium with their own hands.
Why is it so attractive? It is worth listing the advantages of a tiny plant terrarium, as the question will immediately disappear:
- to create an original garden, even recycled household materials are suitable;
- the manufacturing technology of the florarium is so simple that children can easily make it;
- budget during the period of operation (watering no more than 3 times a year);
- the uniqueness of each florarium;
- compactness – an ideal property for owners of small window sills and apartments;
- the ability to use in shaded places, which will add greenery in various parts of the room.
What materials can be used to make a florarium? Consider the possible options that contain step-by-step instructions for creating such a garden.
Choosing a space for a mini-garden
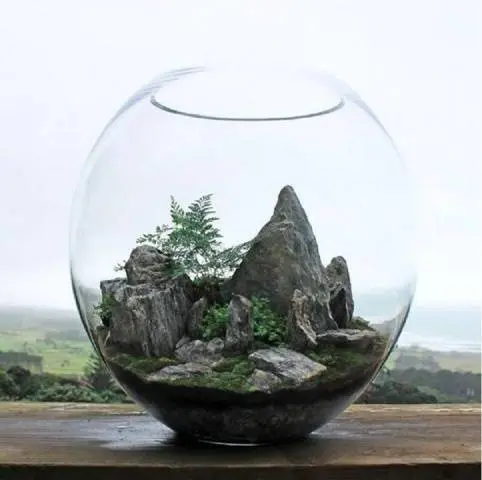
Most often, such plant mini-terrariums are placed in a container made of glass or thick plastic.
Some designers use wooden containers, as well as combinations of various materials. The florarium differs from the terrarium in the presence of a narrowed inlet. It can be located both on top and on the side of the container. For greater originality of some projects, it is closed with an unusually shaped lid. At home, you can get by with a container for growing plants, an ordinary glass bottle or jar.
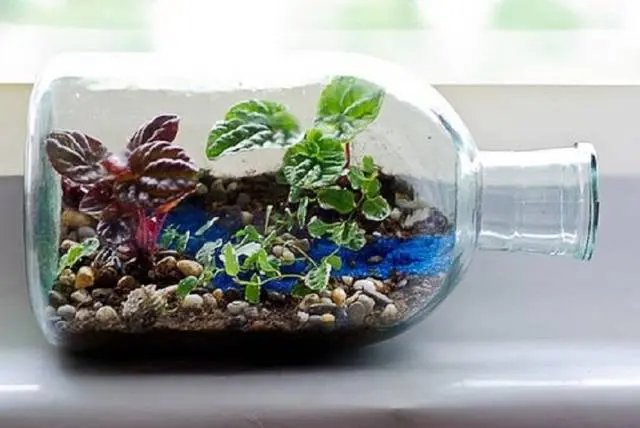
A bottle of wine, any bowl with a narrower opening, and even a laboratory flask will do (this is to add creativity to the office space).
The container you choose should keep the humidity and temperature levels as stable as possible. This is the main purpose of the florarium.

If it is possible to provide an independent source of light and heat, then you can grow the most exotic and whimsical plants.
But when you have created a mini-garden in a glass, an open jar, a vase or a bowl, you need:
- monitor the temperature regime;
- spray plants regularly;
- water them in a timely manner;
- protect from drafts (this item depends on the type of plant).
It is also important to remember that the plants that you planted grow slowly, but still grow. Once this happens, you can transplant them into flower containers. After that, the florarium will be ready for new tenants. How to make a florarium with your own hands? To do this, you need to perform several steps. First, choose a suitable place for the florarium.
Where to place the florarium
For such an exotic item, we choose a place that is in sight and always in the spotlight. The mini-terrarium must be oriented so that all plants are in the most advantageous position. Then from anywhere in the room, they will be clearly visible.
Be sure to provide artificial lighting for the florarium. Firstly, it will give originality to the composition, and secondly, it will allow you not to become attached to a window or other source of natural light. Artificial lighting looks very attractive and allows you to vary the degree of illumination, the direction and its shade.
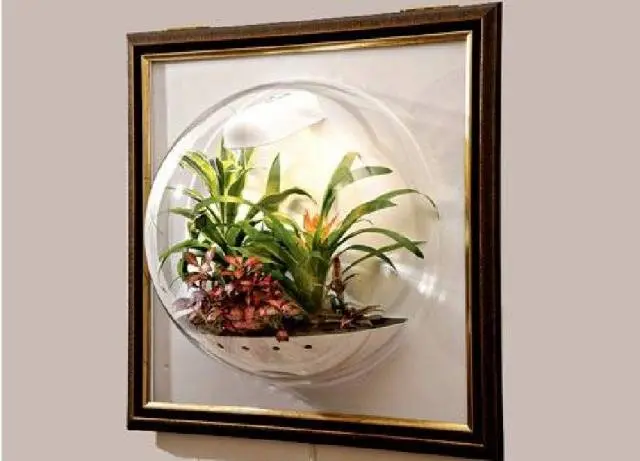
Of all the types of florarium designs, the most advantageous is circular. With this solution, you have access to plants from all sides and can observe their development. And also this option will allow you to control the status of each of them. Try to take into account the size of the room. Too bulky florarium will look like a showcase and cause a feeling of clumsiness.
Place a tiny plant garden on the wall using containers, on shelves, tables or a window.
The composition looks great among beautiful vases. For children, you can combine the florarium with a living corner, where plants and animals will complement each other. And now we begin to create our own unique mini-garden. Consider a step-by-step plan for creating a florarium for beginners.
Creative Tips for Beginners
There are a lot of varieties of plant mini-terrarium designs. Specialists offer ready-made forms, as well as advise on their placement. But, independent creativity is much more interesting and colorful, because each florarium is unique.
It is performed with different access to plants – frontal or vertical. The list of mandatory technical equipment includes:
- Additional lighting or lighting. Glass tinting will soften the bright light, add an original shade to the internal contents of the florarium.
- Hygrometer, thermometer. Humidity and temperature control is a must. For tropical plants, the necessary indicators must be observed. They are different from what we are used to, so we will have to constantly monitor!
- Ventilation. For the florarium, it is necessary to create cleanliness, freshness and air movement.
After preparing all the necessary technical equipment, we proceed to the choice of plants. Plants for the florarium are selected so that they are combined in size, color, texture, demanding conditions.
The most common inhabitants of mini-gardens are:
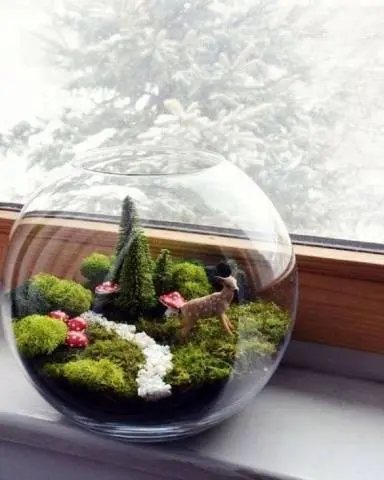
- Moss and fern. From mosses, sphagnum is most often used, and from ferns, species that grow slowly are chosen – multi-row, asplenium, pteris.
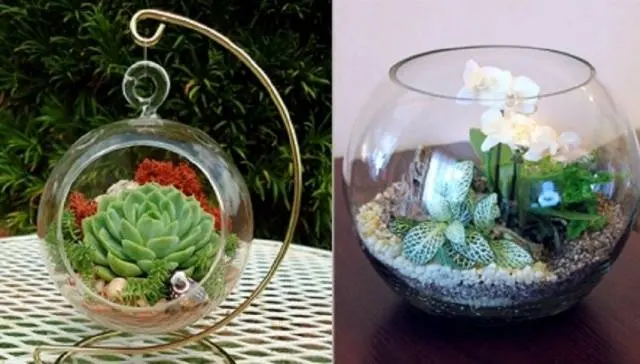
- Orchids, saintpaulias, cyclamens.
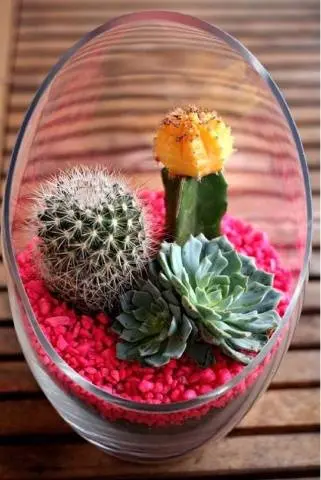
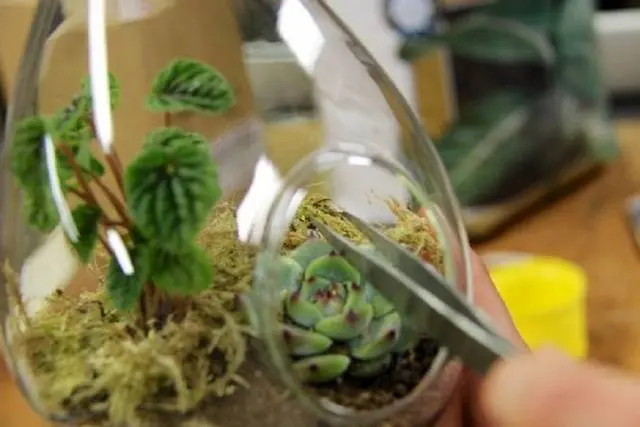
- Cacti and succulents.
- ivy.
Of course, the list is very short, but for beginners, it is not the quantity that matters, but the right combination of plants. Currently, the succulent florarium is becoming very popular.
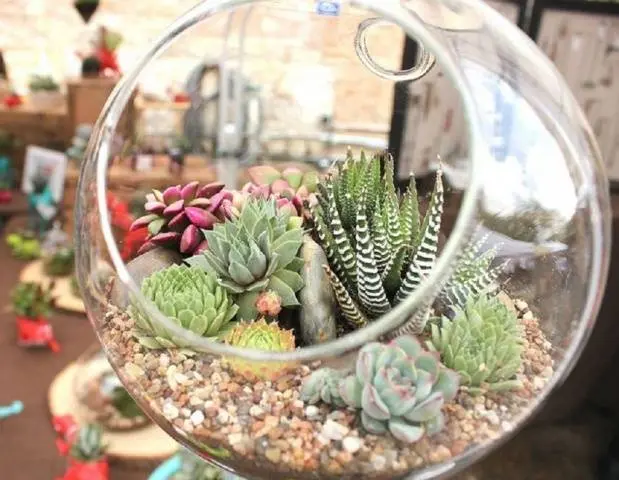
They look very impressive and are suitable for creating a “drought-resistant” composition.
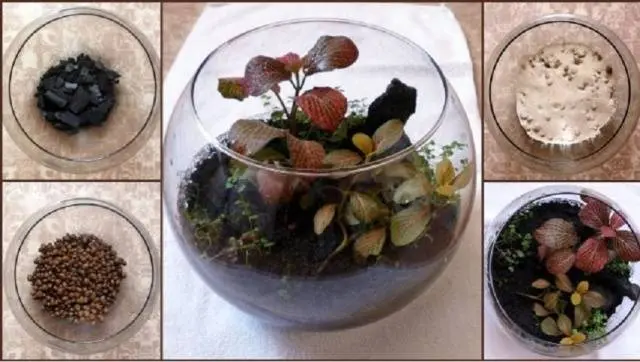
We decided on the types of plants, now we proceed to the design of the bottom of the florarium. It is good to put a plastic grate on it. In this case, the plants do not have to be in the water all the time. You can replace the grate with a layer of expanded clay or sand. Here they play the role of natural drainage.
There should always be water at the bottom. It can be in a special pallet or at the bottom of the container. This condition must be met in order to create high humidity. If you purchased plants that usually grow in swampy areas, then you will need a constant presence of a water layer up to 20 cm thick. Drought-resistant plants do not need this condition.

We turn to filling the florarium with plants. First of all, you need to prepare the substrate for the type of plants that you will plant. This is another reason why they pick up the same type of “tenants” in a mini-garden. In addition to the substrate, additional design of the florarium will be required. Our plants need to be properly positioned.
Ordinary shelves and ladders look too traditional. It is better to diversify the interior of the florarium with elements of “wild” nature. It can be the original form of snags, stumps, tree branches. Before being placed in a container, they should be treated against increased exposure to moisture. Here you can suggest, as an option, wrap the tree with layers of sphagnum.
Light-loving plants are planted at the top of the florarium, shade-tolerant – lower. Orchids create a special beauty. A wonderful background for them is ivy, ferns, tradescantia, asparagus. Do not use large-leaved and fast-growing plants.
Having completed all the points, you can admire your work and do not forget about caring for the florarium. The maintenance manual for the florarium is based on the selected plants, but spraying the leaves, cleaning the display case, shaping and trimming the shoots will still have to be done.
Spray plants with purified water, remove diseased or overgrown ones in time. Subject to these simple rules, your florarium will be beautiful for a very long time.