


Whole course: lesson 1 | lesson 2 | lesson 3 | lesson 4 | lesson 5
I think you already know from the last lesson that dates and times in Excel are stored as ordinal numbers, the starting point of which is considered to be a certain January 0 1900 years. Fortunately, in the cells we see not these numbers, but the dates and times familiar to us, which can be stored in a variety of formats. In this lesson, you will learn how to enter dates and times in Excel to get the formatting you want.
Entering dates and times in Excel
Dates and times in Excel can be entered as an ordinal number or a fraction of a day, but as you yourself understand, this is not very convenient. In addition, with this approach, the cell will have to apply a certain number format each time.
Excel offers several formats for entering temporary data. If you apply this format, Excel will automatically convert the entered date (or time) to an ordinal number (fraction of a day) and apply the format to the cell Dates (or Time) set by default.
The figure below shows a table of date and time input options that Excel supports. The left column shows the values to be entered into the cell, while the right column shows the result of the conversion. It should be noted that the dates entered without specifying the year are assigned the current year, namely the one set in the settings of your operating system.
These are not all possible options that Excel supports. But even these options will be enough for you.
Some of the date display options presented in the right column may differ. It depends on the regional settings and the date and time display format in the operating system settings.
Date and time format in Excel
When working with cells in Microsoft Excel that contain dates or times, you can apply different formatting to them. For example, you can display only the day of the week in a cell, or only the month and year, or only the time.
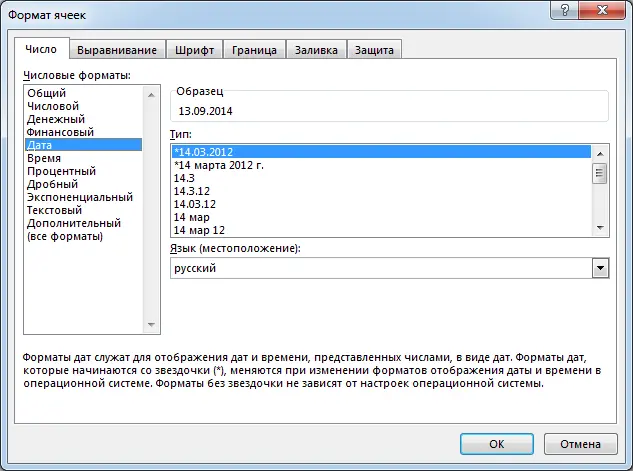
You can get access to all possible formats on the tab Number dialog box Cell format… In the category date here are the built-in date formats:
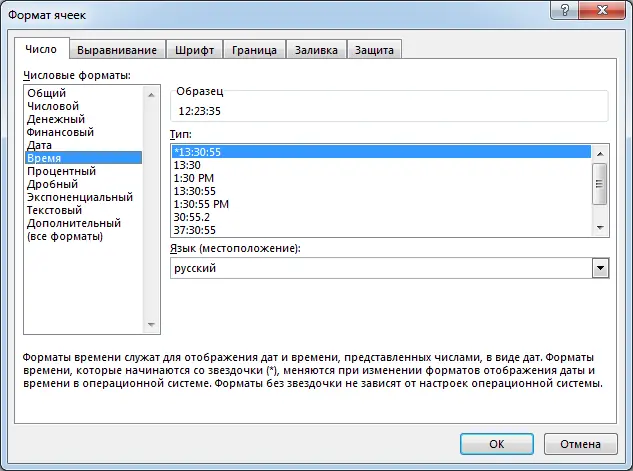
And in the category Time – built-in time formats:
In order to apply formatting to a cell, just select the desired format in the section A type and press OK. The required formatting will be applied. If the built-in number formats are not enough for you, then you can use the category All formats. Here you can also find a lot of interesting things.
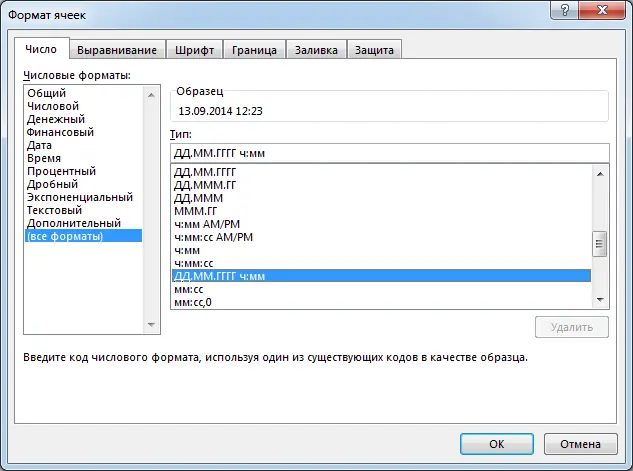
If none of the options suits you, then you can create a custom number format. It’s easy enough to create if you use the built-in number formats as a template. To create a custom number format, follow these steps:
- Select the cell to which you want to apply the desired number format.

- Open a dialog box Cell format and go to the tab Number.
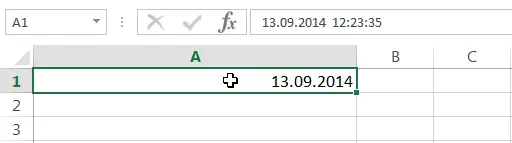
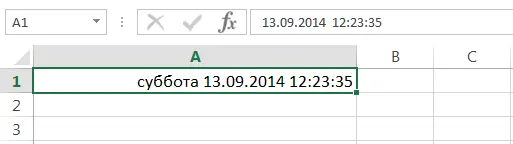
- In category All formats in the field A type enter the desired number format code. In our case, we will enter: DDDD DD.MM.SS hh:mm:ss and press OK.
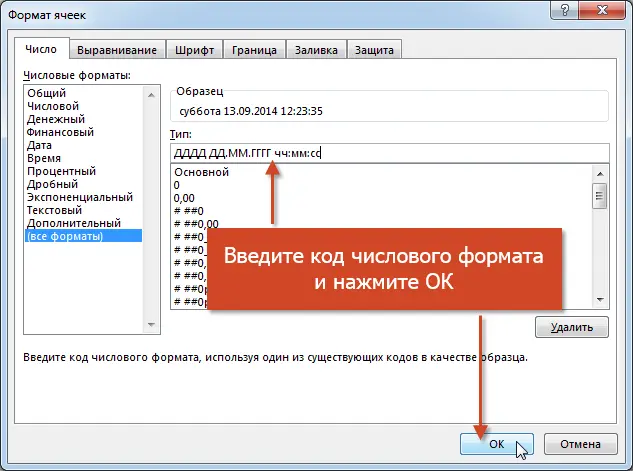
- The custom number format will be applied to the cell.
As you can see, everything is quite simple!
In this lesson, we learned how to customize the format for displaying dates and times in Microsoft Excel, and also analyzed several useful options for entering them on a worksheet. In the next lesson, we will talk about 7 Excel functions that allow you to extract the desired parameters from date and time values. This lesson is over. All the best to you and success in learning Excel.