Contents
Drip irrigation is the know-how of Israeli farmers who used such a device back in the sixties of the last century. According to their observations, this made it possible to increase the yield while saving water – due to the supply of irrigation to strictly defined places. Other advantages of drip irrigation are the possibility of automation using programmable sensors, the best microclimate in the soil – due to the slow entry of moisture from the soil, air is not displaced from the soil and plant roots breathe, the ability to regulate the water supply to specific areas.
Automatic irrigation systems
Drip irrigation can be used both outdoors and in any kind of greenhouse, and the installation scheme and set of parts will be similar in all cases. In specialized stores, you can purchase both a ready-made kit (for example, “Beetle” from cicle), and components for the system, if you want to design and make it yourself or if the configuration of the beds is non-standard. The Zhuk device is designed for 30 or 60 plants, but you can always buy Zhuk expansion kits and assemble a drip irrigation device from professionally selected parts with your own hands.
In large greenhouses, various types of automatic irrigation are used: spraying from above (the so-called sprinkling), subsoil irrigation with porous hoses, individual water supply to each hole – that is, drip irrigation. All these systems have their pros and cons, but the last option is the most convenient to organize watering polycarbonate greenhouses in your personal household with your own hands. Such a device will save water, as well as protect plants from sunburn, which are likely after sprinkling.
The manufacturer cicle offers ready-made kits “Beetle” for watering both open beds and greenhouses. The beetle can be connected to a watering tank or directly to the water supply. In the second case, cicle systems are used only for cold irrigation.
Watering options
Having a well-mounted drip system, it is possible to set up watering the entire greenhouse, individual beds or watering with fertilizer application with your own hands. Experienced summer residents recommend making drip irrigation with the ability to turn off one or another bed from it. This will allow you to alternate planting plants on different beds in different years, without re-equipping the greenhouse and irrigation system.
Having decided to build a do-it-yourself irrigation system in a polycarbonate greenhouse, you first need to draw up a detailed plan for the greenhouse and decide on the source of water. This can be a well, a water supply system, and even an ordinary barrel installed at a height of about two meters above the ground. Drip irrigation is convenient to arrange where there are problems with water pressure. Since the hoses of this system require low pressure, and a barrel fixed at a low height is able to provide it. In addition, even after deciding to mount the irrigation system to the water supply, it is worth preparing a barrel as well – it will come in handy for fertilizing through drip irrigation.
Extensive and detailed plan for organizing automatic watering
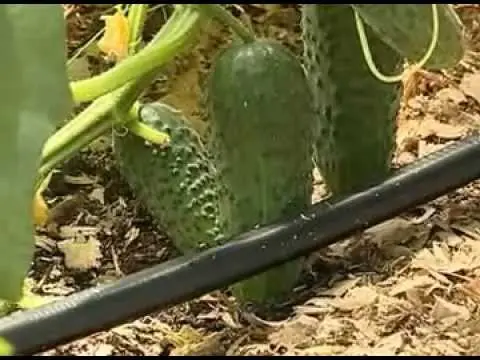
Further, in accordance with the plan, it is necessary to calculate how many pipes, filters, connectors, plugs and taps will be needed. The main component of the kit is a drip tape, that is, a narrow hose made of several layers of polyethylene, welded together in a special way, so that microspaces are formed inside it for slow water supply. On sale there are tapes of different diameters, the frequency of the location of the watering holes and different water yields – from 1,5 to 9 liters per hour. The tape is an indicator of the correct operation of the entire system. If the ground is evenly moist at the place where the water flows out, this is a regular state. If a puddle has formed near the dropper, you need to check the tape for breaks and replace if necessary. If the soil in the greenhouse is dry, the system is clogged. That is why high-quality filters are important for drip irrigation.
Video “Organization of drip irrigation in a greenhouse”
How to Install

If you bought a drip irrigation kit, then detailed assembly instructions are attached to it. If you are collecting drip irrigation with your own hands, then you need to decide whether it will be warm or cold watering – that is, whether you need a container in which the water will be heated during the day.
First of all, a container is mounted near the greenhouse, from which watering will take place – the main thing in the set. This should be a barrel with a volume of two hundred liters or more, installed at a height of about one and a half meters above the level of greenhouse beds. Water must be supplied to the barrel – tap, from a well or any other. The barrel should be closed: this will allow the water to warm up during the day to a temperature comfortable for the plants, but not overheat and bloom.
A main pipe is laid from the barrel to the greenhouse. For a do-it-yourself drip system, a polyethylene pipe is ideal, opaque, with thick walls, with a diameter of 25 cm. The pipe can be dug in or raised above the ground on a support, but simply put on the ground is also suitable.
From the main pipe to the beds, branches of the tape depart. The calculation of the amount of tape is simple: the number of beds is multiplied by the length of one bed and a certain amount is added to the result for the stock. In the finished Zhuk system, the calculation is based on the number of plants that can be watered.

Drip irrigation system diagram
The drip tape is attached to the main pipe using a set of seals and starters. In the pipe, you need to make holes for the diameter of the drip tape – no more than 14 mm. A seal must be inserted into the hole, then a starter with or without a minicrane, then a piece of tape. It should fit into the connector with little effort. Important – the holes of the Beetle drip tape should be directed upwards. The procedure must be repeated for each bed. If necessary, the drip tape can be cut, insert a corner or a tee of their set of components, and make branches in several directions with your own hands.
The first watering through this device is technical. The ends of the tapes must be open so that water flows freely through them. After flushing the system with your own hands, put plugs on the ends of the drip tapes or, more simply, tie them in a knot.
At the end of the season, the drip tape is removed. The kit must be kept dry. Also an important element of the correct operation of the system is the regular cleaning of the filters.
Video “Drip irrigation from scratch”
This automatic irrigation system for a greenhouse is very effective and convenient, so both beginner gardeners and experienced gardeners should be aware of its proper organization. This video will help you.