Contents
Today, energy sources such as coal and wood are still quite popular. Wood burning stoves are installed in many houses. Firewood is also used for heating fireplaces and boilers. Most owners of their own plots chop wood by hand, with an ax. However, there is a more modern option – the use of a wood splitter. Such a unit simplifies the chopping of firewood and reduces time costs.
To figure out how to design a wood splitter with your own hands, you should familiarize yourself with the drawings of the device and view several photos of finished products.
How to choose a wood splitter
When choosing a wood splitter that will be used for domestic needs, you should decide how much work you have to face. It depends on what design the product will be. The first question that confronts the owner of a country house is: to buy a factory device or to assemble a device with your own hands?
In the case of a purchased product, you will have to pay a lot of money. For self-assembly, you will need to prepare a set of tools and the necessary materials. However, if you choose this option, you can get by with a minimum of costs.
Types of wood splitters
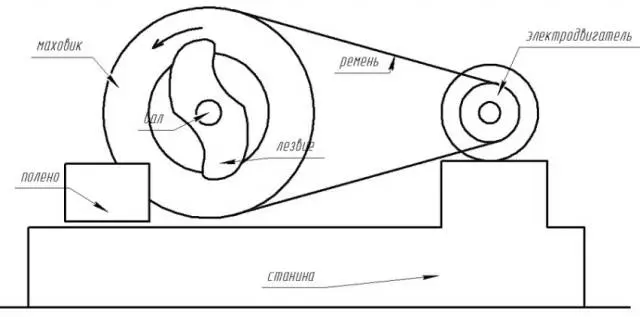
To understand how different wood splitters are arranged and work, you should understand their types. This will help you understand the instructions and the product diagram. There are different classifications of such devices. You can assemble a wood splitter with your own hands according to the video instruction or drawing.
An important characteristic of the wood splitter is the position of the chocks. It can be:
- Horizontal – logs are laid on a bed. Then they move to the cutting tool or it moves in the direction of the log.
- Vertical – the knife is placed above the log, which allows you to split the material from above. With this design, the wood splitter, the chock must be fixed.
It can be argued that the efficiency of horizontal products is less than vertical ones. However, each device has certain features of operation. Divide designs and drive:
- On diesel or petrol. This type of device is the most common. The main advantage of the products is complete autonomy.
- The wood splitter is mechanical. It is very durable and reliable. They are mainly used for short-term work.
- On an electric motor. These wood splitters are stationary products. They are comfortable, but differ in average performance.
It also matters what shape the cleaver is made of. This indicator also applies to the main parameters of the product. Cleavers can have a conical or cruciform shape. In the latter case, firewood is split into 4 parts. This is quite convenient if they are used to load into the boiler shaft. However, it will take a lot of effort to split firewood on such a device.
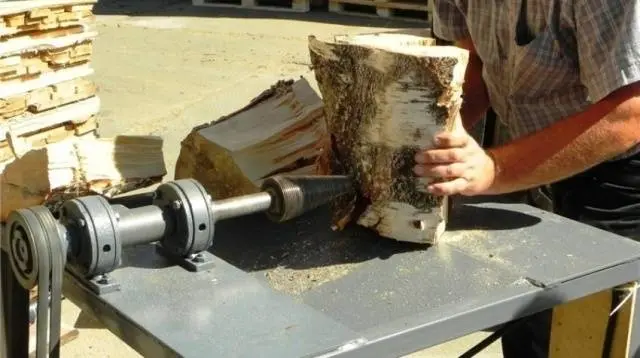
More popular products with cleavers in the form of a cone. You can design a wood splitter with your own hands very quickly.
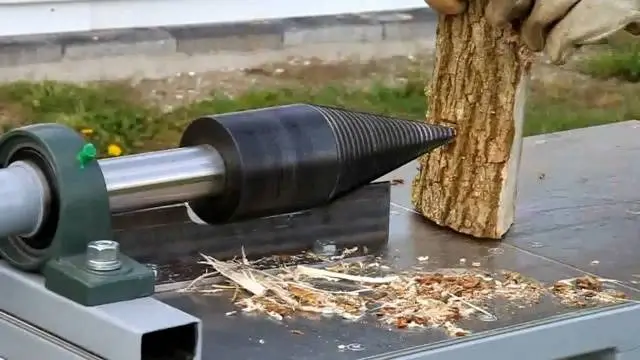
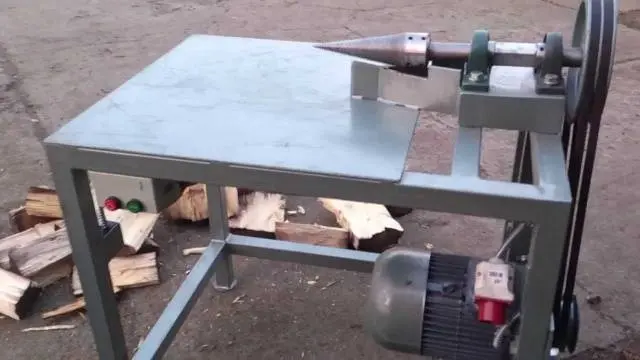
Features of products with a cone-shaped working part
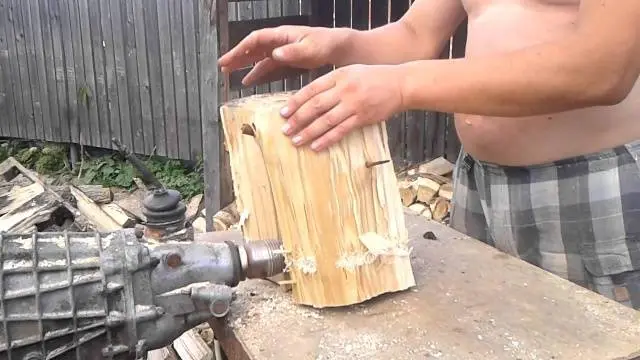
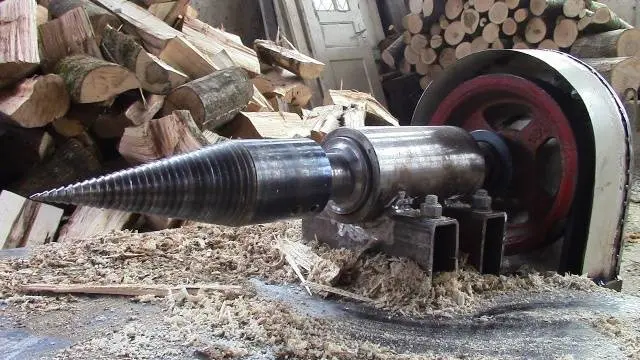
The cleaver, which is made in a conical shape, may have a thread. It is used in electric and diesel wood splitters. Its advantage is the fact that the logs are split using the rotational movements of the tip. The cleaver is twisted into a log. For this reason, it does not take much effort to split the workpiece.
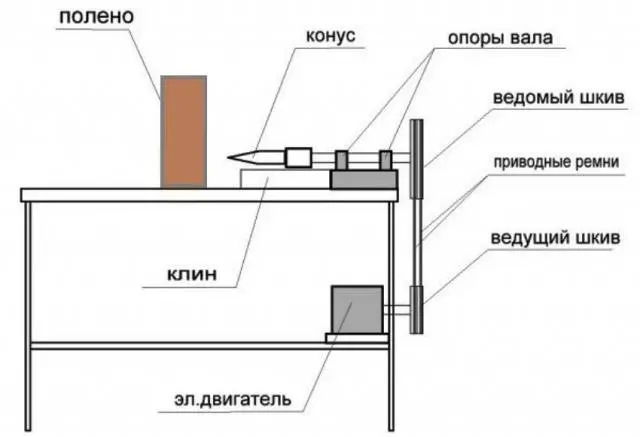
In models that run on electricity and gasoline, a cone-shaped cleaver is usually used. If you want to design a screw homemade wood splitter, you will need to create a drawing. During operation, it is better to follow pre-prepared instructions. Before you create a wood splitter with your own hands, you will need to know its device.
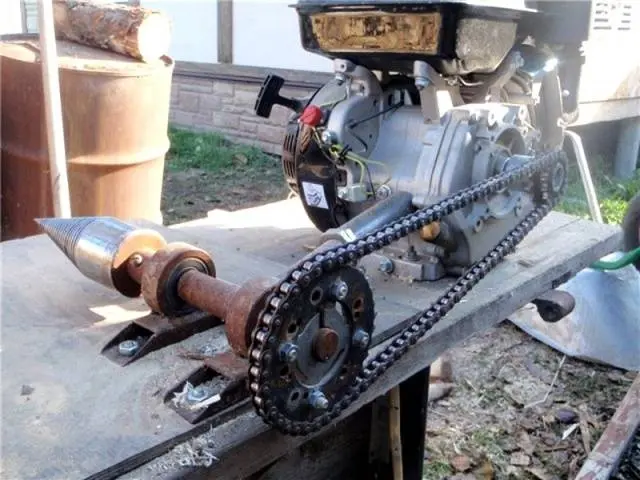
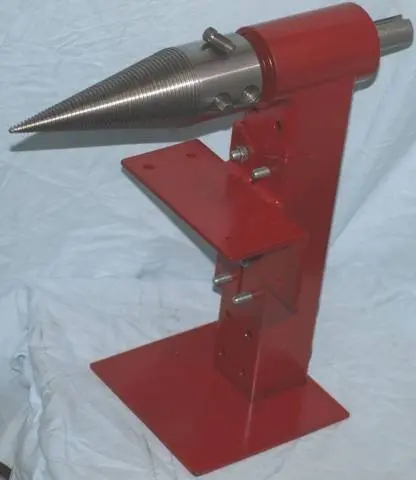
Such an assembly is made of several parts:
- Motor. It can run on fuel or electricity. To ensure the effectiveness of the device, the engine must have a power of 1,5 kW. The voltage in this case should be 380 V.
- Bed. This item is a table with legs. Firewood is placed on it. An engine is installed under the frame.
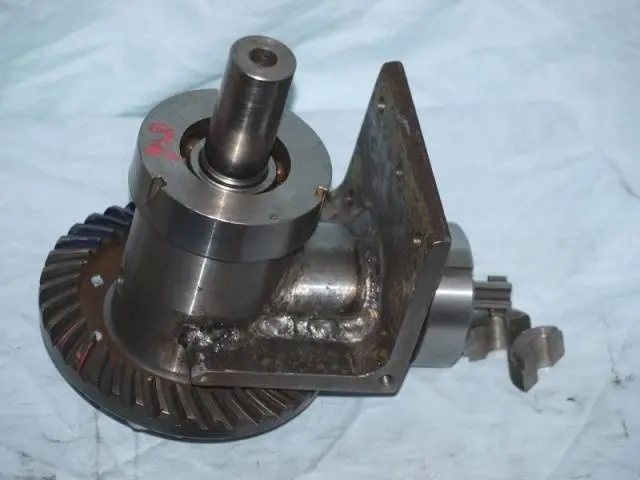
- Reducer. It serves to regulate the number of revolutions of the motor.
When assembling the device, its design should be taken into account. The advantage of such a product is the low cost of manufacture. Usually, wood splitters with a cone-shaped cleaver are created for domestic purposes.
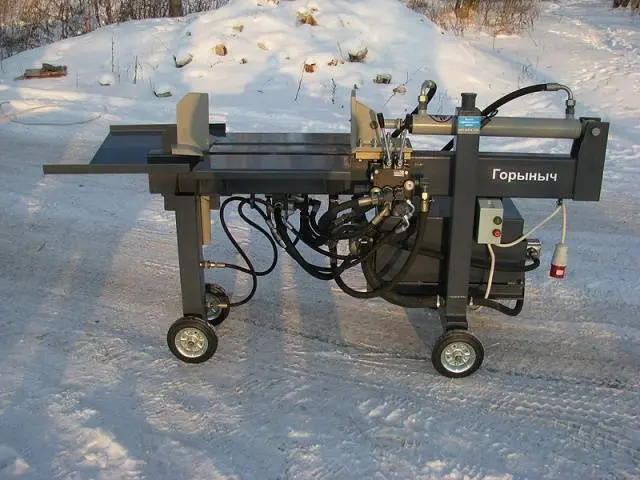
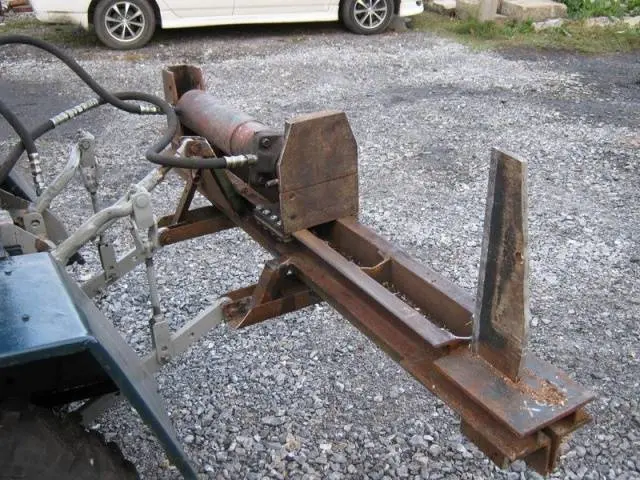
Hydraulic wood splitters
Models of the hydraulic type have one indisputable advantage – they allow you to chop quite large volumes of firewood in relatively short periods of time. The cleaver in such a device is located on the rod.
When creating a hydraulic wood splitter, several features should be considered:
- how is the log located;
- motor power;
- the force with which the log splits;
- allowed log size.
The assembly of a hydraulic wood splitter is more difficult than a cone splitter. However, the performance indicators of such devices are much higher.
Thanks to the drawings of the wood splitter, you can understand by what principle it works. Assembling such devices at home is a fairly simple task. To figure out how to make a wood splitter with your own hands, you will need to study a device of a certain type of design.
Rack splitters
They were so named for the fact that the cleaver is attached to the rail. The log splits when you press the handle, which is available in the wood splitter. In this case, the gears are engaged, and then the rack begins to move towards the log. As a result, the chock splits into several parts.
Homemade rack wood splitters are characterized by the following parameters:
- uniform in hand;
- minimum log size;
- workpiece splitting force.
Rack structures are often implemented in the factory assembly. However, such devices are much more expensive than those that are made by hand.
Wood splitter assembly
At home, assembling a wood splitter with your own hands is not difficult. To do this, you will need to prepare certain tools and materials. In the case of different types of products, you will need to take into account their features.
Screw products
To assemble a screw product, you will need to purchase a cleaver in the form of a cone, a gearbox and a frame. The last element can be independently constructed from sheet steel and metal corners. You can assemble a wood splitter with an engine with your own hands quite quickly if you follow the instructions.
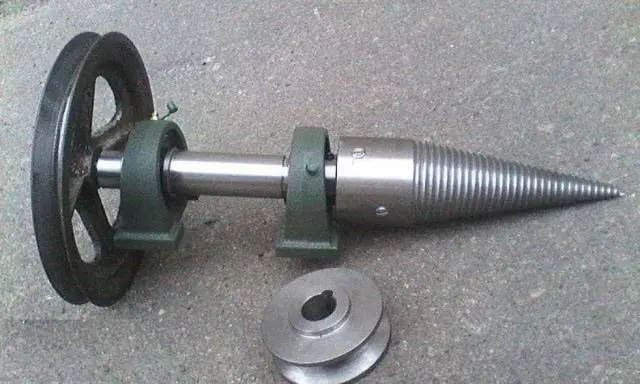
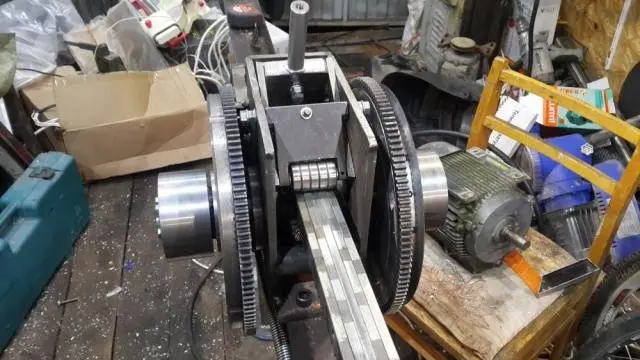
First, the motor and gearbox are installed on the frame. Then a cone is put on the shaft, and the shaft is connected to the gearbox. During the assembly of such a device, it is necessary to consider:
- The nozzle must not be attached directly to the engine.
- If you do not have experience working with electrical equipment, you should seek help from a specialist.
- The belt drive must be covered with a casing.
- The shaft must rotate at 250 rpm.
Taking into account such features, it will be much easier to assemble a screw wood splitter. To figure out how to make a wood splitter, you should get acquainted with the features of its design and operation.
Assembly of the hydraulic product
Designing a homemade hydraulic type wood splitter is a little more difficult. This is due to the presence of a hydraulic unit. Before work, you should buy a hydraulic cylinder, as well as a pump and a motor for it.
After that, the hydraulic part is installed on the frame. Before starting work, it is necessary to assess how economically profitable the creation of such a unit will be.
Conclusions
You can not only design a wood splitter yourself, but also purchase it in a store. The main difference between such devices will be the price. The main advantage of wood splitters, which are sold in the store, is saving time and effort.
A do-it-yourself wood splitter assembly video is presented below: