


Contents
Residents of eastern countries use a pitcher-like brazier for cooking, calling it tandoor. They cook in it not only meat and fish dishes, but also bake bread. In their design and form, such braziers are diverse. From the article you will learn how to build a tandoor with your own hands.
What is tandoor
First you need to understand what dishes the inhabitants of the East prepared. The stationary tandoor, installed in the dwelling, had various sizes, and was intended not only for cooking, but also for heating. This massive furnace reached 1 m³ in size and weighed up to a ton. Using the specific properties of the brazier, Asians made cakes, samsa, pilaf, lamb, and vegetables. Due to the deep baking of the product, it was possible to endow any dish with a special aroma. On a conventional grill or in an oven, it is impossible to achieve such a result.

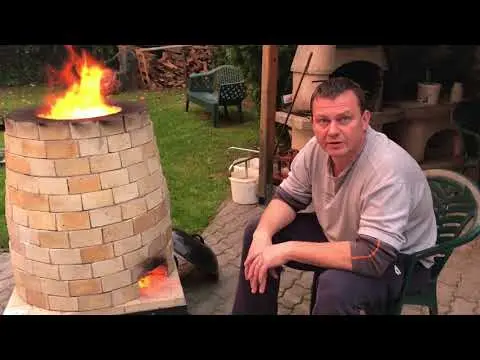
Video “Do-it-yourself brick tandoor”
From this video you will learn how to independently build a high-quality brick tandoor for a summer residence.
Brick tandoor
Any person with little skills in construction can easily master the construction of such a wonderful stove. In the beginning, you need to make a design diagram indicating all sizes and gaps. In the absence of cast-iron grates for the tandoor, you will need to complete the drawing and order them.
For the construction of the tandoor, a ready-made clay insert or a method of forming a jug-shaped surface inside the brickwork can be used. If you purchase a finished tab, the construction process will be much easier and faster. To make such a tab with your own hands, you will need heat-resistant clay. Any of these options will begin with the construction of the skeleton.
Foundation
- It is necessary to mark a flat area for a monolithic foundation. Only this type of core can withstand the weight of the future furnace.
- Next, a pit is dug to a depth of 15–20 cm. The bottom is covered with rubble and sand to build a sandy base at a depth of 5 cm.
- Formwork is being constructed and the inside of the pit is reinforced with metal profiles and rods. Steel products are connected with wire.
- The concrete solution is poured into the pit so that the foundation surface is 15 cm above the ground level.
- The skeleton is allowed to dry for several days. In hot weather, it is covered with a film so that cracks do not appear.
Masonry walls
- First of all, the inner chamber of the tandoor is laid out. From the very base, it has a round shape, the diameter of which is 1 m. The bottom of the combustion chamber is completely bricked up.
- In the bottom row, a passage is left for traction, which will act as a blower. The second row is laid with a brick, a place is left for the grate.
- A cast-iron grate is installed horizontally in the middle of the chamber. She sits on a sand-clay mortar, through which the laying of refractory bricks of the tandoor firebox is carried out. All subsequent rows are laid out with fireclay bricks vertically around the perimeter of the outer diameter of the combustion chamber. Outside, the brickwork is covered with steel wire. The resulting rings are rigidly tightened and fixed.
- The height of the brazier does not exceed 1,5 m. The upper rows are placed with a decrease in diameter so that a jug-shaped conical shape is obtained inside the chamber.
- The inner cavity of the lined chamber is covered with a layer of clay and carefully smoothed out. It is on this surface that the dough of future cakes will be baked. The outer part of the furnace should be covered with a layer of clay.
- The outer masonry of the miracle stove can be built in the form of a circle or a square. It is performed with a small gap from the combustion chamber at a distance of 10-12 cm from the edge of the foundation. The height of the masonry is aligned with the brazier, while the outer walls are made vertical.
- The gap that remains between the combustion chamber and the masonry is filled with heat-saving material. For this, sand, salt, small gravel or stone chips are used. Such a layer will allow you to keep warm in the chamber for a long time. From above, the layer is covered with clay mortar and laid with bricks.
Closing holes
Depending on the purpose of the tandoor structure, the lower hole intended for traction may not be closed at all. Usually a door or an adjustable air damper is installed on this cavity. For the upper hole, through which firewood and food are laid, a round wooden cover with an external handle is made. This homemade flap should fit snugly against the top surface of the neck to keep the heat inside. When cooking some dishes, it is not necessary to completely close the top. In these cases, a specially made damper is used, which partially covers the loading opening.
Decoration

After building the tandoor and making the covers, it’s time to start decorating. One of the design options may be the laying of natural stone on the outer surface. This design will improve the ability to retain heat inside the brazier.
Tandoor with finished tab
The properties of the inner surface of the tandoor allow you to achieve high-quality baking of dishes. To save time, use a ready-made tab, which has the shape of a jug without a bottom.
After laying the first two rows of bricks and installing the grate:
- the finished tab is placed in the middle of the building;
- set on a clay solution;
- lined with bricks.
Inlay preparation
- To make the tab yourself at home, you will need fireclay clay of medium viscosity and normal plasticity. It is thoroughly mixed with salt, sand and wool in a ratio of 4:1:1:2. Clay must be cleaned of various impurities. Sheep wool is used for reinforcement and thermal insulation. The solution is thoroughly mixed with water until the consistency of sour cream is obtained.
- Strips of 2000x200x20 mm in size are made from the resulting solution. The process must take place in the shade so that the clay does not lose its elastic properties.
- From the stripes, a semblance of a bowl is formed, which has no bottom. For this, a cylindrical frame is used, previously lubricated with oil to simplify its subsequent removal. This work is carried out in the sun.
- The next element of the tab is the dome, which is also formed in the sun. The lower diameter of the dome is made the same as the size of the bowl, and the upper one is half as large.
- We carefully connect the two halves of the future tab using the surface sealing method and a special tool in the form of a trowel with a diagonal relief pattern.
- After connecting the cone to the bowl, the neck of the tab is formed. In the upper part, the clay is compacted to increase strength.

The tab is ready! After drying, it is installed on the lower rows of masonry.
Foundation
- A site is marked for the installation of a monolithic foundation.
- A pit is pulled out with a depth of 20 cm, a sand cushion is made.
- Formwork is being made, the inside of the pit is being reinforced. For reinforcement, unnecessary metal profiles are used.
- The internal cavity is concreted with mortar to a height of 15 cm from the ground. Using the level rule, the surface of the skeleton is leveled.
Now the foundation needs to dry. It will set for 3-4 days. No work can be done during this period.
Masonry walls
- First, the bottom is laid out under the tab and the outer walls of the tandoor. From the very base, it has a round shape, the diameter of which should be 1 m.
- In the bottom row, a passage is left for traction, which will act as a blower. The second row is laid with a brick, a place is left for the grate.
- In the middle, a cast-iron grate is installed on a sand-clay solution.
- The tab is installed in the middle of the building. The lower part is coated with heat-resistant clay mortar.
- After installing the tabs, they begin to build the outer walls. The perimeter of the tandoor is made in the form of a circle or a square. The outer walls are laid out of red brick at a distance of 10-15 cm from the edge of the foundation.
- Upon completion of the brickwork at the level of the neck of the tab, the gap is filled with heat-insulating material (sand, stone and salt have such properties).
- The upper part of the furnace is laid with a brick, the opening of the insert is left free. To make a tight lid for the future tandoor, they take a ring from an old barrel, with a larger diameter than the opening of the tab. Install it in the upper part when laying the surface with a brick. This ring will become the outer contour of the upper shutter.
Let the tandoor dry. Then, gradually melting, it is finally dried.
Earthen tandoor

One of the popular varieties is the Armenian earthen tandoor. A variety of designs suggests its manufacture even with a horizontal location axis. Let’s look at how to build a tandoor in the ground on your site:
- A place is selected taking into account the fact that it will be impossible to move this furnace.
- A project is being carried out that will contain diagrams and sketches of the structure. The project provides for the height of the tandoor at a level of 15–25 cm above the ground for ease of use.
- A site is marked for earthworks.
- A hole is dug, the diameter of which should exceed the size of the future furnace by 1 m. The depth is made in accordance with the project. A recess is left for the blower.
- At the bottom of the pit, a sand cushion 5 cm high is organized.
- With the help of clay mortar, the bottom is laid out with refractory bricks. On the side where the blower will be, a small cavity is left in the form of a gutter that goes under the future wall.
- With the help of clay mortar, round walls of fireclay bricks are laid out to the design height. The Armenian design does not provide for the presence of a conical convergence of the combustion chamber.
- From the side of the blower, a metal pipe with a knee is installed, which will go into the gutter at the bottom.
- Clay mortar is coated with internal walls and the surface is carefully smoothed.
- The outer surface of the masonry is reinforced, then it is covered with a thick layer of clay.
- A wooden damper is made for the upper cavity of the resulting combustion chamber.
The main work on the construction of the tandoor in the ground is over. Now you need to let it dry for 2-3 weeks. During drying, the gap between the masonry and the ground cannot be covered.
After complete drying of the combustion chamber, the cavity of the pit between the furnace and the ground is filled up. For this, it is better not to use dug soil. Material that retains heat is more suitable. It will be enough to use sand and stones.
Tandoor in the Uzbek way
The main material for the manufacture of such a furnace is clay, which is thoroughly mixed with sheep’s wool. Reinforcement of the inner part is made of fireclay bricks, and sometimes simply from kaolin – this is such a heat-resistant material that consists of minerals and is used in the East in the construction of furnace equipment. People call it white clay.
Cheaper and faster option
In addition to stationary ones, the Uzbeks made portable pitcher-like tandoors. Such ovens are very economical and allow you to cook a cake or pilaf on a few dried camel thorns and roots. Portable kilns have such properties due to the mature technology of clay production and its subsequent firing. Using improvised material, the manufacture of portable tandoors did not require much effort and expense.
Tandoor from a wooden barrel

Unpretentiousness and simplicity of Uzbek technologies make it possible to use various materials in the construction of the furnace. Let’s figure out how to use a wooden barrel to build furnace equipment:
- A whole, preferably an oak barrel is selected, the rings are loosened, after which it is filled with water. It will take 5 days for the water to soak into the wood. The heavier container is turned upside down.
- During the day, the barrel is allowed to dry. The inner surface is lubricated with sunflower oil. After impregnation with oil, leave for another day.
- While the barrel dries up, prepare the clay mixture. The finished mixture is rolled out and strips are made from it, corresponding in length to the diameter of the barrel. Flats are made 7-10 cm wide.
- The inner cavity of the barrel is completely sealed with these strips, which are overlapped to avoid cracks and hollow parts.
- In the neck of the combustion chamber, a gradual narrowing is made to comply with the thermal regime.
- After laying out the strips on the inner surface, smooth them as much as possible. Minimize any irregularities.
- After all this, the barrel with clay walls is dried. This process takes up to a month. It is best to put the assembled structure in a windy place under a canopy.
- In the process of drying, the clay will begin to separate from the walls of the barrel. This needs to be monitored closely.
- When the clay is completely dry, the barrel is dismantled, having received a finished clay oven.
This combustion chamber performs the function of an inlay. It is installed on the foundation and lined with bricks.
Tandoor from an iron barrel

An iron barrel is used as a template for building a clay chamber, just like a wooden one. Only a metal container does not have to be soaked in advance. All actions of the technological process will be the same, except for the last one: after making sure of the strength of the dried clay, the barrel is carefully cut with a grinder in height and the clay oven is pulled out of it.
Getting Started
After two weeks of natural drying, the finished structure can be heated little by little, gradually increasing the temperature inside the chamber. In this way, the inner surface of the clay will be fired. The quality of firing is checked by light tapping on the inner surface. When a loud knock with a slight echo is heard, this will mean that the tandoor chamber is ready for operation.
Finished tandoors
If there is no desire to engage in the manufacture of a tandoor, it can be purchased ready-made. They are portable and come in a variety of sizes. Such a miracle stove will be an excellent replacement for a portable barbecue when traveling to the country. Today they even make tandoors with electric heating. The heating element of such structures is a tubular electric heater.
The quality of cooking in electric tandoors is significantly different from cooking in the original ones. The absence of the aroma of firewood and the drying of the internal cavity with a tubular electric heater affect the taste of ready-made dishes.
The considered designs of the oriental miracle stove can not only replace the brazier or barbecue familiar to many. They will improve the quality of cooked food. The vertical arrangement of the barbecue or the installation of a cauldron directly on the coals seem to us at first a curiosity, but after tasting any of the dishes cooked in the tandoor, you forget about other types of oven equipment.
When building a tandoor, it is important to remember the properties of heat-insulating materials and their use in accordance with the proposed recommendations.