


Contents
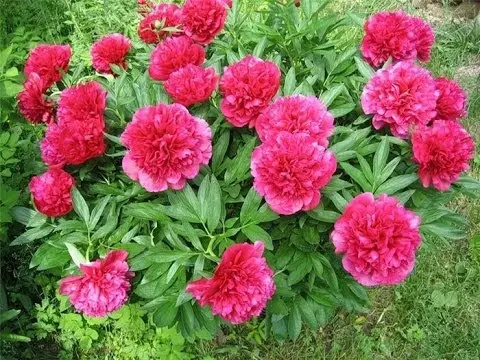
Lush flowers in a flower bed need a beautiful frame and support. Support for peonies is also necessary for practical purposes: even with a slight wind, the stems of the plant tend to the ground, large buds crumble. You can make a beautiful frame with your own hands without spending a lot of time and money on it.
The need to install supports for peonies
During the budding period, pion stems can break off under the weight of inflorescences. After the rain, the bush falls apart, looks sloppy. In order to preserve its natural form, to prevent breaking off the stems, to show all the beauty of a flowering plant, support is needed. You can make it beautifully, in the form of a flowerpot or an ornate hedge, this will only decorate the flower bed.
How to make a do-it-yourself stand for peonies
Supports for peonies can be made with your own hands according to photo instructions. To do this, you will need construction tools, fittings, plastic pipes, all kinds of fasteners.
Stand №1 for peonies made of plastic pipes
The product is easy to make at home. To do this, you will need tools and supplies.
The design is easy to use by putting it on a bush with peonies
What you need to make a support:
- metal-plastic water pipe with a diameter of 20 or 26 inches (about 5-6 m);
- wood trim;
- plastic barrel (its diameter must correspond to the dimensions of the future support);
- screwdriver;
- country reinforced irrigation hose (its diameter should be slightly larger than the diameter of metal-plastic), the hose should be worn tightly;
- self-tapping screws.
Materials for the support are prepared in advance so that everything is at hand.
Algorithm of actions:
- The metal-plastic pipe along the entire length is laid out on a flat surface.
- A metal barrel is rolled over it so that the plastic is wound around the container. This material is flexible, bends well and acquires rounded shapes.
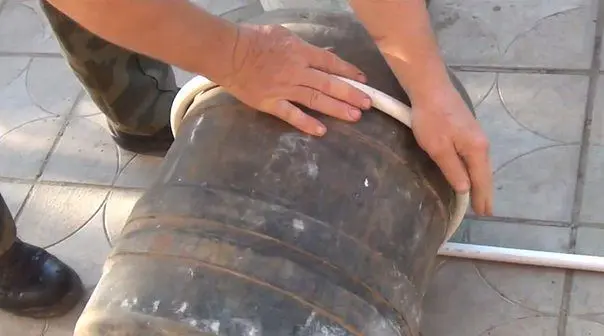

The first curl is wound onto the barrel, then the plastic is folded along the entire length in the same way.
- In the process, a workpiece in the form of a spiral should be obtained.
Each subsequent curl should lie next to the previous one, and not go on top of it.
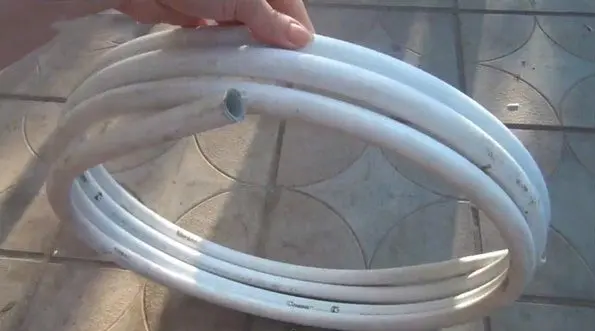
- The resulting spiral is cut in only one place. The result will be 3 circles.
- The ends at the incision site are connected with a piece of an irrigation hose (length 10-15 cm).
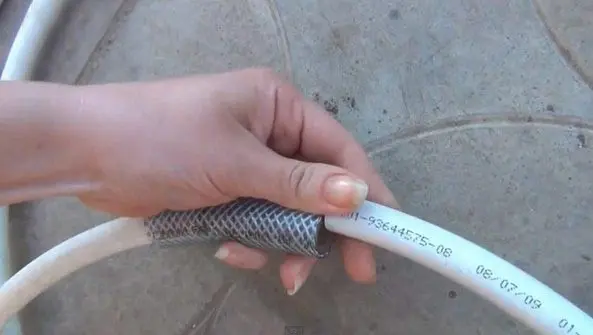

The length of the hose can be increased, thereby varying the diameter of the circle
- The plastic blank is divided into 3 equal sectors, marks are made.
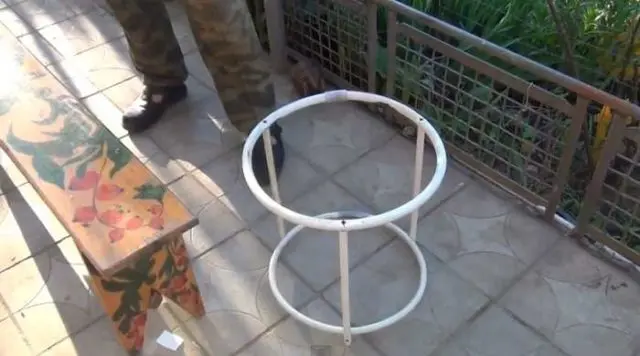
- For further work on the manufacture of the support, you will need 2 such circles. On one of them, self-tapping screws are screwed into the marked places.
- From the same pipe, you need to cut 3 columns 40 cm long.
- A wooden chop is hammered into one end of the columns.


A wooden insert will allow you to connect the rack with a circle by screwing a screw into them
- Racks are connected to the circumference with screws. To do this, through a plastic circle, in places where there are marks, they drive a self-tapping screw and screw it into a rack where there is a wooden chop.
- The bottom ring is directly attached to the uprights with screws.
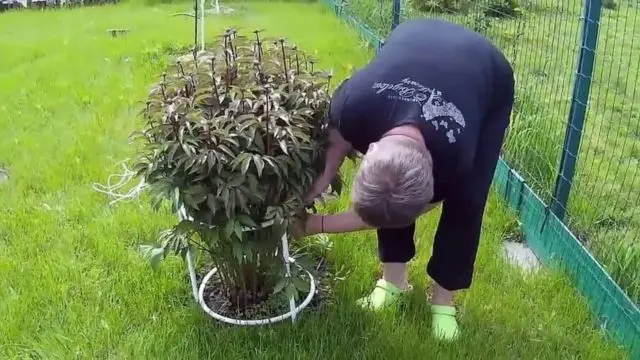
Before using a do-it-yourself peony support, the plant is pre-tied up. Then the rack is put on from above, passing the stems through the lower circumference. It is important not to damage the buds in the process.
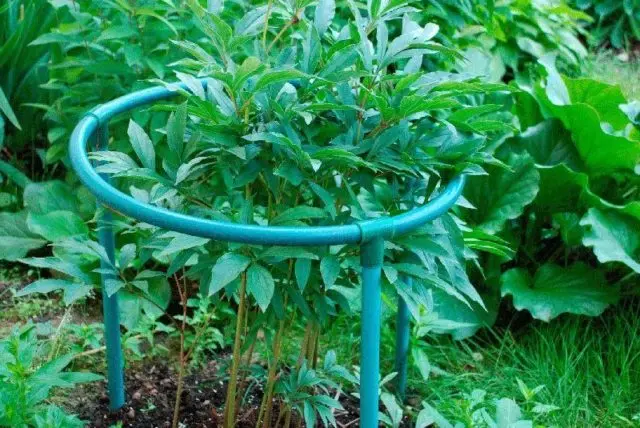
The plastic support is light, easy to mount and dismantle, it is not affected by precipitation
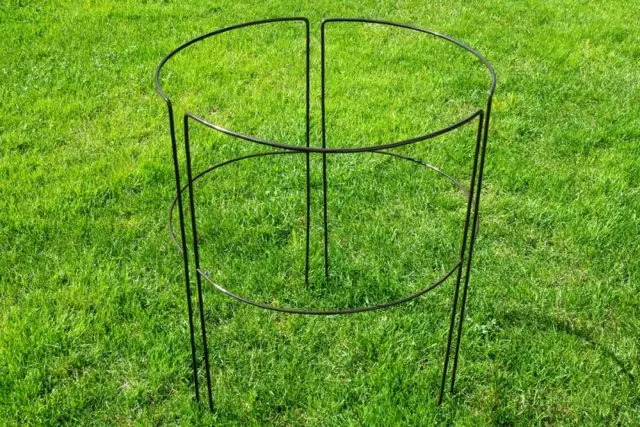
Stand №2 for peonies made of plastic pipes
It is even easier to make a prefabricated support for peonies from plastic pipes. For its manufacture, you will need special tees for PVC pipes.
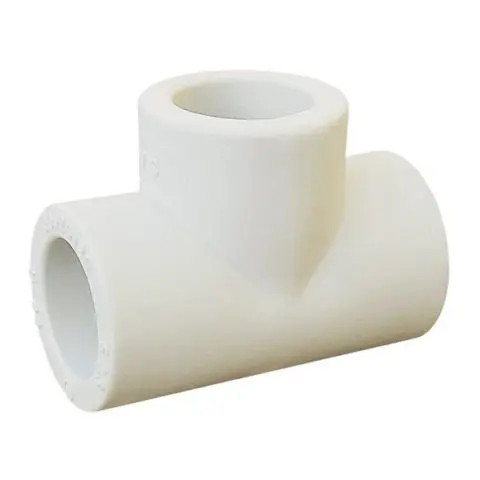
Such a device will serve as a fastening of structural elements
Necessary materials and tools:
- plastic pipe;
- 3-4 tees, suitable diameter;
- scissors for metal-plastic or hacksaw.
- roulette.
Pipes take such an amount to cut a circle out of it for support and rack.
Algorithm of actions:
- A segment equal to the circumference of the future support is cut off from the pipe.
- As in the first option, you can twist the plastic using a barrel.
- 3 or 4 tees are put on the resulting circle, one of them should connect the edges.
- Then, racks 0,5 or 0,6 m long are cut from the consumable material. Their number is equal to the number of tees.
- The resulting supports are led into tees at one end, the other end is left free.
- A plastic stand is put on an overgrown peony, and the racks are deepened into the ground.
This is a simple version of the support for spray peonies, you can assemble it as a designer
Do-it-yourself stand No. 3 for peonies from reinforcement
Such a fence is suitable for those flower growers who do not accept stands for peonies made of plastic pipes in flower beds, as they do not look quite natural. Eco-style flower beds need other materials.
For the manufacture of the support, 5-6 reinforcement bars will be needed, any diameter can be taken, the length depends on the height of the bush. The work on making a fence is simple: the rods are bent in the shape of a semicircle, fixed with their free ends in the ground, forming a fence.
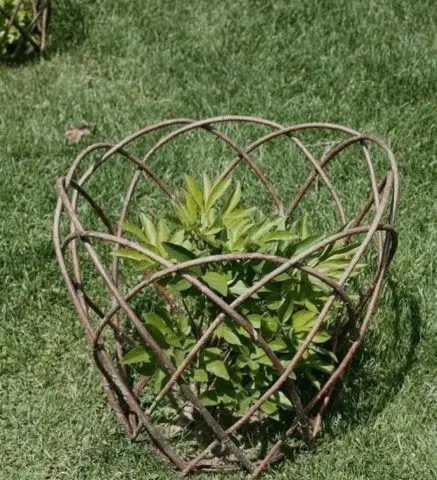
A simple solution when the support looks openwork, decorative, but only suitable for low bushes
For taller plants, it is better to make a large-scale product. Thin reinforcement lends itself well to exposure, it is easy to bend it.
With a special tool, you can assemble a convenient, thin support from the reinforcement, which does not hide the beauty of the plant.
The design is made in accordance with the height and volume of the bush. To assemble such a support, you will need a welding machine, it will help fasten the parts of the product.
How beautiful to tie peonies
For these purposes, simple designs are used that are easy to make with your own hands. There is an old, proven way of how to tie up peonies beautifully; it is easy to make such a hedge from a photo.
old way
Similarly, bush peonies have been tied up for a long time. Such a fence does not look pretentious, simple and natural.
Tool, materials:
- roulette;
- wooden pegs;
- a hammer;
- leg-split.
The pegs are cut with a height corresponding to the length of the peony stems, while the buds should be on top of the structure. It should also be borne in mind that wooden supports by 10-15 cm will be deepened into the ground.
Algorithm of actions:
- Pegs are driven around the bush from 4 sides.
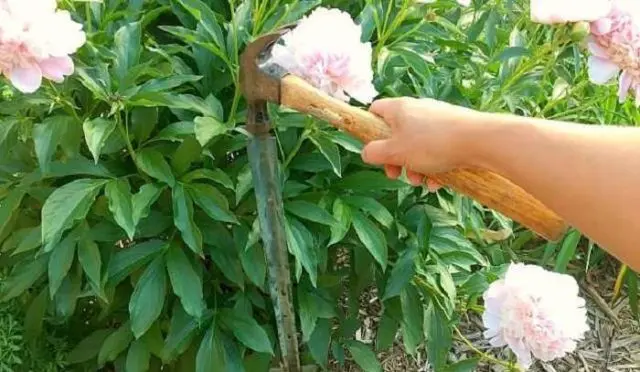

It is important to fix the supports at the same distance from each other and from the plant.
- Notches are made on the pegs along the entire length so that the twine does not move out when winding.
- They take a rope, tightly tie it to one peg and begin to wrap it around other posts in a circle.
- In several places, the twine is fixed by tying it with a strong knot to the peg.
The hedge does not need to be made too dense, as the greenery of the plant will not be visible.
With the help of a grid
The garden mesh keeps the shape of the bush well, looks presentable. Experienced flower growers recommend tying peonies with a green net, as in the photo:
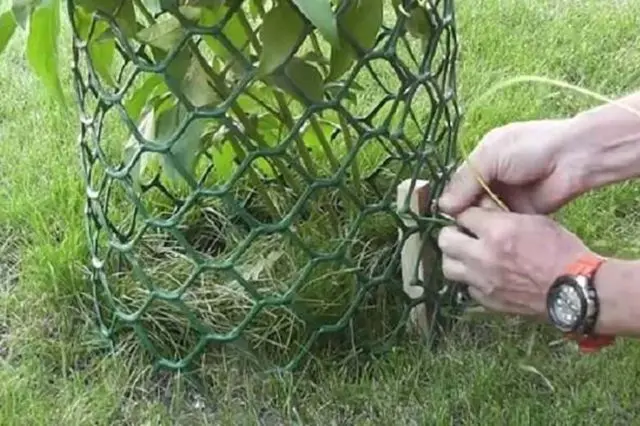
The support does not argue with the bright greenery of the bush, merges with it, looks organic
A layer 0,4 or 0 m long is cut from such material. The bush is simply encircled with a net, the edges are fixed with a thin wire.
There is another more laborious way. For its implementation, you will need a grid with a large cell (5×10 cm). It is placed on sprouting peonies, fastened on each side with pegs. Growing, the stems of the shrub will stretch upward, occupying the cover cells. Once every 3 weeks, the net is raised higher so that the flowers can grow freely. It is not necessary to fasten the relief support: it is held by the foliage, while preventing the stems from bending.
Conclusion
Support for peonies should be light, mobile, fit into the landscape of a garden or flower bed. Finished forged products are expensive, they are heavy, it is difficult to carry them from place to place. It is not necessary to buy expensive stands for peonies, they are easy to make with your own hands, as shown in the photo above.