Contents
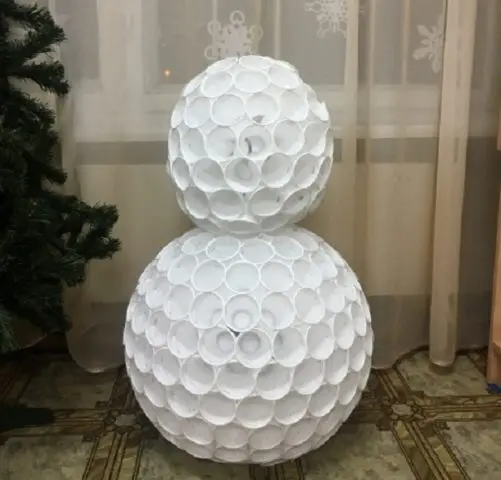
A snowman made of plastic cups is a great option for themed crafts for the New Year. It can be made as an interior decoration or for a kindergarten competition. Peculiar and large enough, such a snowman will certainly give a festive mood to others.
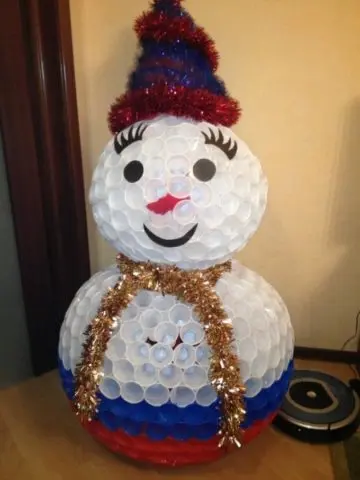
Making a snowman out of plastic cups is a painstaking, but quite interesting job.
Tools and materials
To perform such an original craft as a snowman, you will need very inexpensive materials and tools. As a basis, you will need to stock up on a considerable amount of plastic glasses. They can be transparent or colored, but white ones are the most suitable. The volume is desirable to choose 200 ml.
For fastening, depending on the chosen method, you may need a transparent universal glue or a stapler.
Do not forget about decorative elements. The hat can be made from colored cardboard, it is also useful for creating eyes, nose, mouth and buttons. It is better to use tinsel as a scarf, but it will be no less interesting if you use a fabric product.
How many cups do you need for a snowman
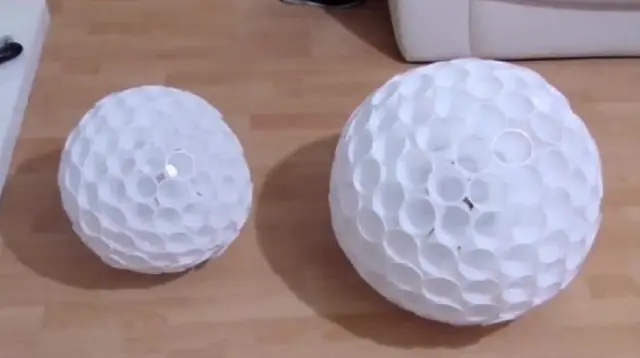
The number of plastic cups plays an important role, because the size of the future snowman depends on it. On average, crafts will require approximately 300 pieces. So much will be enough to create a snowman 1 m high from two balls. A standard three-tier figure will require about 450 pieces. plastic cups.
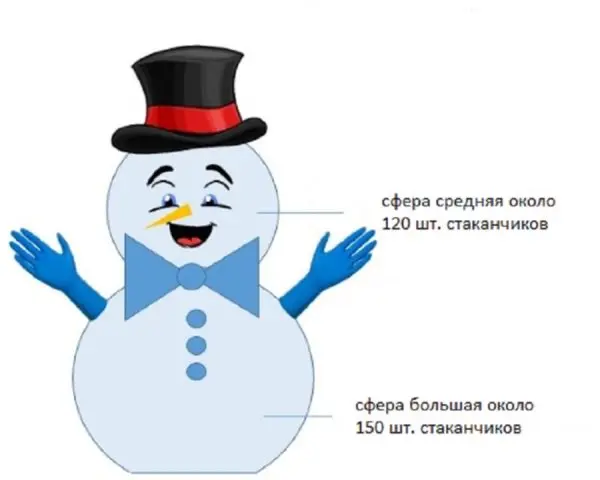
Scheme of a small snowman from two balls
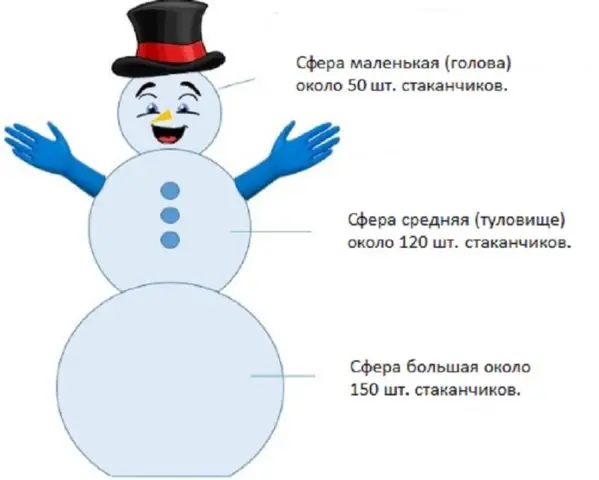
Scheme for a standard snowman from 200 ml glasses
How to make a snowman out of plastic cups
One of the options for creating a snowman from plastic cups is to use universal glue or a heat gun. In this case, you can glue the elements in two ways:
- connecting with each other;
- gluing on a plastic or foam base.
In the first case, glue is applied to the edge of the plastic cup, and a second one is attached to it. Wait 30-60 seconds for a good bond and continue gluing. Perform the formation of the ball in rows.
In the second option, a plastic or foam base is used and cups are also attached to it in rows, applying glue to the bottom rim.
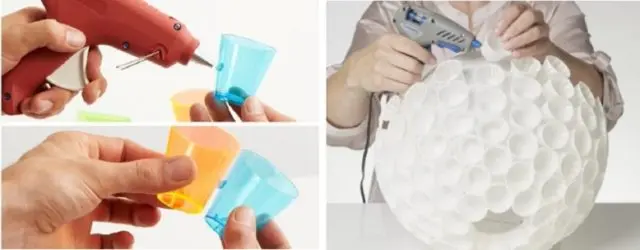
Options for gluing cups to create crafts
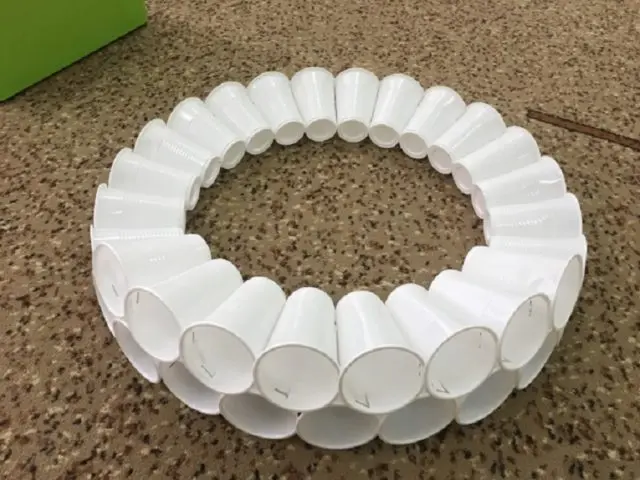
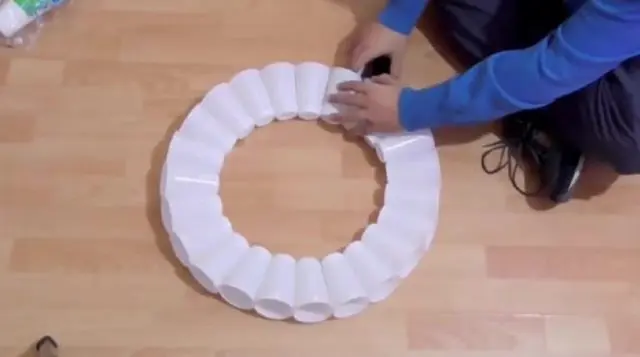
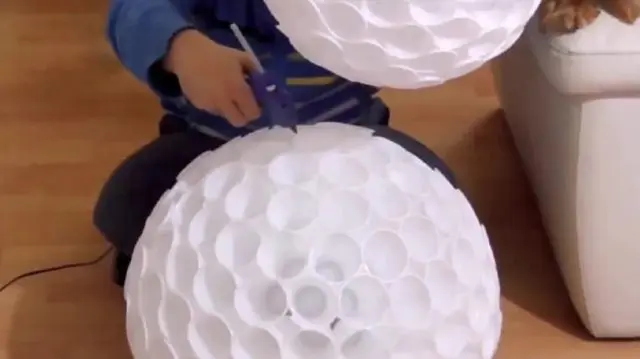
The collection process itself is concluded in the following steps:
- If you use the option of gluing the cups together, then for convenience it is better to arrange them in a circle of the desired diameter. Then proceed to fixing.
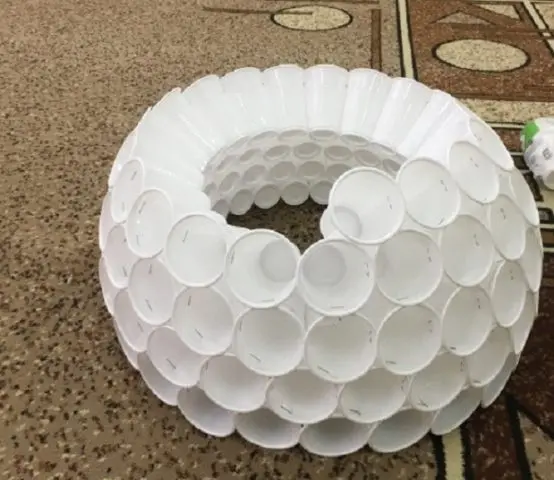
- Bonding is performed in rows, gradually reducing the number of glasses.
- When one half of the ball is ready, proceed to collect the second. Then they are glued identically to each other.
- In the same way, a smaller ball is made for the head or torso, depending on the type of snowman.


In each row, the number of glasses is reduced by 2 pcs.
- The resulting balls-blanks are glued together. To do this, securely fix the lower part so that it does not move (if the size allows, you can turn the stool upside down and install it between them).
- Next, apply glue to the edges of the plastic cups located in the center of the lower ball. A second blank is applied, fixed for several minutes.
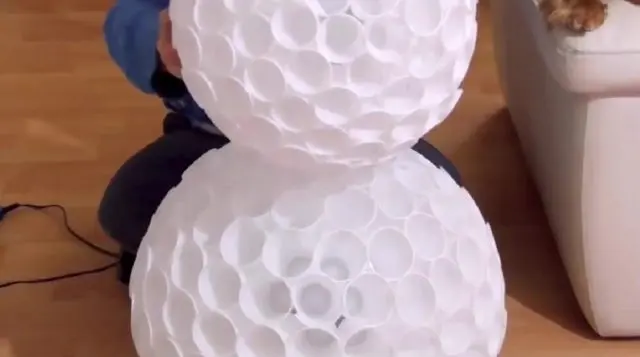

When gluing the balls, it is undesirable to press hard on the base, otherwise the cups will bend
- Finish the craft with decoration. Add nose, hat, scarf, eyes and buttons.
The principle of collecting a snowman using a plastic or foam base is almost identical. They also form two or three balls of different sizes, glue them together.
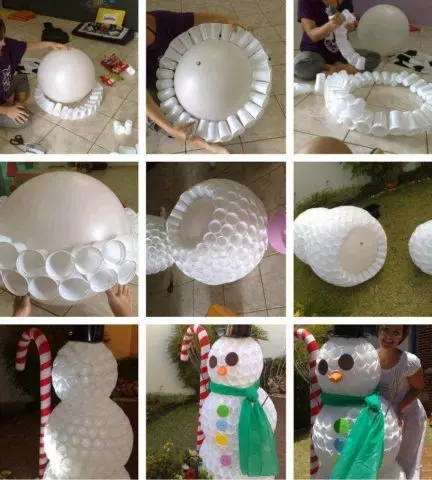
Stages of creating a snowman by gluing cups to a spherical base
How to assemble a snowman from disposable cups with a stapler
An equally convenient way to attach disposable cups to each other to form a snowman is to use a stapler. Staples allow you to securely fix each element.
For such crafts, you can use any plastic cups, but keep in mind that a wider rim around the edge will prevent even bonding.
In this case, cups with a volume of 100 ml with a narrow rim were used, their number was 253 pieces. In addition, it took:
- stapler with a pack of staples;
- universal glue or hot glue;
- elements for decoration (hat, nose, eyes, mouth, buttons, scarf).
Step by step execution:
- First, a circle of 25 cups is laid out on a horizontal surface. Then alternately connect them together with a stapler.
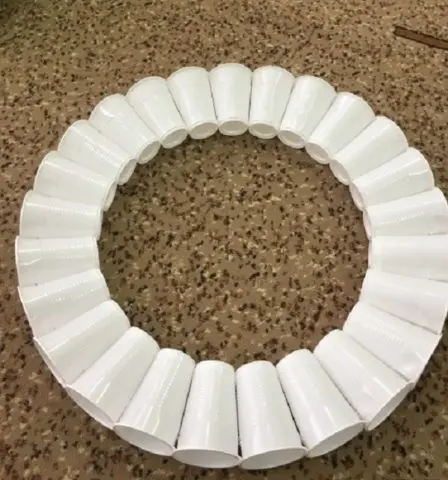

The circle can be made wider, but then the cups will also need more for the snowman
- In a checkerboard pattern, they begin to line up the second row in a circle.

Fastening is carried out in two places (to the bottom and side row)
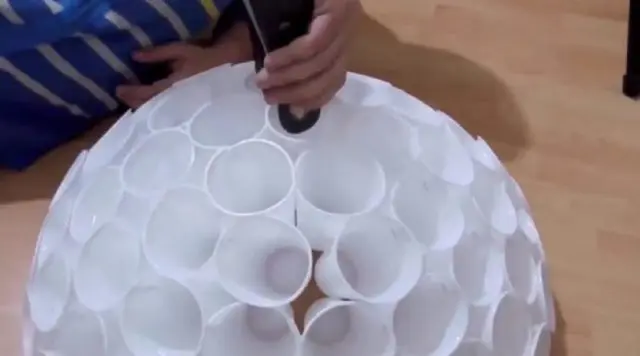
- In the same way, all levels are performed until the ball closes.

In each row, reduce the number of cups by one
- Perform the second half of the ball identically.
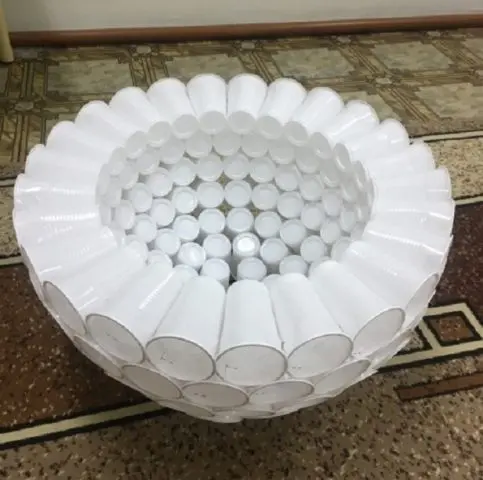

When creating the second half, the number of glasses must match
- In the same way, perform the head. In this case, 18 plastic cups were used.
- Finished blanks are glued together.

- Start decorating. A cone-shaped nose is made from colored cardboard, as well as a hat. Cut out black circles for the eyes and buttons. Complete the snowman with a scarf.


All decorative elements, except for the scarf, are fixed with glue.
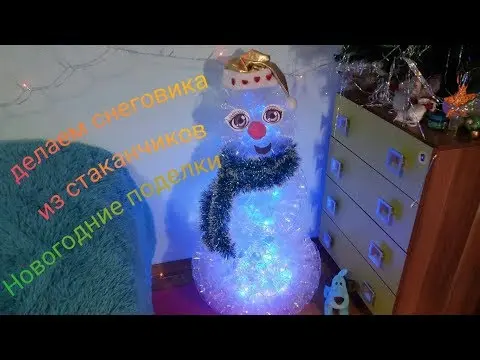
How to make a snowman out of plastic cups and garlands
The process of creating a glowing snowman is no different from the first two options, except that before connecting the two hemispheres, an LED garland is placed inside.
List of required materials and tools:
- plastic cups (at least 300 pieces);
- stapler and packing staples;
- hot glue;
- wooden skewers (8 pcs.);
- LED garland.
Stages of creation:
- To begin with, fasten the circle.
The diameter of the ball will depend on the number of cups taken.
- Then, in turn, they begin to attach the following rows, while reducing each by one glass.

It is desirable to arrange glasses in a checkerboard pattern
- Having completed both hemispheres, two wooden skewers are inserted in the middle crosswise. They hang an LED garland.
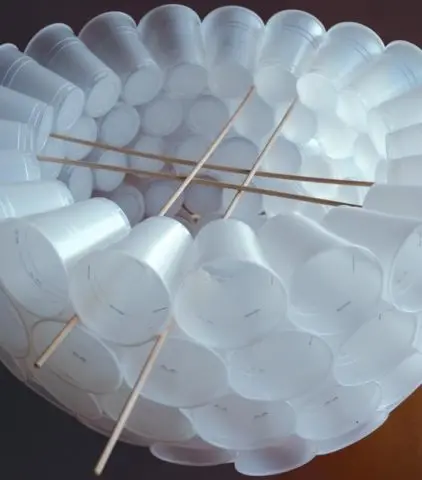

The skewers are fixed with hot glue, and their protruding ends are broken off
- The resulting hemispheres are fastened with a garland inside. And in the same way perform the second ball.

The spherical blank for the head must be of a smaller diameter
- Assemble the craft by gluing together both spherical blanks in the center.

- Start decorating. A cylinder hat is made from foamiran, a cone-shaped nose is formed from colored cardboard and eyes and buttons are cut out. Tie a scarf.
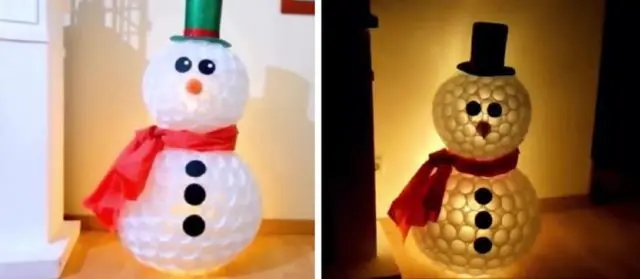

If the garland is replaced with an LED lamp, then the snowman can become an original night light.
Ideas for decorating a snowman from plastic cups
To make the snowman look festive and complete, it is important to carefully consider the choice of decorative elements. For example, the most basic decoration of this craft is a hat. There are many options for creating it. Can be made from colored or white cardboard.
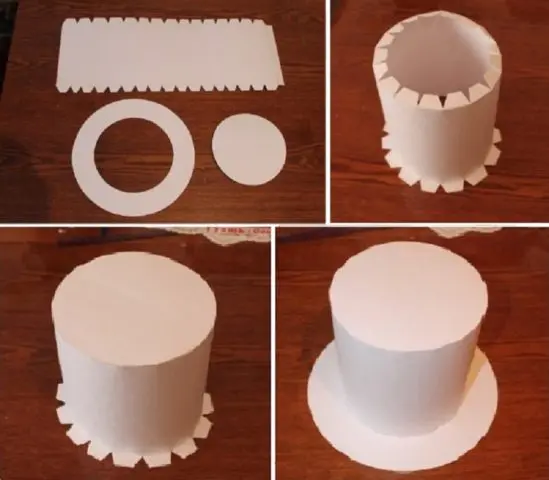
Option for making a wide hat-cylinder made of cardboard
Foamiran can be a good material, especially if it is shiny.
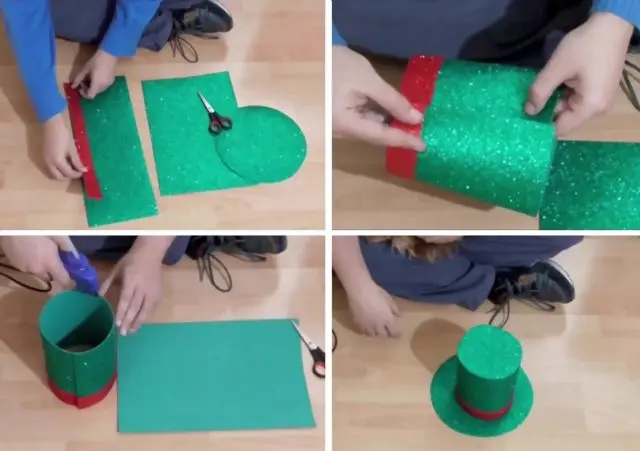
A foamiran cylinder hat can be decorated with a beautiful ribbon
You can completely simplify the task by using a ready-made New Year’s cap.
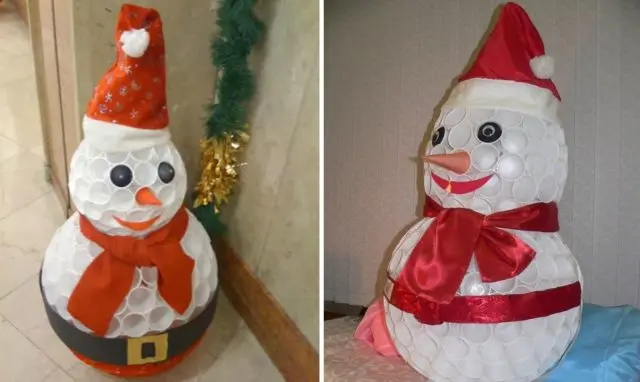
A belt will be a great addition to a regular cap
Do not forget the New Year elements, for example, you can decorate a snowman and give it a festive look with the help of tinsel.

Tinsel is suitable not only as a scarf, but also perfectly decorates a hat
Conclusion
A snowman made of plastic cups can become an original interior decoration for the New Year. The craft itself is quite simple to perform, it does not take much time and does not require expensive materials. And the most basic feature of such a product is that it can be done by the whole family, having a great holiday together.