Contents
If spring is fickle in its weather preferences, if April is a cold month, and May can scare you with frost, then it’s good to have greenhouses and greenhouses in summer cottages, or at least mini greenhouses and mini greenhouses. A greenhouse made of polycarbonate, glass or plastic film will allow you to grow seedlings of vegetable crops earlier, which means summer will be closer by a month. A greenhouse can extend the summer for the whole year. That is why summer residents often try to build such mini structures with their own hands or buy ready-made ones.
How is it different from a greenhouse
Of course, a greenhouse and a greenhouse are very different from each other, primarily by purpose, and therefore to everything else:
- structures;
- materials;
- equipment;
- even the way they work.

They say greenhouses appeared before greenhouses. They were invented for growing seedlings. Since their appearance, as now, they use the heat of the sun from above and the heat from the decomposition of manure from below, they are not satisfied with artificial heating. Although some owners may turn on electric heaters during especially severe frosts. These can be small simple structures from 50 cm to 130 cm high, working in them, the person is usually outside. There are no doors, if necessary, remove the top or side of the greenhouse, and then put it in place. These mini structures can be both stationary and portable. Portable ones are used to cover newly planted seedlings from a short-term cold snap. They are not difficult to make by hand.
Greenhouses evolved from greenhouses in which exotic plants were grown. In greenhouses, seedlings can be grown all year round. These are serious stationary structures with artificial heating, where the plant can not only germinate, but also bear ripe fruits. They are about 2 m high so that a person can enter and work quietly. But there are much more if they are designed for the operation of technology. At summer cottages, mini greenhouses are used, sometimes even without heating. They are bought ready-made or do-it-yourself for the long-term maintenance of plants.
Preparing a place for a greenhouse
Before you start making a greenhouse, you need to choose the right place for it. The greenhouse should not be in the shade, in a draft, on a slope or in a wetland. Having looked for a flat open place for it, we will plan the location. In length, it should be located from east to west, so that one side faces completely south. 
So in a non-shaded area, the plants will receive more light and heat. Now you need to prepare the soil mixture. There are several of the most common options for its composition.
- for 1 part of ordinary garden soil, 2 parts of humus, 1 part of sand, 5 parts of peat soil and 3 parts of lime are taken;
- 3 parts of peat soil, 5 parts of sawdust, 1 part of ash, 1 part of chopped straw. Before planting, add (per 1 sq. M) 30 g of superphosphate and 20 g of potassium sulfate;
- 2 parts already decomposed peat, 1 part horse manure, 1 part chopped straw. Here, before planting, add 30 g of urea, 2 kg of potassium chloride and 3 kg of superphosphate (per 1 cubic meter).
Cucumbers, tomatoes, cabbage or ornamental plants are grown on such soil. Manure is used as fuel in greenhouses, horse manure is best. If the place is still damp, you need to make a water drainage system with your own hands. According to the installation method, greenhouses are in-depth and aboveground. Any of them can be done with your own hands, you just need to prepare well and think everything through.

Aboveground greenhouses are usually lightweight mobile structures that can be moved, assembled and disassembled as needed. These mini greenhouses have one drawback: they are not buried in the ground, so they keep heat worse. They are called “French”, designs are varied in shape and number of light-transmitting frames. You can buy ready-made factory above-ground greenhouses, or you can use homemade ones.
An in-depth greenhouse is good because a thick layer of soil acts as a heat insulator. It is easy to make it, you need to dig a trench and install logs or brickwork around the perimeter. Then the outer frame of the structure will be attached to them. A single-sided in-depth greenhouse is called “”, any summer resident can easily make it with his own hands. Such a greenhouse is heated with heat that is released during the decomposition of biomass. Manure is usually used as a biofuel, you can take any, but horse manure is preferable. Therefore, even on a cloudy day in the absence of sun, the plants are not threatened by cold.
First you need to dig a trapezoidal pit with your own hands. Its depth can vary from 30 cm to 80 cm – the colder the spring, the deeper the pit. It is desirable to strengthen its walls with boards. At the bottom, now you need to pour manure in such a thick layer that only 20 cm of soil remains on top. Now we need to fill the soil from above, and make a crown, best of all from logs. A greenhouse frame will be installed on it.
Video “We make a greenhouse on our own”

Making a drawing
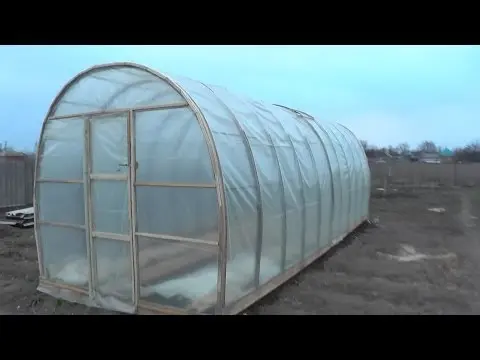
To date, the most popular for summer cottages is a polycarbonate greenhouse. It is made of two components: a lightweight metal frame and cellular polycarbonate. Before starting work, you need to make a drawing, taking into account all dimensions, so that during assembly everything exactly matches and docks. It may look something like this if you stop at a single-sided form.
You yourself must decide on the size. The optimal width of an in-depth greenhouse is one and a half meters. If you do less, there will not be enough manure for heat, if more, it will be inconvenient to process. It all depends on the expected temperature, with slight frosts you can make a mini greenhouse 1 m wide.
How to build a frame
The simplest option is called an arched roof. For it, bars with a thickness of 50 mm are needed. Of these, you need to make 2 slats with a length equal to the length of the greenhouse. Polycarbonate will be attached to them.
A shed polycarbonate greenhouse is also easy to do with your own hands, but the frame will have to be welded, guided by the drawing.

Frame structure in the diagram
You can make a frame structure from water metal-plastic pipes. They bend comfortably, so they need to be bent in a semicircle, connected with several pipes in length and, sheathed with polycarbonate, make an arched roof for the greenhouse. If it is large, and not a mini greenhouse, it will be difficult to make opening doors.
Installing the greenhouse
Now you need to fix the polycarbonate on the frame. It is very important that the side with the light protection film is on the outside. A standard sheet has the following dimensions: 210 cm by 6 m. For our mini design, one sheet will be enough. We cut it with a construction knife into 4 parts with a width of 90 cm and 3 by 170 cm. We put the wide side (with a size of 210 cm) along the bar and fix them with overlapping screws. The edge of the top sheet must be glued with tape. Now it remains to bend the whole structure with an arch. To do this, take a bar 50 mm thick and a length that corresponds to the width of the greenhouse from your drawing (up to 150 cm), and nail it firmly to one of the frame bars.

Now we bend the canvas in an arc and just as firmly nail it to the second beam of the frame. Let’s do the same on the opposite side. Now these end sides need to be closed. For this, a sheet 90 cm wide is suitable. It must be attached to the end of the arched structure, mark the desired size with a marker, cut and attach to the beam, thereby closing the hole. Now the resulting cover needs to be installed on the crown – and the polycarbonate greenhouse is already made by hand. And to work in a greenhouse, the cover will just need to be removed.
Video “Do-it-yourself polycarbonate greenhouse”
This video contains detailed instructions that will allow you to understand how to properly and efficiently build a greenhouse on your site.