


Contents
It is difficult for the owner of a small summer cottage to find a place for installing a large greenhouse. In such conditions, greenhouses come to the rescue. There are many options for arranging the simplest structures covered with a film or non-woven fabric. Greenhouses sheathed with polycarbonate have proven themselves best because of the ability to organize a microclimate in them, the same as in a greenhouse. A factory-made greenhouse is in great demand among summer residents. The design is so simple that you can make it yourself.
Features of the greenhouse greenhouse device

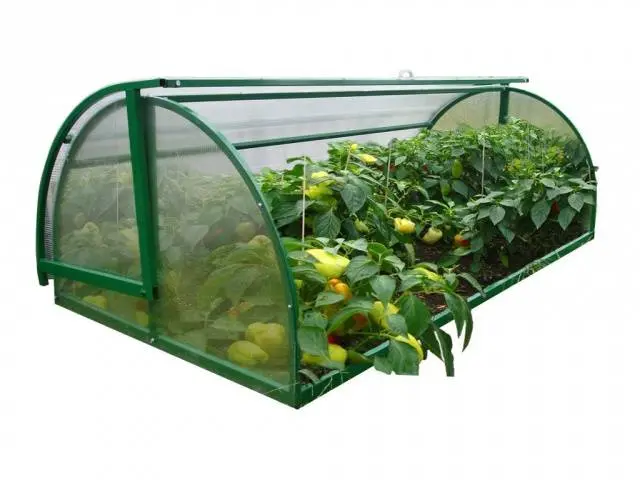
The greenhouse design got its name due to the shape and method of opening the sash, resembling a bread box. The shelter is designed for growing early greens, root crops and seedlings. Tall crops in a greenhouse will be crowded.
bread box dimensions
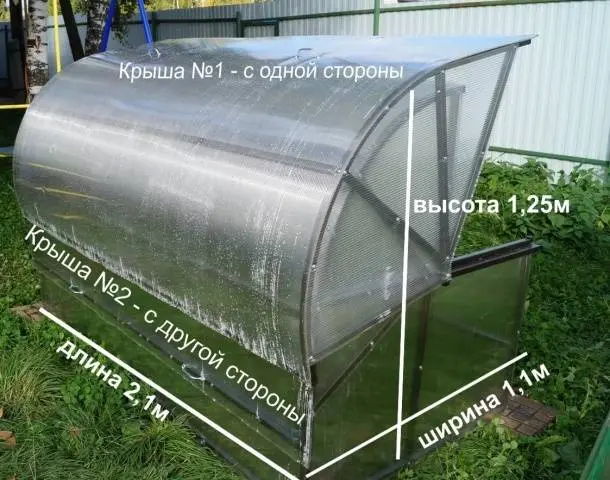
Bread box greenhouses are produced by many manufacturers, and their sizes can be very different. There are no standards or special design requirements. The length of the greenhouse usually varies between 2-4 m. The height of the breadbasket from the base to the top of the arch is limited to 1 m. Given the open sash, the height can increase to 1,25 m.
Width is the only parameter that has a limit. It all depends on the number of openings. The width of the structure with one sliding door is usually from 0,8 to 1,3 m. Access to plants in such a greenhouse is possible only from one side. If the bread box is made too wide, you will have to stomp around the garden while caring for the plants.
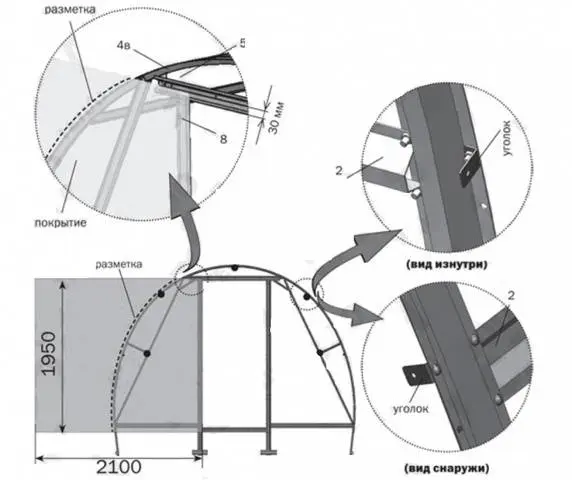
The double-leaf bread box opens access to a bed from two parties. This makes it possible to increase the width of the structure. Factory-made greenhouses most often have a width of 2 m. For reference, the photo shows a drawing with the dimensions of the bread box.
Drawing and features of the device of the frame of the bread box
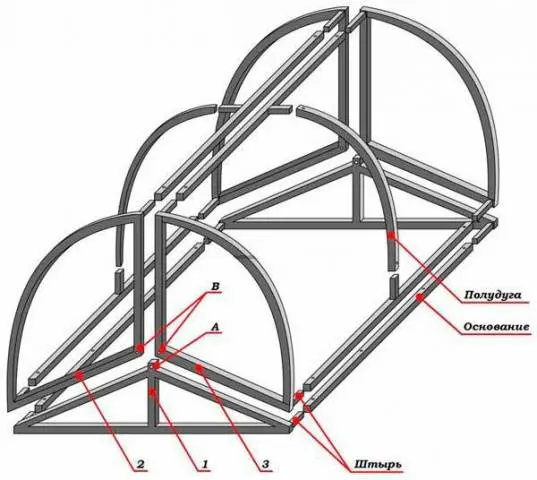
Using the example of the presented drawing of a bread box greenhouse, we will now figure out what elements the frame consists of. So, the basis of the structure is a rectangular frame with vertical triangular ends, indicated in the diagram by the number 1. The upper part of the frame of the bread box is made of semi-arcs. The elements form two sashes independent of each other. They are attached to the top of the triangles located at the ends of the base with the help of hinges. In the diagram, the attachment points are shown by points “A” and “B”. Each flap of the bread box has its own polycarbonate lining.
Both wings of the bread box rotate freely along the axis, and the precise adjustment of the size of the half-arches eliminates the formation of gaps between the doors when closed.
When buying a factory-made greenhouse, the frame quickly folds according to the attached scheme. Depending on the dimensions, the purchased model will cost the summer resident from three to seven thousand rubles. It will be cheaper if you make drawings of a bread box greenhouse with your own hands, and build a structure from the materials available on the farm.
When drawing up drawings, it is important to take into account that the standard width of polycarbonate is 2,1 m. The sheets are 3,6 and 12 m long. The dimensions of the frame must be adjusted so that there are fewer scraps left. Depending on the dimensions, one sheet 3 or 6 m long is usually enough for the lining of the bread box.
The second important point in drawing up the drawings of a polycarbonate breadbasket greenhouse with your own hands is the exact observance of the size of the semi-arcs. If the dimensions of the sash frames have a large run-up, in the closed state there will be a gap between them. Draft will negatively affect the development of plantings inside the greenhouse.
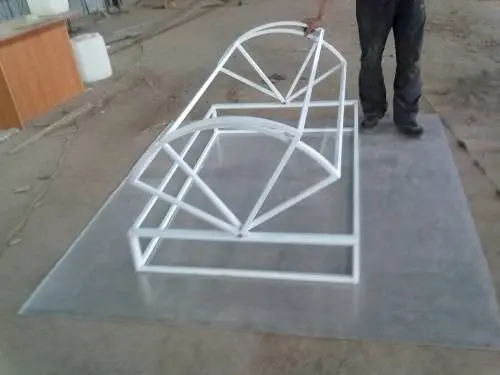
With self-made bread bins, the frame is made from any pipes. It can be plastic, aluminum, galvanized or just black metal. Only the latter material is highly susceptible to corrosion and must be carefully protected by priming and painting. It is advisable to take pipes for the frame not round, but square. They are easier to connect and sheathe with polycarbonate. Yes, and the greenhouse itself will acquire an aesthetic appearance.
Advantages and disadvantages of the bread box
To determine whether a greenhouse in the form of a breadbasket is suitable for your site, let’s look at its advantages and disadvantages.
First, let’s look at the advantages of the design:
- Compact dimensions allow you to place a greenhouse in any part of the yard. If desired, the shelter can be moved to another place. The light weight of the product makes it possible to transport it to two people.
- The shape of the shelter allows 100% useful use of the garden area. There are a lot of seedlings that can not be said from the appearance of a compact greenhouse.
- The free opening of the shutters allows you to quickly take care of the plantations without keeping them in the cold for a long time. Opening only one sash from the leeward side provides good ventilation without drafts.
- The streamlined arched shape gives stability to the structure in case of strong gusts of wind. A durable semi-circular polycarbonate roof will endure a snowy winter. The greenhouse can not be removed for storage, but left to stand in its place.
- A big plus of polycarbonate is the protection of plants from the harmful effects of UV rays. Daylight is scattered throughout the space of the breadbasket.
- A factory-made greenhouse is easily assembled and disassembled in a short time. If desired, the breadbasket can be designed independently according to individual sizes.
The only drawback of the greenhouse is the height limitation, which does not allow growing tall crops.
Choosing the best place to install a bread bin
A compact polycarbonate product will fit in any part of the yard, but it is advisable to choose an unshaded area with trees or tall buildings. It is important to pay attention to the sides of the world. It is optimal to install a greenhouse so that its one side is facing south, and the other is facing north. With this arrangement, the plants will receive maximum heat, plus it is possible to adjust the illumination for different plants.
Do-it-yourself greenhouse installation
So, you purchased a factory product or decided to make it yourself. You already have a drawing and material at hand, it’s time to get to work:
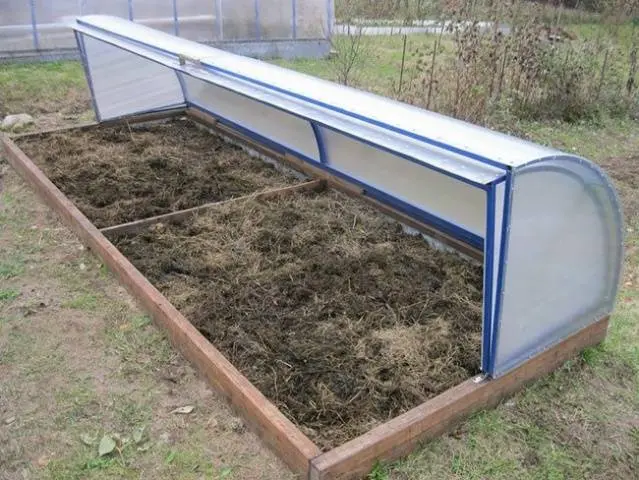
- The arched frame, sheathed with polycarbonate, is very light, but it is desirable to organize a simple foundation under it. It is enough to lay a row of red bricks, hollow blocks, or simply knock down a box from a bar in a shallow trench dug to the size of the frame. In the latter case, the wood is treated with a protective impregnation against rot.
- Guided by the drawing, assemble the frame. Test the doors for free opening. If everything is fine, put the greenhouse on the foundation and fix it with anchor bolts. This procedure must be done necessarily to protect against tipping over.
- The installed frame is once again tested for the free opening of the wings. See that there are no distortions. It is important to check the tightening of the bolts again. After that, you can proceed to the sheathing of the frame with polycarbonate.

- Spread a single sheet of polycarbonate on a flat surface without stones and other sharp protrusions. Next, mark up the desired fragments. It is better to cut polycarbonate with a jigsaw. Close the ends of each workpiece with plugs so that water and dirt do not penetrate into the material cells.
- Lay the finished polycarbonate fragments on the frame with a protective film outward. Drill holes at the attachment points, and fix the sheets with special hardware with a sealing washer.
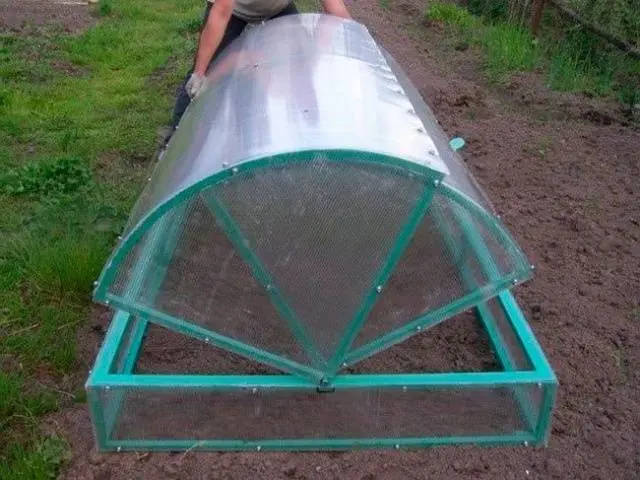
Once again, check the sheathed structure for the free opening of the wings. If everything was done correctly, each side of the bread box should move freely to the side.
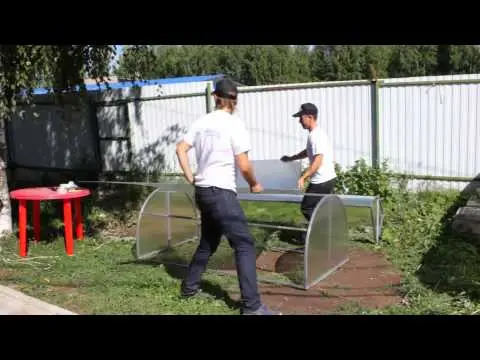
In this video, the greenhouse is a bread box in the assembly:
Summer residents who had to change the film on primitive shelters every season will appreciate the operation of a polycarbonate bread box.