Contents
A mini-greenhouse made at the cottage site with your own hands is a great opportunity for growing strong seedlings or early vegetables. A functional mini-greenhouse near the house can be the simplest, have any design and size, the main thing is that in practice it fulfills its main purpose – to protect plants from adverse weather conditions and create a comfortable microclimate for them.
Site Selection
The arrangement of a greenhouse with your own hands always begins with the choice of terrain. If the mini-greenhouse is stationary (not portable), then the following factors must be taken into account when locating it:
Light mode
From the point of view of maximizing the use of solar energy, it is recommended to install a mini-greenhouse along the length from the western part of the site to the east. You should not build a structure along walls, high fences, trees, otherwise you will have to install additional lighting in the greenhouse.

Air flow direction
Ideally, when it is possible to make a mini-greenhouse in a sunny place, protected from winds and drafts. If the site is intensively blown by winds, which contributes to the destruction of heat flows, then it will be advisable to erect a dense hedge at a distance of about 10 m from the walls of the structure.
Location relative to the house
A stationary mini-greenhouse near the house can block the view from the window. It is also important to install it parallel to the garden paths, the house and other buildings – in this case, the cottage area will look more harmonious.
Passage to the greenhouse
When erecting a structure, it is necessary to take care of laying functional paths. This means that the path to the greenhouse must be made wide and even so that inventory, fertilizers and other necessary materials can be easily transported along it.
Close proximity to commercial buildings
It is advisable to build a mini-greenhouse so that water and electricity can be easily connected to it – this will save money during construction and further maintenance.
Terrain relief
The area under the greenhouse should be flat. It is impossible to install a building in the lowland of the site, since cold and humid air accumulates there (warm air masses tend to rise up).

Also in the lowlands, as a rule, groundwater is located close to the surface, which is why the humidity in the greenhouse will be constantly elevated. You should not build a greenhouse on loose soil, because over time the soil will sag, and the structure will deform, and may even collapse.
It should be said that portable greenhouse designs have greater functionality for summer cottages. They can be installed in different places depending on the illumination, winds blowing. Small portable greenhouses can be located along the walls of the house – so they will be provided with reliable protection from the wind.

If a mini-greenhouse is located on the south side of the house, then the plants will be provided with maximum light and thermal conditions. Conversely, if there is too much sun and the plants are hot, the greenhouse can be moved to a shaded area.
Purpose
Basically, a mini-greenhouse is used as a shelter for growing seedlings of vegetables and flowers. However, not all vegetable crops can grow in a greenhouse. For example, eggplants are very thermophilic and sensitive to temperature changes, so growing seedlings of this crop is possible only at home in pots.

The rest of garden crops, such as tomatoes, cucumbers, peppers, cabbage, grow quite successfully in a greenhouse, and take root safely in open ground. So that after planting the seedlings in the garden, the mini-greenhouse is not empty, you can plant low-growing vegetable plants in it, for example, radishes, various varieties of cabbage – by creating optimal conditions for the growth of these vegetables, you can get a crop much earlier than when growing in the garden .
Do-it-yourself stationary mini-greenhouse is ideal for growing early vegetables; cucumbers, tomatoes, peppers, or exotic heat-loving fruits. It is also possible to sow seedlings in it, but since the height and area of uXNUMXbuXNUMXbsuch a design provides more opportunities for vegetable growing, it is more expedient to plant early vegetables in a greenhouse, and use low greenhouses for seedlings.
Video “Miniature greenhouse for vegetables. Convenient and simple”
A guide to growing vegetables in a mini greenhouse.
Устройство
Any mini-greenhouse consists of a frame and a translucent coating. The material for the frame is selected based on the area and purpose of the structure:
- metal tubes (aluminum, steel) – this option is suitable for a small stationary greenhouse – when choosing a metal, you need to take into account that the aluminum frame is lighter, you can easily disassemble it and move the structure to another place, and steel is cheaper, but such a frame is mounted when welding assistance, so moving the structure is not easy;
- wood – this material is suitable for a small mobile greenhouse intended for seedlings – when building a frame with your own hands, you need to treat the tree with special anti-rotting agents, or paint it;
- metal-plastic waste – a mini-greenhouse made with your own hands from used window frames is now not uncommon – old windows are strong enough, equipped with fittings, so you can make a functional structure out of them, not only for seedlings.

As for the coating of the greenhouse, it should be as translucent as possible. Glass is ideal, but making a stationary greenhouse with such a coating is quite difficult. Alternatively, you can use ready-made window frames that are installed on a brick foundation.
The simplest and most economical option is plastic wrap. It is easily attached to any frame, but it does not differ in durability, it can be damaged by wind, hail, and above all, the film does not let air through, and therefore there is a need for regular ventilation of the greenhouse.
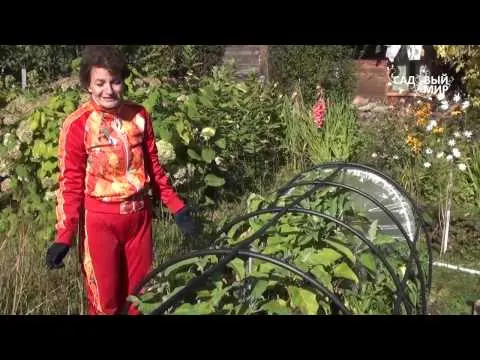
Now polycarbonate is very popular – it is a transparent sheet of plastic with maximum light transmission. It comes in different thicknesses (from 2 to 8 mm), unlike glass, it does not break, it is easily bent, so it can be used to cover arched greenhouses.

Equipping a mini-greenhouse near the house with your own hands, you need to consider such important points:
- high-quality illumination – if the plants do not have enough light, they will stretch and become weak;
- free access to plants – if the greenhouse is stationary, you need to make small paths in it, along which you can freely walk to water the plants, loosen the soil, and fertilize;
- if the structure is small and entry into it is not possible, then you need to make opening windows, or a removable cover;
- the frame of the greenhouse should be as strong as possible – able to withstand heavy rain, wind, sometimes snowfall, and protect plants from such weather;
- heating – if it is not possible to heat a mini-greenhouse with electricity, then the most acceptable option would be biological fuel (manure, compost, litter embedded in the soil) – these organic materials, rotting, emit a lot of heat, due to which the soil temperature is maintained.
How to Make Your Own Hands
In the construction of a greenhouse with your own hands, you can use everything that remains after the repair of the house. To equip a greenhouse, you will need the following materials (the list is approximate):
- wooden blocks 3 m high – 10 pieces;
- metal pipes – about 100 meters;
- plastic or metal corners – 30 pieces;
- crosses (any material) – 15 pieces;
- covering material: polycarbonate (approx. 45 m), foil (50 m).

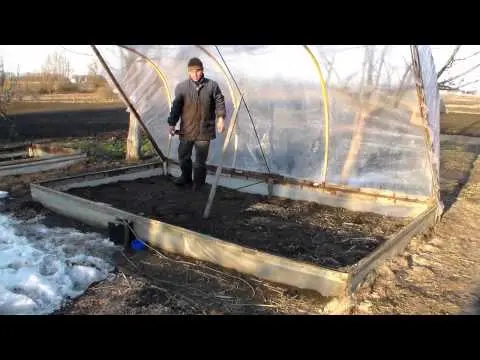
Construction begins with the installation of the frame. First you need to make and mount the side walls. If the frame is metal, then it must be assembled by first laying it out on a horizontal surface, if wooden, then the horizontal boards must be fastened with other boards, nailed with nails 7-8 cm long. Next, the frame is installed (digged in) in a place intended for installing a greenhouse.
The next step is nailing the top to the structure. Depending on the frame material, boards are nailed or metal tubes are welded. Many vegetable growers build arched greenhouses with their own hands. This option is simpler in that you just need to fix the pre-prepared arc frame.
After establishing the frame, it is desirable to build a small base (foundation) of boards or bricks, something like a high bed. And the final stage is covering the frame with a film or polycarbonate. As for glazing, this process is rather complicated, therefore it is more often used for arranging greenhouses intended for growing seedlings and vegetables all year round.

The film on the frame must be well stretched and fixed – this will reduce the likelihood of damage to the coating. Sometimes in practice, a weighting material is used to fix the film: the remains of pipes, bricks, stones. They are simply laid or tied along the edge of the film. Thus, the simplest, but rather spacious and functional greenhouse was erected with our own hands.
If a greenhouse is needed only for growing seedlings, then the best option in this case would be a wooden, if necessary, portable structure, which you can easily build with your own hands. The dimensions of the greenhouse can be different (you need to calculate based on the number of seedlings), but the height should be at least 60 cm. The coating can be either film or glass – old window frames with glazing are ideal, but you can also use ordinary film.
Video “Covering a homemade mini-greenhouse”
The video shows the process of installing covering material on a homemade mini-greenhouse.