


Contents
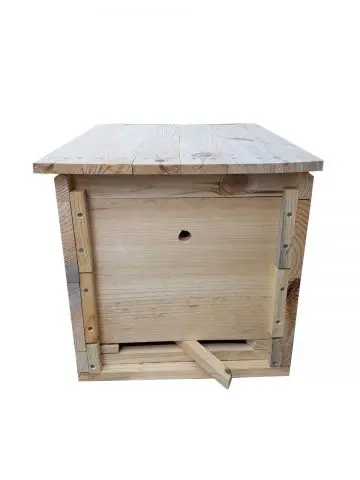
The horned hive got its name because of the presence of small pins that stick out of the body or bottom. This design was invented by Mikhail Palivodov. This design was developed as the most simplified and easy to use. It is worth noting that the initial idea turned out. In addition, of particular importance is the fact that, if necessary, beekeepers can use Dadan or shop frames.
Distinctive features of horned hives
Considering the distinctive features of horned hives, it is worth noting that ordinary hives can be made in several variations:
- with figured ends, as a result of which they can be attached to each other;
- with a flat surface.
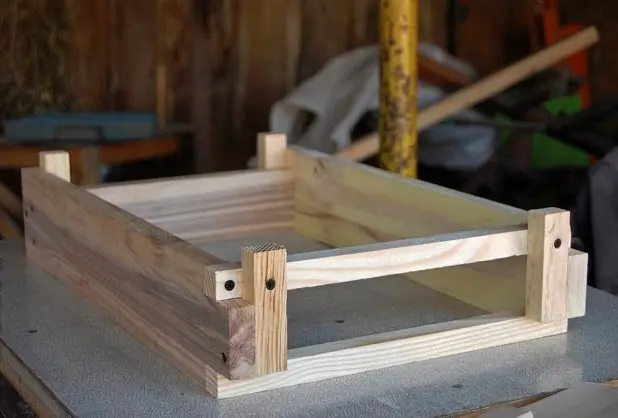
The hive from Mikhail Polevoda is made much more cunning. Sections are made of 4 knocked down boards; bars are used as fasteners that protrude above the body and do not reach the bottom part a little. During the installation process, sections can be stacked on top of each other, while the bars are not fastened together, and the body cannot be moved.
It should be borne in mind that a small gap (5 mm) is specially left in which you can insert a chisel and separate the modules if they were glued together with propolis.

Advantages and disadvantages
Judging by the reviews of beekeepers, the horned hive has the following advantages:
- the design is quite easy to make yourself;
- as a material, you can use a dry shalevka of any breed;
- for bars and frames, scraps from waste can be used, as a rule, the quality of the finished structure does not suffer from this;
- in the process of making a horned hive, you do not need to have a special tool;
- sections, consisting of 8 frames, are perfect for the core;
- at the request of the beekeeper, it is possible to install Dadanovsky or shop frames in the hive;
- such designs are inexpensive, which is very important for both beginner beekeepers and owners of large apiaries.
During the years of use, no deficiencies were identified. Horned hives are considered to be a good design that is easy to use and does not cost much to manufacture.
Equipment
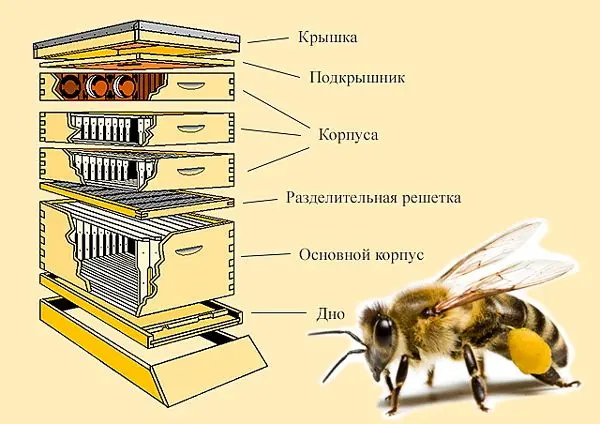
In order to properly collect horned evidence for the apiary, it is recommended to first study the complete set of the structure. Designs designed for bee colonies include the following elements:
- bottom – as practice shows, it can be not only deaf, but also consist of a special mesh, the first option is used in winter, the second – mainly in summer;
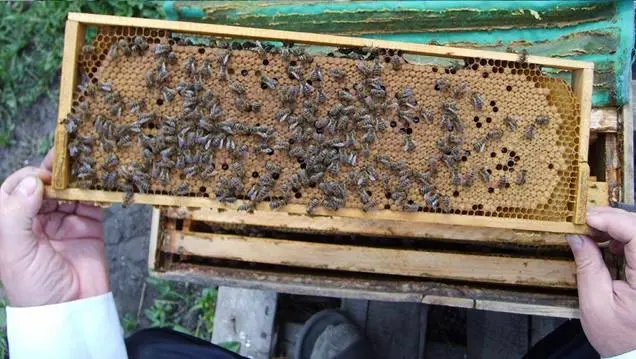
- frame – capacity is up to 8-10 honeycomb frames, it is important to consider that the number of frames used depends entirely on the design features;
- frame – it is used as an alternative solution for the ceiling or as a visor, as a rule, it is installed on the upper part of the structure – on top of the body.
If horned hives are planned to be installed in regions with low temperature conditions, then it is necessary to first insulate the bee houses using foam plastic for this purpose.
How to make a horned beehive with your own hands
Making your own horned hive at home is not as difficult as it might seem at first. All that is required in this case is to follow all the recommendations and carry out the assembly process in stages. To simplify the work, it is necessary to perform work in accordance with the attached drawings, which indicate the dimensions of the structure.
Dimensions of the horned hive
Before proceeding with the process of assembling a structure to accommodate bee colonies, it is recommended to understand what size the future hive should be:
- height of extension cases – 153 mm;
- sidewall width – 535 mm, in this case it is necessary to take into account the standard width, 16 mm – distance to the walls, wall thickness and external protrusions of 40 mm;
- the width of the front and rear walls is 389 mm, while taking into account 10 honeycomb frames, extreme spikes and a special gap of 5 mm;
- folds located in the upper part of the front and rear walls – 8×11 mm;
- spikes located on the front and rear walls – 7×11 mm;
- side grooves used to assemble the case – 7 mm wide, 10 mm deep, indent from the edge of the board should be 20 mm.
Before proceeding with the assembly, it is necessary to prepare a flat surface.
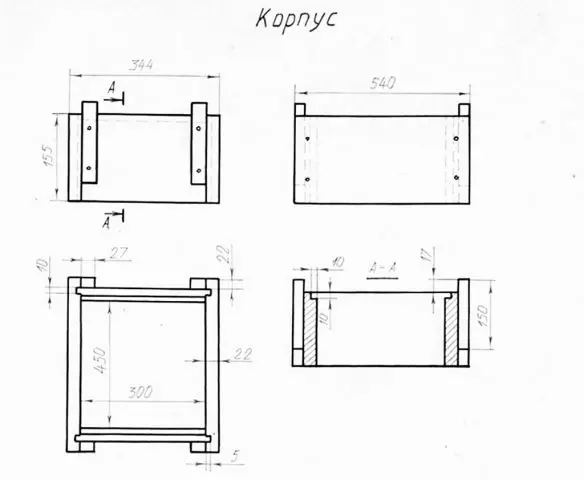
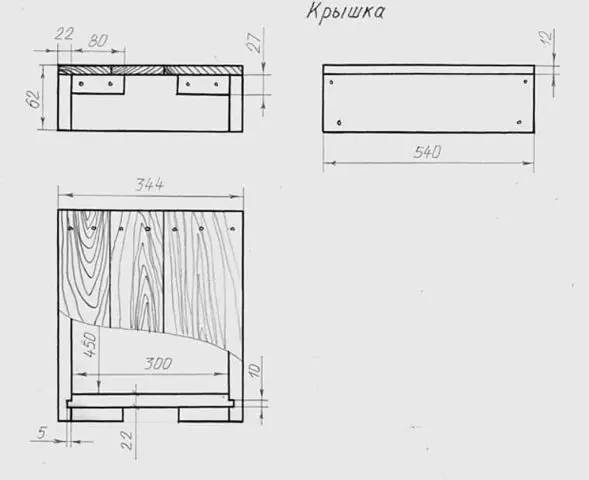
Drawings of horned hives
In the process of performing work, it is worth using drawings for a horned beehive for 10 frames.
Necessary tools and materials
For the manufacture of horned hives, it is recommended to use boards from spruce tree species. It is best to use boards sawn from dead wood or dried willow, which is quite light. Some beekeepers note that untreated wood can be used, which reduces the cost of the finished structure.
The most budget option is a shalevka, while the width must be chosen as standard and be 25 mm. After the material has been processed on a jointer, the required thickness of 22 mm will be obtained.
It is necessary to carry out installation work after all the material and tools necessary for work have been prepared. During assembly, you will need to have a mallet on hand, with which you can put the spikes in the grooves, a screwdriver, screws and a saw.

Assembly process
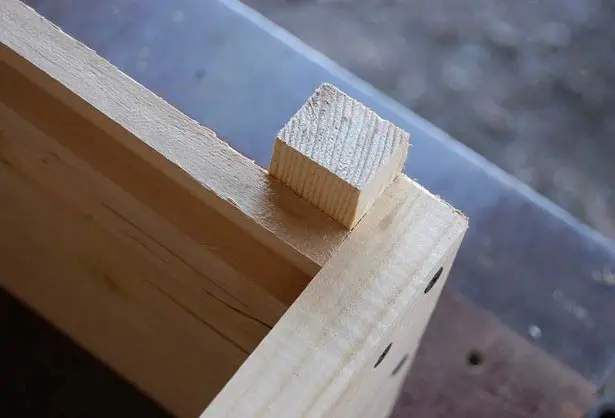
To create the body, you will need boards that are cut into small bars 22 x 27 mm in size – these will be horns. With the help of a milling cutter, small recesses are made in the boards for installing frames. The size of the hangers should be 10 x 10 mm. The horns are installed from the end side.
After that, the body is folded for each section. Boards should be stacked in such a way that there are no gaps between them. Fastening is carried out using self-tapping screws.
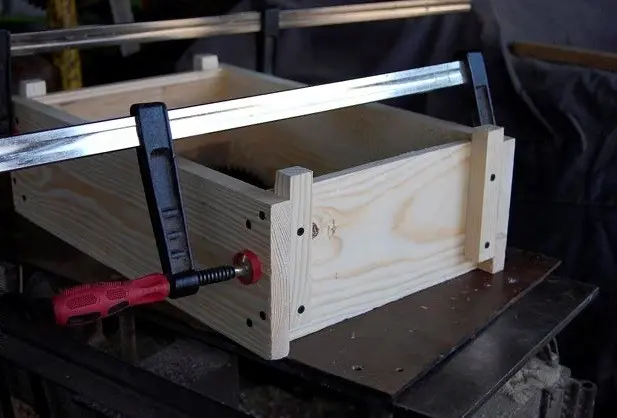
Be sure to check the corners, they must remain straight. After the first 2 compartments are made, it is necessary to check the docking – there should be no gaps. The thickness of the board used must be at least 22 mm.
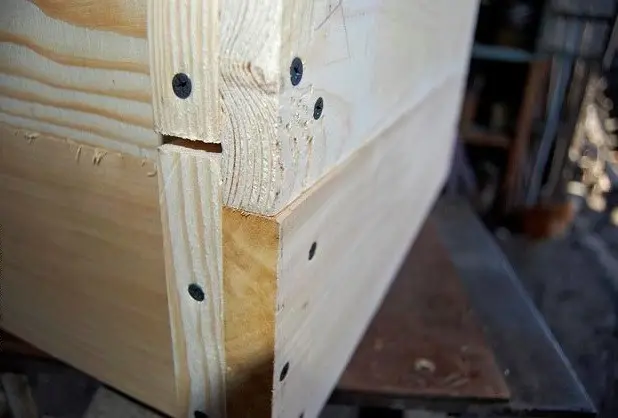
After that, it is worth checking the internal corners for cracks.
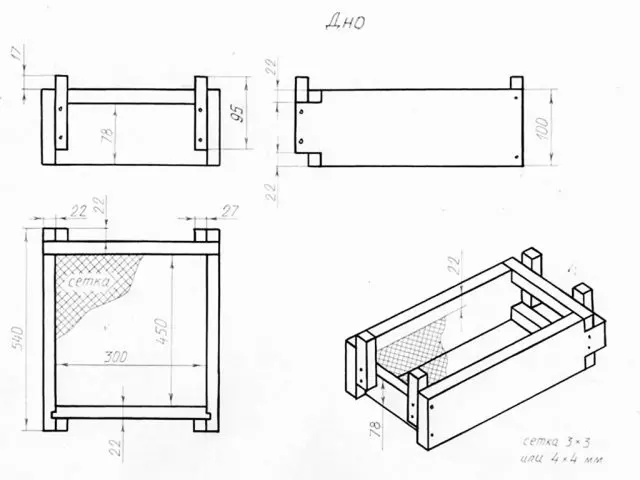
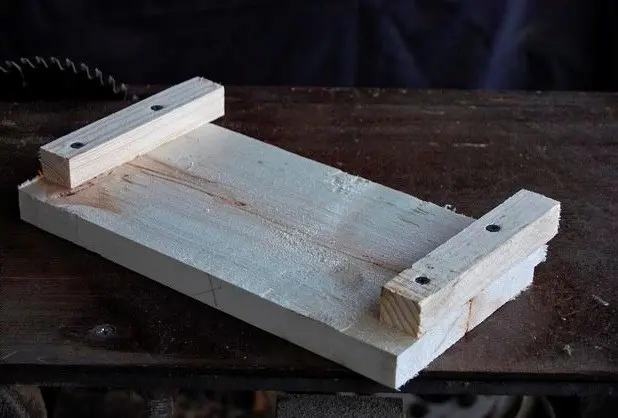
For the manufacture of the bottom, boards with a thickness of 22 mm and bars measuring 22 x 22 mm are taken. Using a workbench, cutouts are made on the side walls.

The assembled elements of the lower tier are fixed with a clamp and fastened with self-tapping screws.
During assembly, it is necessary to leave a gap for the notch. A mesh is inserted into the bottom.

Methods of keeping bees in horned hives
As a rule, the process of keeping bee colonies in horned hives is not much different from the stay of bees in conventional structures. A distinctive feature is the fact that when working in the apiary, you will have to operate not with frames, as is usually the case, but with sections, of which there should be a large number.
It is important to consider that a large amount of time should be devoted to working with the bottom – it is subject to regular replacement. On hot summer days, it is recommended to use a net, which ensures the flow of fresh air, as a result of which the bees do not gather on the front walls of the structure. In addition, the bottom of the mesh in the summer time allows you to get rid of ticks that crumble from insects during movement.
Thanks to the deaf bottom, the optimal temperature regime is maintained in winter. In the spring, when bee colonies are checked, the bottom must be replaced. Determining the presence of brood is quite easy, it does not require removing sections. It is enough to put your hand on the frame and if you feel warm, then this indicates the presence of brood in the bee colony.
Conclusion
The horned beehive is considered a fairly simple and popular design used by beekeepers. During the production process, it is recommended to take into account that the number of frames used can be any, depending on the preferences of the beekeeper. As you know, there are no clear rules in the production process, as a result of which you can choose any size and shape. If we talk about traditional houses for bee colonies, then they should include 8 frames up to 22 mm thick.