


Contents
In the country, not only beautiful paths or comfortable furniture can please. A good mood is created by original garden sculptures and crafts. From today’s article you will learn how to make figurines for the garden with your own hands from plaster.
Material Features
Gypsum, like its variety – alabaster, has long been used in construction. It is easy to work with him, even a child can handle it. For the manufacture of complex three-dimensional figures, you will have to stock up on ready-made forms or build reliable wire frames.

It should be remembered that alabaster is fragile. In construction, it is used for interior finishing work. If you put plaster sculptures in the garden without proper care, children will quickly break them, and heavy rain will complete the destruction.
Video “Garden figures made of gypsum, made by hand”
In this video you will see a master class on making plaster figurines for the garden.
Production
For creativity, a novice master will need a suitable type of gypsum:
- Sculptural. Demanded for the injection method. With its help, it is possible to create objects of large sizes. If you use a frame, durable products come out.
- Acrylic. Similar to sculptural, although slightly lighter. If mixed with marble chips or aluminum powder, the products will look like natural marble.
- Polymeric. Serves as a raw material for the creation of small garden forms.
The gypsum begins to harden as early as 4 minutes, fully seizes in 25-30 minutes. Dilute it to the consistency of liquid sour cream.
In the role of casting molds use any suitable items:
- construction helmets or half a rubber ball – fit to create “ladybugs”;
- plastic bottles – the basis for elongated objects or prefabricated elements, for example, the legs of a mushroom or the body of a snake;
- inflated balloon.
The stores sell ready-made forms of suitable sizes, which you can stock up on before starting work. However, the form can be built independently on the basis of the same gypsum or silicone:
- In a container of suitable size, a liquid gypsum mortar is made.
- The object whose shape is needed is pressed in halfway.
- Waiting for the plaster to harden.
- Repeat the procedure for the other half.
- The two blanks obtained are varnished, then glued.
It turns out a three-dimensional volumetric form for pouring.
The cast billet should be given a marketable appearance. To do this, it is primed, then painted or varnished. This should be done at the stage of hardening – so the paints are better absorbed into the material. When creating one-color figurines, paint is added at the initial stage, mixing it with a plaster solution.
To clean the form of gypsum residues, sulfuric or hydrochloric acid is used.
Here are the main mistakes that beginners make when creating plaster figures:
- Do not stir the powder in water, but pour water into gypsum. This leads to the formation of lumps, it will not work with the solution.
- They are trying to create massive sculptures without a frame. The material is unusually fragile, the heavy shape is easily damaged. As soon as a crack appears, the figurine, which has no base, falls apart into pieces.
- Make an excess amount of gypsum. Within five minutes, the solution will harden to the state of a cobblestone, it will not be possible to re-dissolve it. You need to prepare gypsum in parts.
- Prepare too little solution. As a result, it is not enough, but while a new portion is being stirred, the partially filled workpiece is already hardening.
Vases
From gypsum, you can make unusual planters with your own hands.
For work it is necessary to prepare:
- gypsum;
- flexible wire for the construction of the frame;
- construction bandages;
- water-based paint;
- acrylic lacquer for exterior decoration;
- large bucket.

Here is a step by step workflow:
- We put the bucket upside down.
- We braid it with wire, tuck the edges and hide.
- We remove the finished frame.
- I have prepared a plaster solution.
- We put bandages in the solution, soaking them for a couple of minutes.
- The frame is covered with bandages from the inside and outside, the wall thickness is approximately 2 cm.
- We coat the frame-bandage form with a plaster composition. We give half a day to freeze.
The surface of the flowerpot is cleaned with emery, leveled. After harvesting, the cache-pot is decorated with small pebbles, multi-colored glass and beads. To paint the pots, use your own imagination.
flowers and leaves

You need to find suitable large leaves, such as burdock or water lilies. Pour a layer of sand with a slide, cover it with a film. Lay the leaves face down on the sand. The wrong side is covered with a gypsum mortar 1–1,5 cm thick. They give half an hour to cool. Castings are turned over, the sheet is removed, all excess is cut off and sanded. It turns out an exact copy of the plant, on which the smallest veins and bends are visible.
To make decorative flowers, cut buds must be sacrificed by dipping them whole in a plaster solution, then taken out and allowed to dry. However, artificial plastic analogues are also suitable instead of living ones.
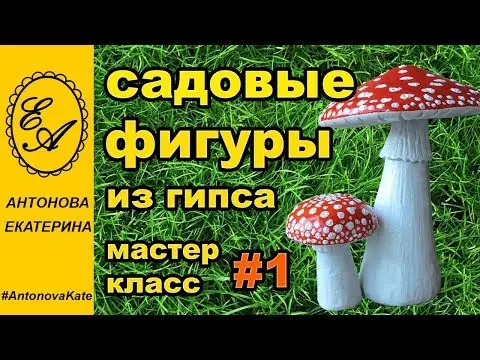
mushrooms

For manufacturing, you will need two casting molds:
- plastic bottle for the leg;
- old hat bowl
In order for the gypsum to be easily removed from the mold, its inside is covered with cling film smeared with a special solution. Prepare it according to the following recipe:
- 7 Art. l water;
- 1 st. l. liquid soap;
- 2 tbsp. l. sunflower oil.
A figure is created in several steps:
- The bottle is cut across, the upper part will serve as a mold for the stem of the mushroom.
- The prepared film is wrapped around the inside of the mold.
- The finished gypsum mixture is poured into a mold turned upside down.
- When the plaster hardens, the plastic is cut with a knife and the finished leg is carefully removed.
- The old bowl is also wrapped inside with a film, a gypsum mortar is poured.
- When the gypsum begins to harden, stick the “leg” into the center with a sharp end.
- Give time to cool.
The workpiece is primed. You can use PVA glue, dissolved in water in a ratio of 1: 2. Three hours later, the mushroom is painted using facade paints. After drying, the surface is varnished.
Having made a large-sized mushroom, the leg can be painted by scratching and depicting round windows, doors and a brick wall with the help of a compass and paints. It will turn out a kind of “home of the hobbit.”
Animals
Making animal figures requires either ready-made molds for casting, or the skills of a sculptor. Depending on the initial conditions, the execution process is also organized.
If there is a form:
- a solution is being prepared;
- the casting mold is wrapped from the inside with cling film, then a kind of frame is constructed for greater strength of the sculpture with the help of wire, plastic skewers, etc .;
- pour the mold with a solution, give several hours to cool;
- remove the workpiece, remove the film.

With polymer clay and sculptor skills:
- the body of a bird or animal is molded from clay;
- draw images of feathers, paws, wings, etc.;
- the product is dried until it hardens, then it is used as a blank for creating a casting mold.
The frame for the manufacture of sculpture can be made from improvised materials. For example, how to make the basis for the figure of a cat:
- A plastic bottle is cut in half into upper and lower parts.
- 4 slats are attached to the bottom from below, forming paws, one slat in front for the neck and one behind for the tail.
- String the top of the bottle on the neck rail.
- Gypsum mortar is being prepared.
- The composition is coated with the lower, upper parts, as well as the slats, forming the cat’s body, head, tail and paws.
- Add details such as ears, eyes, cheeks.
- Stick the wire, forming a mustache. They are also lubricated with a solution.
- The surface is leveled by polishing with the palm of your hand, and left to harden for several hours.
Everything, it remains to cover the figure with a primer, paint and lacquer. The empty part of the lower half of the bottle can be used as a planter or fruit vase.
Care Tips
In order for finished garden sculptures to last longer, they require special care:
- teach children to treat them with respect;
- protect from moisture by covering the surface with primers and paints;
- so that the paints do not peel off, the surface is varnished;
- with the onset of cold weather, the sculptures are transferred to storage in a warm, dry room.
To create garden figures, it is worth attracting children, if any, in the family.
This process is simple, but it allows you to develop a creative vein, at the same time replenishing the site with nice decor details.
ძალიან მაგარია მე გავაკეთე და ძალიან ლამაზია♥️♥️♥️