


Contents
In winter, when good conditions are created, chickens can rush in the same way as in summer. It will be enough to warm the chicken coop well. Under optimal conditions, laying hens should be reasonably comfortable. To do this, you need to give them enough space and create good lighting. It is better if the temperature in the room is from -2 to +20 degrees. In addition, chickens need good nutrition. It is better to insulate a frame chicken coop at the stage of its construction. In this case, you do not have to worry about the quantity and quality of the eggs received.
Features of warm chicken coops
There are certain norms according to which it is worth placing chickens in a chicken coop. On one square meter it is necessary to place from 2 to 5 heads. With a small size of the room, it is possible to populate the bird more densely. However, such conditions can affect the ability of hens to lay eggs regularly.
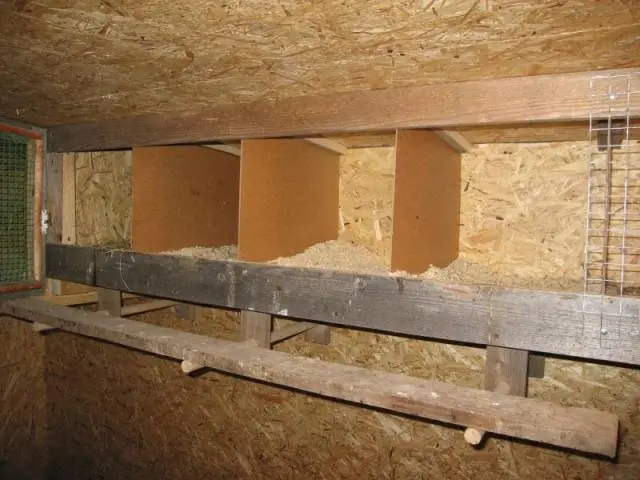
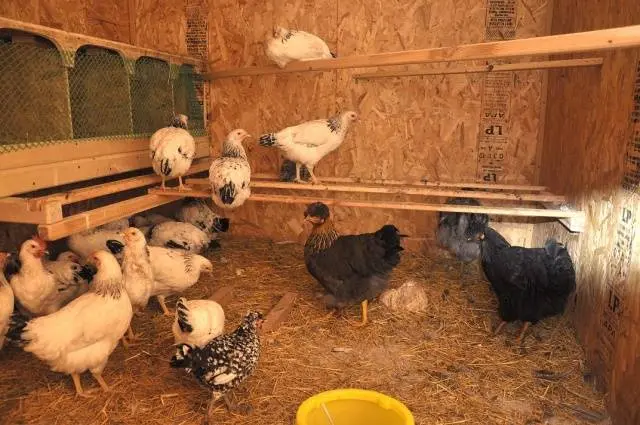
In a cramped room, more perches and nests should be equipped. If you make a multi-tiered chicken coop, the chickens will feel more comfortable. It is necessary to equip and winter walking. When the temperature outside is up to -15 layers, you can let them out for a walk. However, this is allowed only on calm days. To figure out how to build a chicken coop, you should decide on the necessary materials.
Choice of materials
You can build a chicken coop at low cost from foam concrete or cinder block. For the construction of a budget insulated chicken coop, it is equipped as a dugout. Walls are usually erected to a height of about half a meter above the ground. Insulated windows are installed on the south side. They must be equipped with double or triple panes. It is necessary to deal with the warming of the part of the chicken coop that protrudes above the ground. To increase the thermal insulation of the walls, you can fill up 3 sides (except the south) with soil.
If poultry breeding is planned on a large scale for oneself or for sale, a solid foam concrete chicken coop should be built. Such designs are quite warm and reliable.
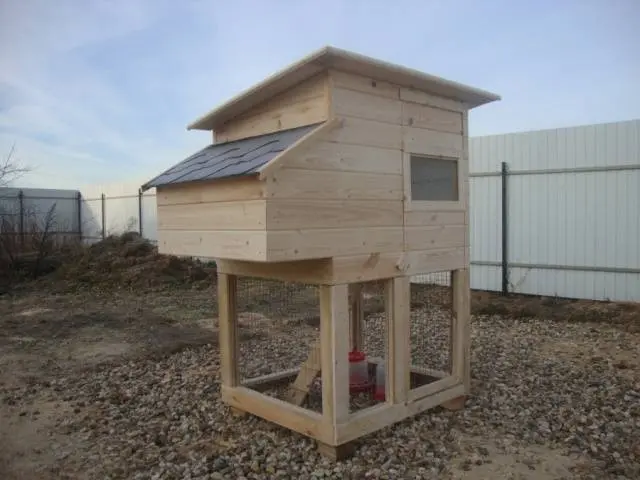
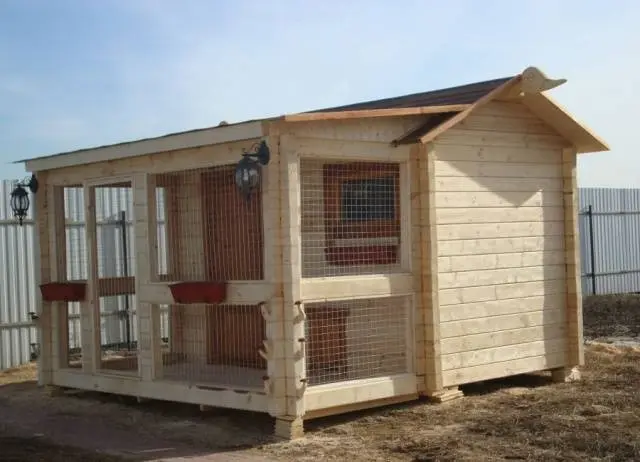
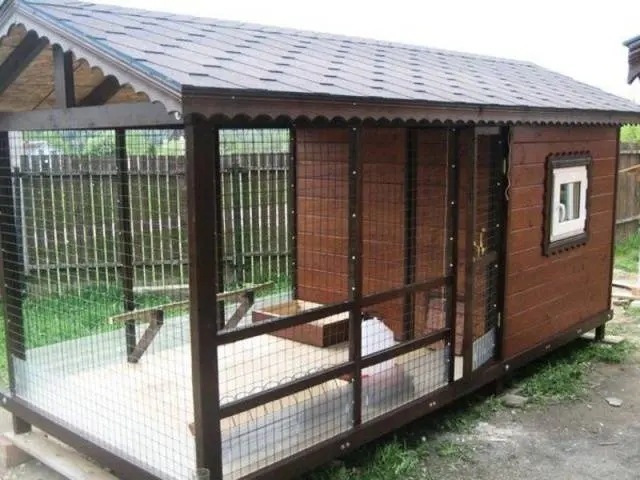
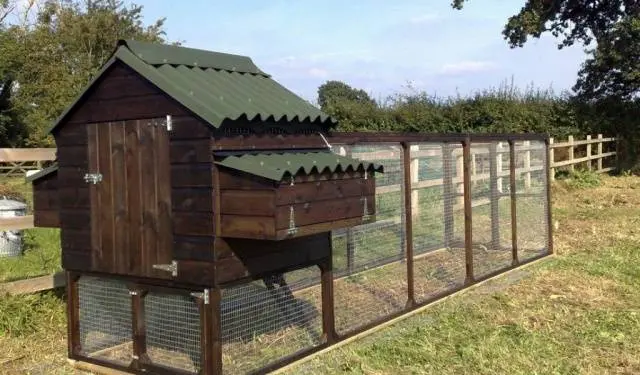
Another good option is to build a frame chicken shed. Since it is not large in size, the timber may have a small cross section. The frame can be sheathed with boards, as well as plywood or other sheet materials. Insulation is placed between the posts. From the inside, the frame is also sewn up. To prevent the appearance of mice in the insulation, you should close it with a metal mesh from the outside and from the inside. Its cells should be quite small so that rodents cannot get through it. Such work will require additional costs, but the fight against mice will cost more.
If the chicken coop is not insulated, in the middle lane you can build it from thick beams or logs. The seams should be caulked. This will protect the chicken coop from drafts. The tow must be covered with slats so that the laying hens cannot peck it out.
Base
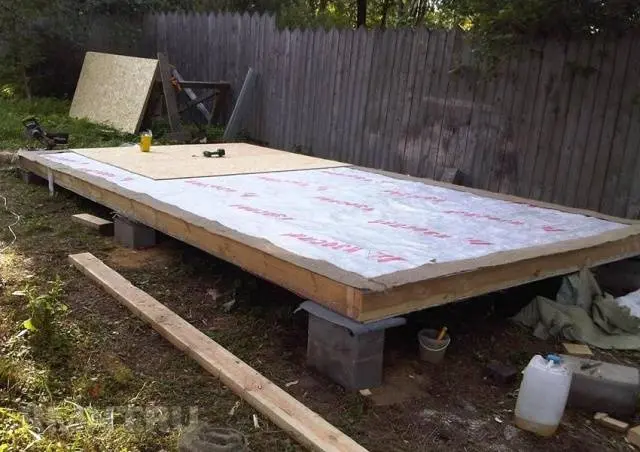
When constructing a heavy chicken coop, the walls of which will be quite massive, you should take a closer look at the device of a tape shallow foundation. There are other options for creating bases. The columnar foundation is quite easy to install. It is suitable for medium sized chicken coops. If the building is light, you can simply install ready-made foundation blocks under it.
If the foundation is piled or columnar, the supports must be installed at the corners and every 3 m. With this arrangement of the columns, it is possible to ensure optimal distribution of the load on the base.
Chicken coop insulation
Heating and warming the chicken coop are the main tasks that are associated with a device of this design. In a warm room, even in severe frosts, you can not install heaters. In any case, when creating a heating system, it will cost a penny.
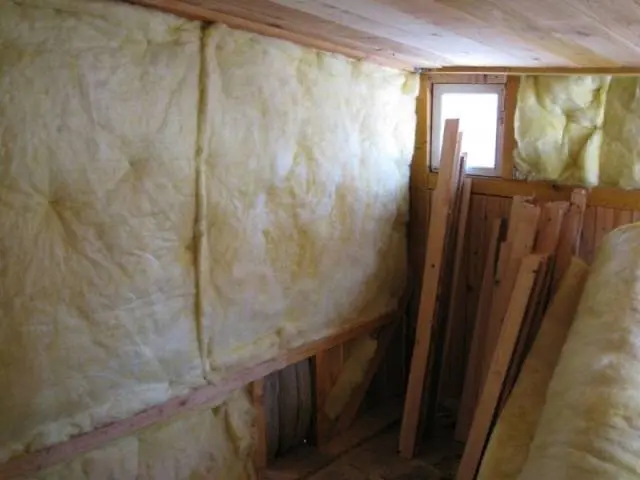
Modern materials are used for the insulation layer. They are stuffed on the frame of the chicken coop both from the outside and from the inside. The main indicator when choosing a material is its price. Foam panels have the best cost. They do a good job of thermal insulation, they are easy to mount on a special glue.

There are several more common options for warming a chicken coop – mineral wool and polystyrene foam. In the first case, it is necessary to protect the insulation with membranes. Outside the chicken coop, mineral wool is covered with hydro and wind insulation, and from the inside – with a vapor-tight membrane.
Expanded polystyrene is also distinguished by a fairly large number of positive properties. It has better insulation performance than polystyrene, however, it has a high price. Mice do not like this material, which is undoubtedly its main advantage.
Natural materials can also be used as a heater for a chicken coop. The space between the two planes is covered with sawdust. Walls can be coated with clay. Such methods of insulation are inferior in quality to many modern building materials, however, the costs are minimal.
If the construction of a do-it-yourself chicken shed is carried out in the southern region, “folk” insulation will be the best choice. However, in the central lane it will not be enough.
Ceiling insulation
The ceiling of the chicken coop must be insulated. Warm air masses always accumulate under it. With insufficient insulation of the ceiling in winter, it will always be cold in the chicken coop. From below, the ceiling is lined with slab panels. Hay is laid from the attic to the ceiling. This allows you to reliably insulate the room. With the right creation of an insulating layer, laying hens will feel as comfortable as possible.

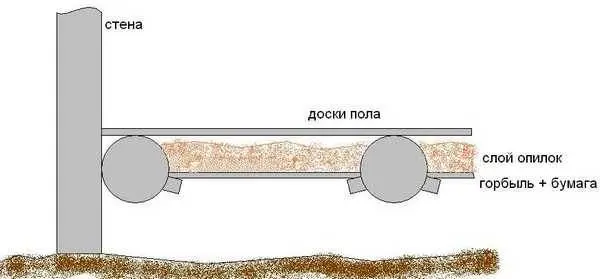
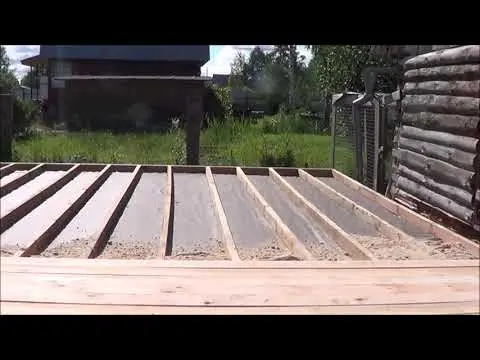
chicken coop floors
Floor insulation is carried out according to the same principle as for any residential building. First, the logs are laid, then the insulation is mounted and it is covered with boards on top. In order for the chicken coop to be as warm as possible, the floors should be insulated as efficiently as possible.
Floors are not always made of wood. It may be clay. In this case, straw and clay are mixed and then left to dry. In addition, an option with a chicken coop concrete floor can be chosen.
When planning a chicken coop, you need to take care of creating a vestibule. The presence of such an extension allows you to reduce the heat loss of the chicken coop and reduce the cost of heating the room.
Отопление
To figure out how to build a chicken coop with your own hands, you need to think about other aspects of creating such a structure. If severe frosts are observed in the region, reliable heating of the chicken coop should be created. Every poultry owner is familiar with this rule. The positive temperature in the chicken coop ensures the comfortable well-being of the laying hens.
Electricity
If it is possible to bring electricity to the chicken coop, the air in the house can be warmed with fan heaters or infrared lamps. The first option is cheaper. Their price can be quite high, however, they require little electricity during operation.
There are two types of automatic systems – programmable by time or by air temperature. Naturally, for heating the chicken coop, it is better to use the option that adjusts to the temperature. When the room temperature drops to a certain value, for example, to 0 degrees, the heater turns on until the temperature on the thermometer reaches +3 degrees.
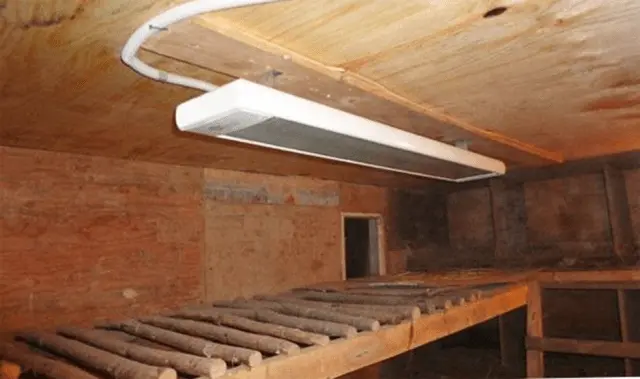
Often, infrared devices are used to heat chicken coops. They do not heat the air masses, but the objects in the room. Usually such devices are installed under the ceiling of the chicken coop. When the birds get cold, they huddle under the heater. The main thing is that the inhabitants of the chicken coop should be warm.

The disadvantage of infrared emitters is their burnout with frequent on / off. For this reason, it is better to turn them off quite infrequently. Such products consume little electricity.
In addition, it is important to know other features of using IR lamps in chicken coops. Their surface heats up when the design of the lighting device is not intended for such loads. Plastic cartridges usually do a pretty poor job of holding their shape. Ceramic products are quite rare. To increase fire safety, a wire cage should be made for the lamp. This will avoid burns to chickens and strong heating of various objects in the chicken coop.
Oil-type heaters for placement in a chicken coop are inefficient. They consume quite a lot of electricity, are fire hazard and create little heat. Making homemade devices is even more dangerous.
Potbelly stove and boiler
Another common option for heating a chicken house is to install a boiler and batteries. However, this option is very costly and will require a lot of effort. The chicken coop is also heated with a potbelly stove. You can fold a small oven. The pipe is usually carried through the chicken coop. It should give maximum warmth.
After heating, this material is able to retain heat for a long time. If the room is well insulated, one heating of the furnace will last for several days.

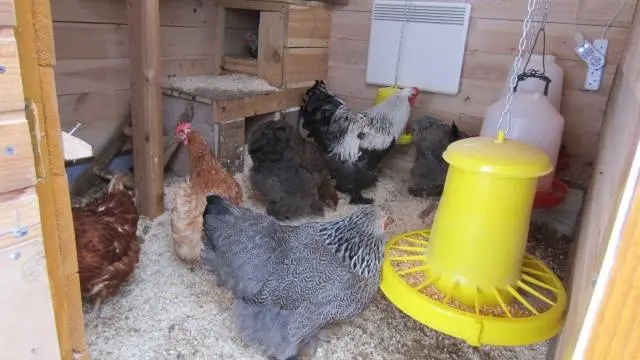
Sawdust
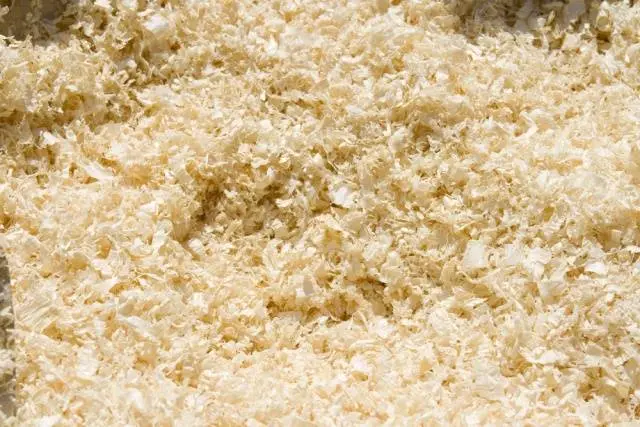
There is another way to heat the chicken coop. It is associated with the decomposition of sawdust and the associated heat release. However, this method only works if the insulation is sufficient. Sawdust must be poured onto the floor. The first layer should be done in the fall. It should have a height of 15 cm. After filling, the sawdust should lie for about a month.
Thanks to this bedding, better insulation is provided than when using hay. At the same time, chickens do not get sick, since sawdust is able to effectively regulate the level of humidity. In addition, laying hens love to rummage through the litter. This will help them stay in shape during the winter with limited exercise.
After a month and a half, it is necessary to fill in a fresh layer of sawdust. It should also have a height of 10-15 cm. After the same period of time, it is necessary to fill in new sawdust again. This operation is repeated throughout the winter. By the end of the cold period, up to half a meter of sawdust accumulates on the floor. When creating such a substrate, even in severe frosts, the temperature in the chicken coop remains at 0 degrees.
When burrowing into the litter, you can find that the temperature in it fluctuates within +20 degrees. Therefore, laying hens partly dig holes and sit in them. In the spring, sawdust should be taken out to the compost pit. The phased implementation of such actions will help keep the heat in the chicken coop.

Ventilation device
To maintain a normal microclimate in the chicken house, the ventilation system should be properly equipped. Usually for it it is necessary to find a plastic pipe of the desired section. It is located under the ceiling. It is carried out through the roof and displayed at a certain height – about a meter. If you install it correctly, natural draft should be enough to get rid of the rotten air masses.
Fresh air usually leaks through cracks in the walls. However, with careful insulation and sealing of all design flaws, you will need to install a plastic pipe. It is mounted slightly above floor level. The pipe is closed with a metal mesh. In addition, it is necessary to perform dampers in it. Thanks to them, you can regulate the intensity of the movement of air flows.
Another option for creating ventilation is to install a small fan directly into the wall. It will effectively draw stagnant air out of the chicken coop. However, such a structure will require electricity.
The optimal indicator of humidity in the chicken coop is 60-70%. If deviations are observed in both directions, the situation should be corrected. Increasing the humidity is quite simple – more water containers should be placed in the room. You will have to work on lowering this indicator. For this task, an infrared lamp should be installed in the chicken coop.
To understand how to build a chicken coop with your own hands, you will need to read the step-by-step instructions. You can compose it yourself. First, the base is made, then a wooden frame is installed, which is sheathed with boards or plywood. It is necessary to take care of the correct installation of the insulation in the walls. After the construction of the roof, it is necessary to equip the chicken coop from the inside.
Lighting
Windows are installed in each chicken coop. Despite the fact that more heat escapes through such structures, they are necessary for the comfortable life of laying hens. In order for a bird to feel normal, it needs sunlight. The frames of such windows are made with 2-3 glasses. From the inside, they should be sewn up with a metal mesh. This is necessary for the safety of the chickens.

In order for chickens to rush well in winter, they should increase daylight hours. It should last about 12 hours. For such a task in the chicken coop, it is necessary to turn on the lighting devices. It is better if the controller is installed in the room. This will turn the light on and off automatically.
At first, some layers will spend the night on the floor, however, if it is warm enough, this is not a big deal. Gradually, chickens will get used to the mode of turning on and off the light. This option can also be chosen – to make the bird rise early. In this case, the light will be on only in the morning hours.
