Contents
Decorating the site is a favorite pastime of summer residents and homeowners. Beautiful flower beds, flower beds and even beds are a true decoration. However, nothing is more pleasing to the eye than ponds and ponds, surrounded by beautiful vegetation. And if a stream of water still beats out of it, then the corner turns into the best place to relax. If you still manage to make not only a fountain with your own hands, but also a beautiful backlight, put a swing or benches nearby, in the evenings all the inhabitants will gather on this patch.
Fountain device
To make a fountain in the country does not need very big expenses. Of course, it all depends on the size of the reservoir and how you imagine it. According to the method of construction, fountains are of closed and open type. It is about the cycle of water use. The closed type uses the same volume of water, driving it in a circle. Open – all the time new. Garden and country fountains are made mainly of a closed type: their device is simpler and more economical. Of course, water has to be topped up and changed periodically – it evaporates and becomes contaminated, but still, the costs are not very high.
When installing an open-type system, you will have to think over the water supply system, its level control, drainage and discharge. You can, of course, use the fountain reservoir as a container for heating water before watering, and make wiring around the garden from the bowl, but watering is not needed around the clock, and the fountain can work in this mode.
In the simplest version, to make a small fountain, you need some sealed container and a submersible pump. Any container can be adapted – a special plastic one for a pond, a barrel, an old bathtub, a basin, a cut tire covered with foil, etc. Pumps are a little more difficult.
Fountain pumps
Fountain pumps are sold special, with built-in filters. To make it easier to make a fountain with your own hands, you can buy such models. It is very easy to work with them: put them in a container, fix them so that they do not move, fill them with water, carry out the starting manipulations (described in the instructions) and turn them on.
Fountain pumps come in different capacities, raise the jet to different heights. Often included are interchangeable nozzle nozzles that change the nature of the jet. They are powered by 220 V, there are models powered by solar panels. Made hermetically, so there will be no problems when connecting, step-down transformers are not needed. The only thing that does not interfere is the machine and the RCD on the line to which the pump will be connected. This is just in case, to increase security. The price of the smallest and low-power fountain pump is $25-30. Performance models cost several hundred or more.
You can use any submersible pump for the fountain. But you need to buy or make a filter for it (you can make a sand filter) and a step-down transformer. A security group from an automatic machine and an RCD on the line will not be superfluous here either. This circuit is worth fiddling with if you have an old pump that is not currently in use.
How to do without a pump
Is it possible to make a fountain without a pump? Yes, but open type. For example, bring a water pipe into the pond – central or supplying water from a well or well. The water coming out under pressure will give a jet of some height. By installing a tip on the pipe, we can change its shape. But with such a construction, it is necessary to figure out where to divert water. You can – back to the well or to the river, to the area for irrigation, etc. Although a pump is present with such an organization, it pumps water into the house, and the fountain is only one of the flow points.
The second option is to put some kind of container at a height, supply water to it, and from there it is fed through pipes to the fountain located below. To create a more or less decent jet height, the container must be raised by 3 meters or more. But the question remains: how to supply water there. Again with the help of a pump, but no longer submersible. They are cheaper, but require a filter. You will also need a pit in which the equipment is installed. A system of pipes connects it with the bowl of the fountain.
Learn how to make a waterfall here.
Fountain lighting
In this area, everything has become easier with the advent of LEDs. They are powered by 12V or 24V, which is much safer than the regular mains. There are even solar-powered lamps.
Lighting can be done using waterproof LED strips or the same spotlights and lamps. To power them, you need an adapter that converts 220 V to 12 or 24 V, but they are usually sold in the same place as LEDs, so there should be no problems. Installation is simple: spotlights have mounting brackets, the tape can be “shot” from a stapler, only brackets need to be found larger than the size of the tape: it is unnecessary to punch it so as not to violate the tightness.
Schemes of fountains of various configurations and photos of their design
Surely you know that the main component of the fountain is its bowl. In fact, this is the same pond, but with additional equipment – a pump. A pond can be made in at least a dozen different ways, and some of them are described in a separate article, because we will not describe how to make a pool bowl. We will pay maximum attention to the organization of fountains and their decor.
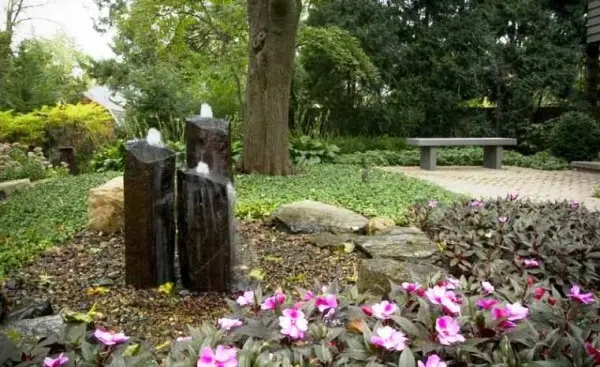
small fountain
The device requires a container and a pump. A decoration is put on the tube that comes from the pump. These can be stone slabs in which it is necessary to drill a screw, with a diameter slightly larger than the diameter of the pipe. These plates are strung one on top of the other like a children’s pyramid.
To avoid water overflow, it is necessary to provide a drain system – just below the maximum level, insert a pipe into the container, the second edge of which should be connected to the sewer, drainage system or garden. You can do it differently: arrange a water collector around the bowl – make a concrete groove or dig in a plastic one. Collected water is also taken somewhere. Usually in closed systems, the problem is not overflow, but a lack of water – it evaporates, but you can play it safe.
Do-it-yourself fountain: photo report 1
And now a photo report of how a do-it-yourself mini-fountain was made according to this scheme. It turned out interesting.
To make this fountain you need:
- square plastic flowerpot without holes;
- small fountain pump;
- plastic pipe 0,7 m long, diameter such that it is put on the pump outlet;
- a bag of decorative pebbles;
- three bricks;
- sawn red granite on slabs.
From the tool – a drilling machine to drill holes in granite with a diameter slightly larger than the diameter of the pipe.
We install a bowl in the prepared hole, put bricks in it, closer to the edges. They are needed for the stability of the structure and in order to reduce the amount of pebbles. They also serve as a support for the stone structure. Between the installed bricks we put a pump with a tube put on, pour water and check how it works.
Holes were pre-drilled in the slabs in the workshop. They should be located approximately in the center so that the stones do not overturn the structure with their weight.
The first plate rests on the lying bricks, the rest are strung so that the center of gravity does not shift. Having laid the first, we fill the remaining space with pebbles. After the last piece is laid, a mark is made on the pipe. The very last stone is removed, the pipe is cut down just below the mark, then the last fragment is returned to its place. When the water is turned on, it looks like it is running straight out of the stone. Very unusual and easy.
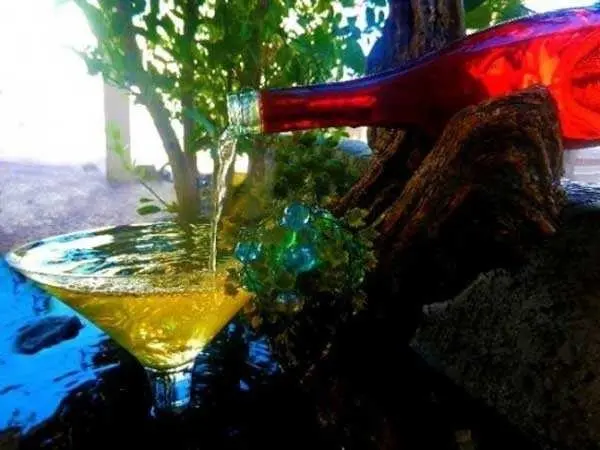
Photo report 2
The next version of a small fountain is made according to the same principle, only a flexible hose is used instead of a pipe, and a snag is used instead of a stone. The effect is just wonderful.
Everything is so clear that there is no need for comments. It differs from the previous design only in the presence of a grid. This is to increase the volume of water: the pan is small.
Until you see it, it’s hard to imagine how easy it is to make things of amazing beauty. As for pipes – it is better to use polyethylene pipes – they bend well and are not afraid of ultraviolet radiation.
How to make a fountain out of a tire, see the video report.
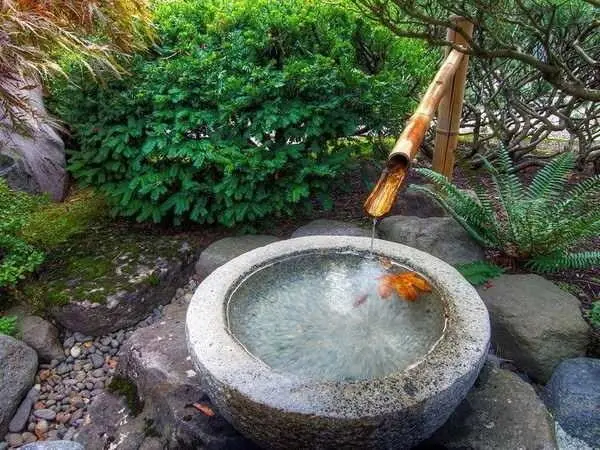
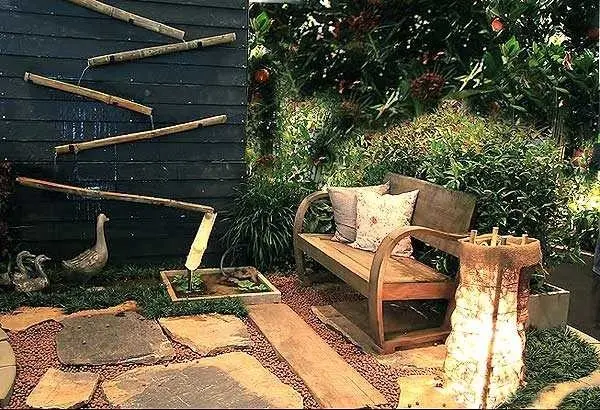
Room or desktop
Mini-fountains are made according to the same principle, only pumps use very low-power ones. Suitable even for aquariums, but without aeration. They even work almost inaudibly. We will make a fountain in the Japanese style. In addition to the pump, you will need a small ceramic container for this. In our case, it is oval made of baked clay. A piece of bamboo – about 70 cm long (bought at a flower shop, sold as a support for climbing plants), a bunch of living growing bamboo and some small pebbles. This is what beauty comes from.
First of all, we cut a piece of bamboo into pieces of different lengths. It is hollow inside – these are natural pipes, which, moreover, do not rot for a long time. One of the sides should have an oblique cut, the second – even. Sawing so that the longest piece near the evenly cut end has a “joint”. The lower incision goes about 5 mm below this thickening. It’s just that there is a partition inside, with its help it will be easy to put this segment on the pump outlet. It is difficult to cut, but it was possible to saw through a thin trunk with a metal blade.
We put a small pump in the bowl, put on it the longest piece of bamboo – its length is about 35 cm. On the other hand, we put a bunch of live bamboo, fill the space between them with pebbles.
We tie the remaining two pieces of dry bamboo to our “pipe”. You can use hemp rope. That’s all, we made a mini-fountain with our own hands. It remains to fill the water and turn on the pump.
By the same principle, other models can be made. Now you understand how and it will be easy to change the design. A few photos for inspiration.
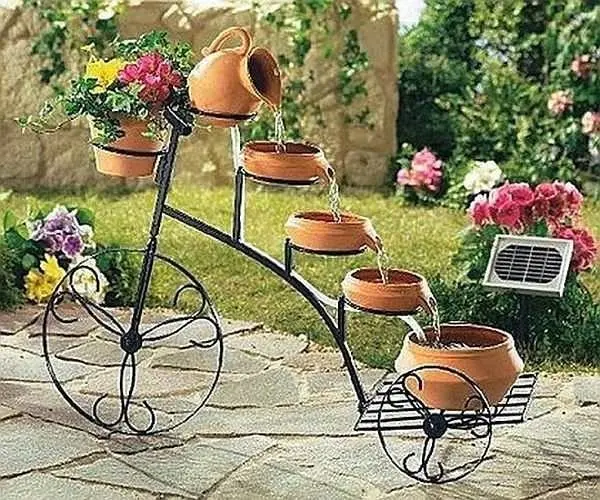
Another type, more traditional and familiar to us, uses almost the same idea and the same tools. Difference in design. You can take a large ceramic or even plastic pot. It is only important that it be without holes for drainage. Then it’s a matter of technique: divide it with a plastic partition into two or three zones, pour more soil into one and plant one of the moisture-loving plants.
The second part will be the reservoir. Only when organizing circulation, multi-stage filtration is necessary: water is very polluted. Therefore, cups made of filter materials with different cells are inserted one after the other – first, a wire or plastic mesh, then a fabric with a different cell, and inside this design, a small pump.
You can make your own hands not only the composition of such a table fountain, but also a pump. How? Watch in the video.
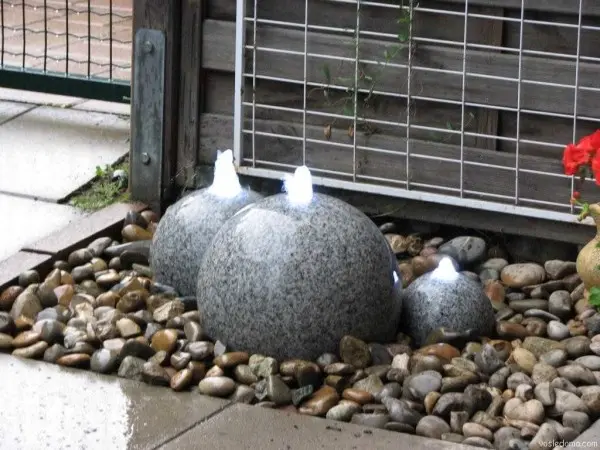
Pebble fountain
A very interesting design at the fountains with pebbles. Their bowl is disguised so that it looks like a dry fountain without a bowl. In fact, there is a bowl, but it is decorated with pebbles, which are laid on a grid that covers the tank.
A certain container is installed in a dug pit. Its volume and dimensions should be quite decent: to collect all the splashes, or at least most of them. A pump is placed in the container, covered with a metal or plastic mesh with a small cell on top. It serves to protect against the ingress of large contaminants into the water, and a thick wire mesh can be laid on top of this fine mesh. This is if you use pebbles. If you will be laying stone slabs, you can use boards or bars.
With pebbles, it is probably better to do the opposite: first, lay a grid with a large cell as a base, and on it with a small one. So you don’t have to suffer with the choice of large pebbles, and garbage will not get into the water.
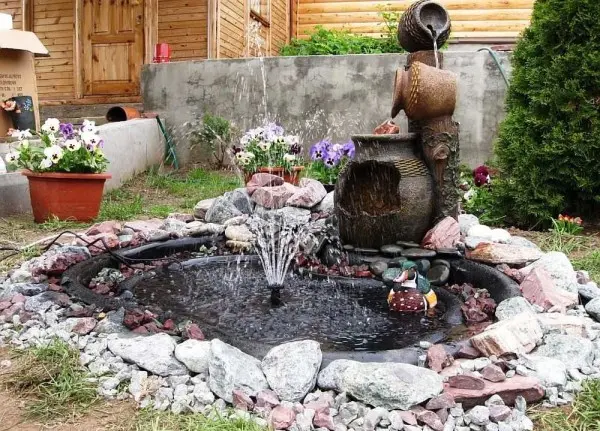
If you turn on fantasy, you can come up with very interesting compositions on this basis. For example, one of the options with a garden watering can. If your garden is decorated in a classic style, a watering can fountain is unlikely to fit well, but very much so in a country style.
As you can see, water is collected in the same vessel, hidden under pebbles, and from there it is pumped into a watering can with a small pump.
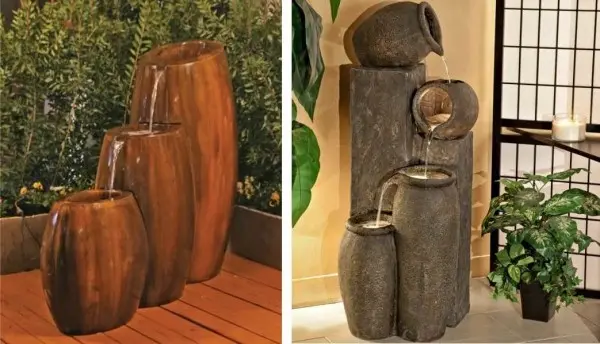
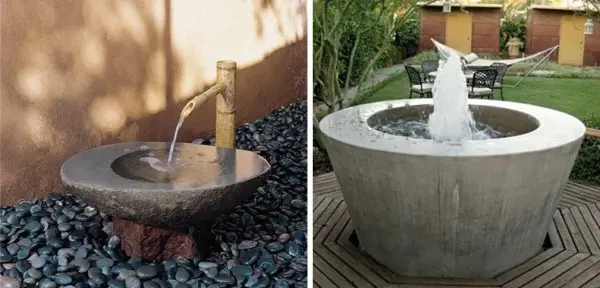
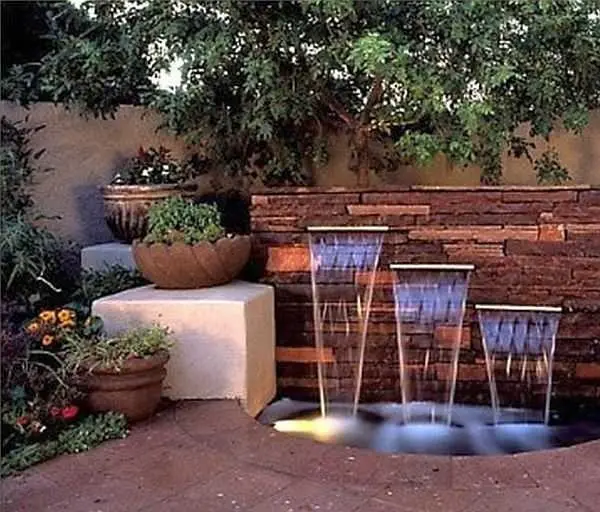
Near the wall
This is a classic option – a small or large trickle of water runs from the wall, flowing into the bowl. As you may have guessed, there is a pump in the bowl that supplies water through a pipe to the water outlet point. It’s simple if you know how. It’s just a matter of implementation and decoration.
In order for the pump to float, it is screwed to some kind of heavy plate. At least to the sidewalk, as long as the size fits. The case usually has corresponding mounting holes, but you should pay attention to this when choosing.
If you plan to do something similar near the wall of the house or fence, take care of its waterproofing. Even if the water does not flow down the wall, splashes will fall on it and the humidity will be high. At a minimum, it is necessary to coat several times with a hydrophobic composition. Try to find one that doesn’t change the color of the surface too much.
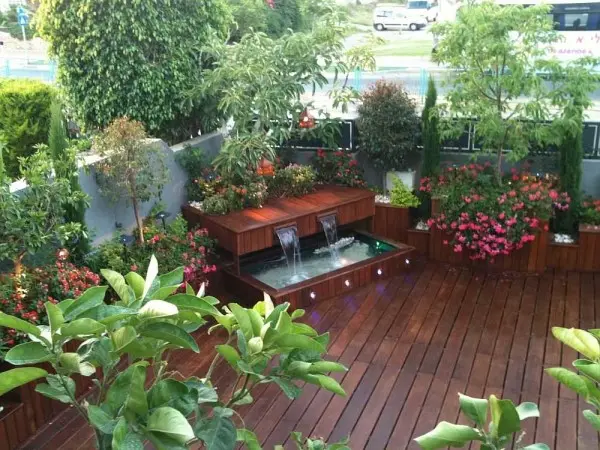
The design style may be different. At the top bowl make a flat surface from which water flows down the wall. The effect is very interesting. It is important that the surface from which the water falls is mirror-smooth and absolutely horizontal.
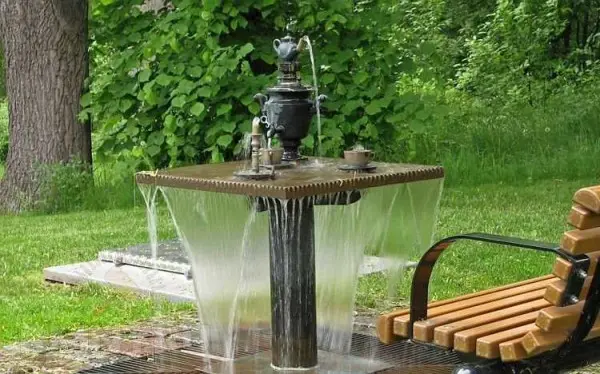
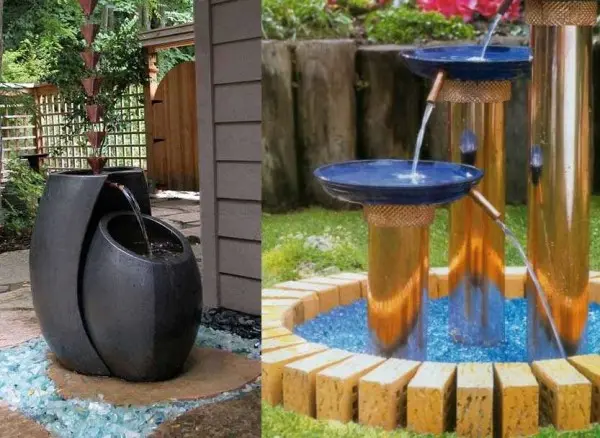
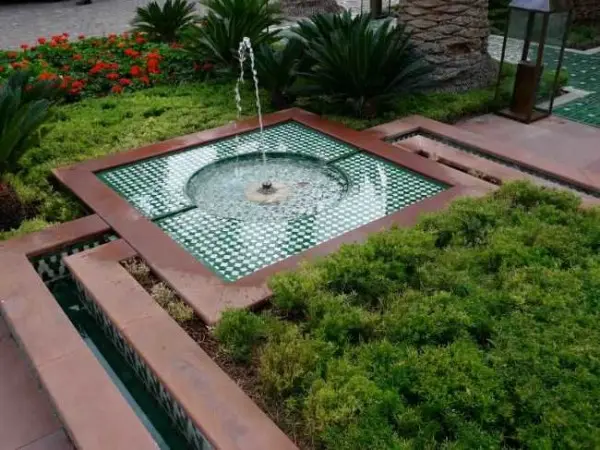
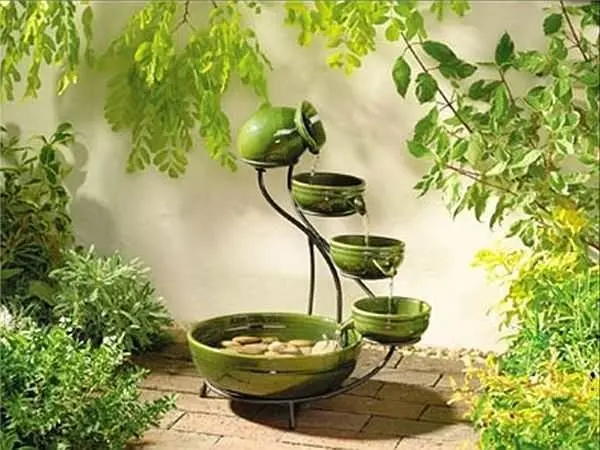
fountain cascade
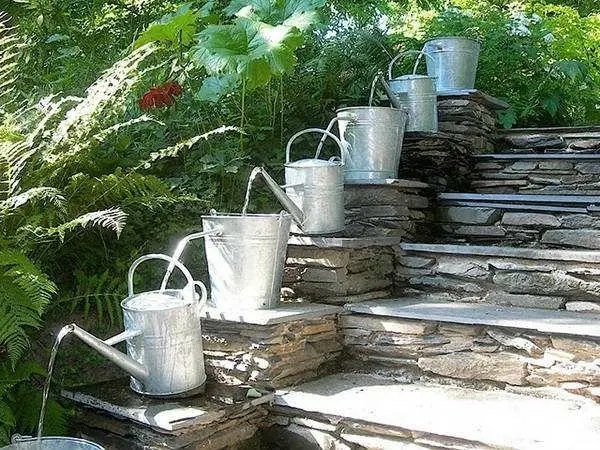
Iridescent jets look very interesting. Fountains of this type are called cascades or cascades. With this organization, water is poured from one bowl to another. In the case of a country or garden fountain, you can come up with interesting shapes. For example, a fountain made of buckets, watering cans, kettles and even old garden carts.
The principle of organizing such a cascade is simple: several vessels or bowls fixed one above the other so that a stream of water falls from one to another. Below is the largest tank, and which is the pump. It delivers water through a hose to the uppermost of the vessels.
How to make a fountain bowl
If you need a classic shape – a round, square or oval bowl with a jet of water – the easiest way is to find a suitable plastic tank. They are of different shapes and volumes – from tens of liters to several tons. They are mostly black and blue in color. Although it seems that for our purposes it is better to take blue, keep in mind that pollution is more visible against such a background. So that your fountain does not seem like a swamp, you will have to clean such a bowl often. From this point of view, it is more practical to take black – the water looks the same, but it needs to be washed less often.
The selected tank can either be buried flush with the ground level, or a side can be left. Most often, the sides are decorated with stone or pebbles. Depending on this, choose the depth of the pit. It is dug out in size a little more than a bowl.
You can read about how and with what you can decorate the site here.
When the required depth is reached, all stones-roots-snags are removed, the bottom is leveled, rammed, sand is added, with a layer of about 10 cm. It is well leveled and spilled – so that it compacts. Put a bowl on the prepared base, fill it with water. Sand or soil is poured into the gap between the walls of the bowl and the pit. Sand – if the soil is clayey, and the soil – if it drains normally. Having fallen asleep a small layer, it is compacted – carefully, with a pole or a deck, falling into the gap to be filled. But no matter how well you compact, be prepared for the fact that in a couple of weeks you will have to add more: the soil will sit down a few centimeters.
You can do without a plastic bowl. There are two other options: make the tank out of cast-in-situ concrete. In this case, you can make a fountain with sides. The process is long and costly, and even waterproofing needs to be taken care of.
The cheapest option is to dig a pit and lay it out with a film. In principle, any high-density polyethylene will do, but it will last a year, maybe two. Then she starts to let the water through. Special films for pools are more reliable in this regard, but they cost decent money, but they can be used for years. The manufacturing technology of such a bowl for the fountain is captured in the photo.
The first stage is digging a pit and leveling the walls. After the required shape and dimensions are reached, the horizontal platforms are leveled and covered with a layer of sand. It will protect the film from possible damage.
We lay the film in the finished pit. Inside, it should lie without tension, freely. Its edges are covered with soil, pressed with boulders. To prevent the germination of plant roots through the film, it is not advisable to spread geotextiles under it. This non-woven fabric is very tear-resistant. It is used when laying roads so that the soil is not crushed and trees do not sprout. So she protect the fountain without difficulty.
Boulders are laid out on the laid out film. If the pit is stepped, boulders should lie on each step. When the design of the bowl is almost completed, the pump is placed. The bowl is filled with water and tested – and the bowl for tightness and pump performance.
Actually, that’s all, if the electricity is connected, you can start the fountain.
Photo design ideas