


Contents
Breakfast in the open air is a good remedy for apathy. If you also want to improve your mental health in such a pleasant way, we advise you to build a barbecue made of stone with your own hands. Such structures can withstand moisture and excessively high temperatures better than metal ones.
Features
The quality of the product depends on the physical properties of the raw material. That is why, when choosing between flexible metal and refractory bricks, the most scrupulous consumers prefer the latter material. Its main advantage is its good heat capacity, which contributes to uniform heat treatment of products. And due to the large space for the brazier, it is possible to cook several dishes at the same time.

Good fire resistance indicators make it possible to attach stone structures to residential buildings. At the same time, the probability of fires does not exceed 3%. When installing smoke channels in the thickness of high-strength walls, stationary devices are used in fully enclosed gazebos. Unlike prefabricated structures made of 1,5 mm steel, they are characterized by:
- a long period of use in the open air – from 25 to 40 years;
- better resistance to chemical corrosion;
- increased strength;
- wide range of equipment that simplifies cooking outside the home;
- presentable look.
Of the minuses, one can only name the high cost of refractory bricks and the obligatory laying of a foundation for a stone brazier. Such devices cannot be moved along the veranda, and transported even more so. But if you need a barbecue oven for long-term use in the country, you should not refuse to invest in your own comfort.
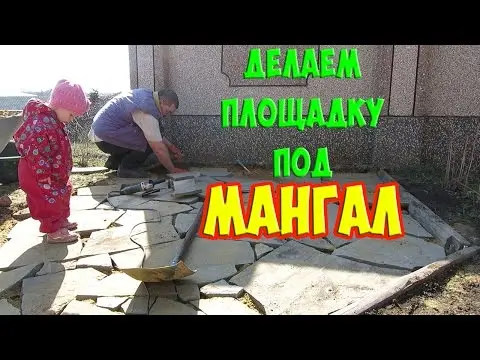
Video “How to make a barbecue area”
From this video you will learn how to build a barbecue area with your own hands.
What to build from
Fire-resistant products that can withstand up to 1000 ° C are useful in work. They heat up faster and release heat more slowly, making it possible to prepare a set meal in 20 minutes. Low thermal conductivity ensures the safe use of structures near the house, and good density eliminates the need for frequent repairs.
To lay out the basement row, you will need corundum lightweight bricks. They show greater resistance to aggressive environments than silicate ones. And if we talk exclusively about the accumulation of liquid, this figure is 15%, which is 3 times less than that of hollow materials.
For interior decoration, you need a building brick that shows good compressive strength. Facing the brazier is unthinkable without porcelain stoneware. When laying the foundation, you will need sand, M-300 cement, boards treated with antiseptics, reinforcing mesh and roofing felt for high-quality waterproofing of the base.
With careful laying, stone aggregates do not need decoration. But if it is important for the owners to emphasize the refined style of the building, they should be equipped with home-made installations for better ignition of coals. We are talking about steel products in the form of a fan.
Order of work
First you need to choose a place for the construction of the object. This may be a plot near the gazebo or a specially equipped area on the terrace. It is desirable that there are no outbuildings and dry trees nearby. The optimal distance from the main building is 7–8 m.
Lovers of a relaxing holiday in the bosom of nature can advise the area near the pond. In order for coals and chips to flare up faster, it is better to build a brazier on a hill, from where it is especially pleasant to admire the beauties of the dacha cooperative. When using it indoors, furniture and household appliances are installed at a distance of 3–4 m from the hearth zone.
From the tools you will need shovels, a chisel, a sledgehammer, a building level and a grinder. If you need to speed up the work – a construction mixer, or better a concrete mixer. A sectional drawing of the brazier is made at the design stage of the object. The image should detail the dimensions and location of each structural element, from support pieces to metal brackets. The development of the plan involves an analysis of the height and width of the future device.
In the first case, the optimal indicator is 85 cm, and in the second, 35 cm is enough. And in order to leave at least a small margin of space, the width of the brazier should not be more than 45 cm.

Basis
For a simple design, a natural stone base on a concrete base is required. If the estimated height of the brazier is 100 cm, the foundation will have to be laid at a depth of 1,46 m. The level of soil freezing depends on its composition. For example, if we are talking about gravelly soil, this figure often exceeds 2 m. In loam conditions, from 0,66 to 1,54 m in different regions of the country. Any deviation from the norm is fraught with swelling of the frozen earth.
To avoid construction errors, you need to act in stages:
- Dig a trench with a diameter of 125 cm.
- Fill the bottom with gravel and sand.
- Tamp the contents with a vibrating plate.
- Pour concrete.
- Install reinforcing mesh.
- Prepare a layer of waterproofing from red clay.
Further work is possible only after the concrete has completely hardened – after 10 days.

plinth
The foot on the foundation may contain niches for storing fuel and cutting products. If the brazier is planned to be used daily, it is better to prefer stationary structures with stands for cauldrons and sinks. Ideally, the height of the plinth, that is, the distance from the floor to the kitchen surface, corresponds to the growth of the owners, and the width does not exceed 40 cm. The length can vary from 90 to 120 cm. The depth is 13 cm.
It is important to lay out the first row according to the level, using refractory fillers. At the next stage, proceed to the device of the second. Solid rows are laid out to the level of the fire. The grooves for the grille are the side surfaces of the plinth. They are supposed to be filled with minor protrusions.
Hearth
As soon as the height of the masonry reaches the ideal mark, you can proceed to the device of the bottom. To do this, you need 3 bricks, which are important to lay strictly in the center of the structure. The gaps between the materials should be filled with crushed gravel, and only then the bars and gratings should be installed.
The wood chips will ignite on a grid with a tripod mounted on the top row of bricks. This will certainly contribute to different degrees of roasting meat in any weather. Fuel should be harvested from birch or ash wood. Larch is not suitable for these purposes, as it releases essential oils. They give the fish a specific smell. Briquettes are needed for long burning.
extract
Externally, the device resembles a dome in the form of a prism or hemisphere. In size, it is about 40% larger than the main structure. This is important for efficient removal of combustion products. The main elements of the hood are a fan and a pipe 1,5 m long. The optimal distance between the upper point of the metal product and the ground is 3 m. With lower rates, good traction, and hence quick cooking, is out of the question.
To prevent fat from settling on the walls of the structure, you need to install a frame with a replaceable container. The spark arrester at the top of the pipe contributes to better smoke removal.
To make the hood with your hands, you need metal sheets 3 mm thick, bolts and corners with a section of 30×30 mm.