


Contents
Amphipods are artificial baits designed for catching zander in the winter. Its name has nothing to do with the similarly named freshwater crustacean. The name of the bait is associated with its position in the water column.
This is achieved due to its asymmetric suspension position. Its advantage is the nature of the game, which is very diverse. Moreover, the game turns out to be wide and sweeping: in the process of posting, the amphipod moves in a circle with a radius of up to 1 meter. This makes it possible to catch a relatively large area in one pass of the bait. Despite this, the “amokoplav” has its drawbacks. One of them is that it does not have a lower tee. Although these minor disadvantages can be easily solved in practice, which is what many fishermen do.
What is an amphipod?
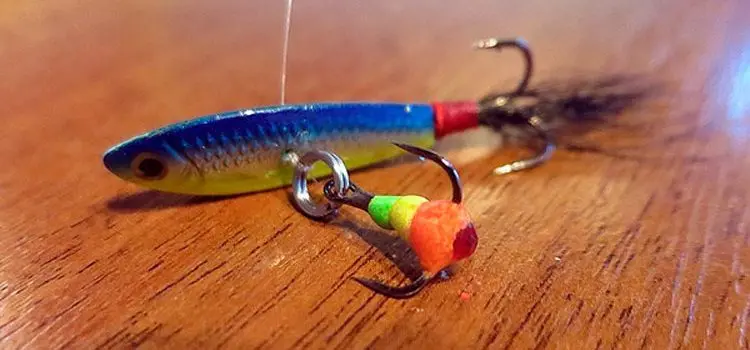
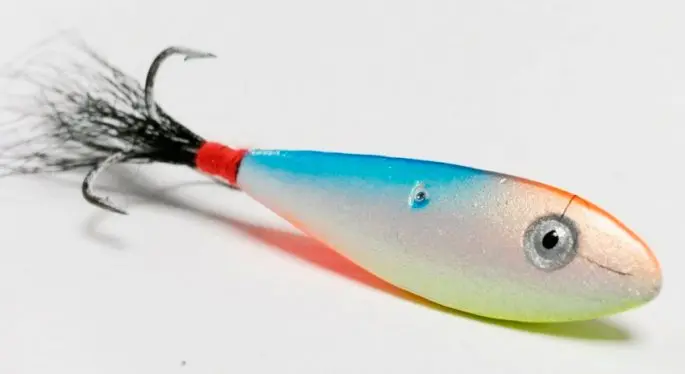
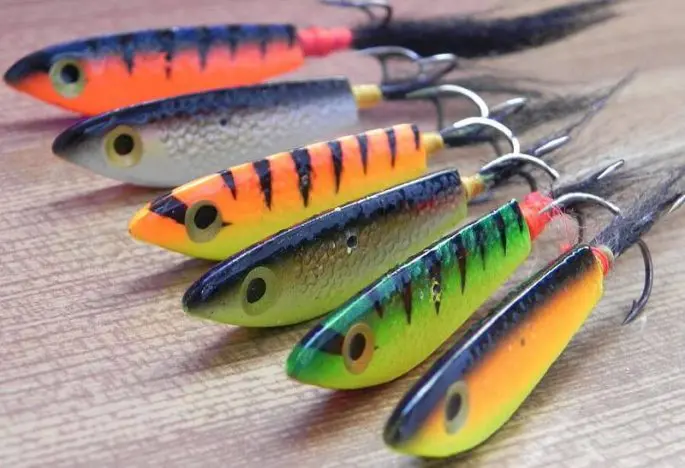
“Bokoplav” is a super catchy bait with a displaced center of gravity, which determines its position in the water column. The bait has fixed and removable triple hooks. The amphipod is intended for catching predatory fish species in the winter. It can be perch, zander, pike, etc.
Design features of the bait
“Bokoplav”, as well as the balancer, is considered to be a spinner that is designed to play in a horizontal plane, with a vertical suspension. The bait is characterized by the presence of a flat body with sides of various thicknesses. This factor also introduces certain nuances into the game of the bait: it periodically falls on its side during the wiring process.
In the center of the bait there is a through hole through which the fishing line passes and to which the tee is attached. To stabilize the position, a tee is used here instead of a ponytail, disguised with a woolen tassel. The bait is also different in that it does not have a hook in the front part.
The play of the bait is characterized as smooth and uniform, which is similar to the play of a flat balancer. When moving upwards, when the gear is pulled up, the amphipod makes powerful oscillatory movements in the horizontal plane. Such aggressive movements of the bait and “turn on” the predator.
Amphipod wiring technique
The 8×8 technique is taken as the basis for the wiring of this bait. This is a process of eight strokes followed by eight second pauses. It looks like this:
- The bait is lowered into the hole and set at a distance of 15-20 cm from the bottom.
- After that, the bait smoothly rises to a height of 50 cm, after which the movement stops, and the rod abruptly returns to its original position.
- Putting the fishing rod in its original position, wait about 8 seconds, after which the movement is repeated. There should be no more than eight movements, since then everything is pointless, as practice shows.
Catching pike perch on amphipod. How to play amphipod.
If a predator is standing next to the hole, then he will definitely try to attack the bait. At the same time, the bite may not be as powerful as is sometimes expected. If there was a bite, then you can continue to be near this hole and play with bait. In this case, perseverance and patience should be shown.
Pike perch fishing on a side float
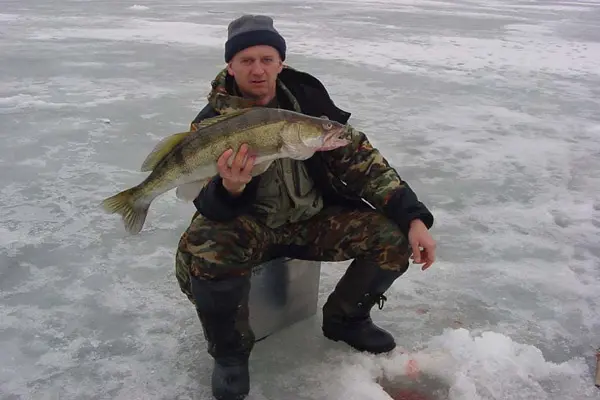
This lure is ideal for zander fishing in winter due to its attractive body. Pike perch quite often leave their shelter in search of small fish. When he is on the hunt, he is necessarily attracted by such movements of the bait, and if he is no longer hungry, then no one can force the pike perch to covet artificial bait.
In large water bodies, such as a reservoir, pike perch disperse throughout the entire water area in winter, so it does not go in flocks and should not particularly count on this. Before starting fishing, it is better to decide on a promising place and only then, start catching it. During this period, pike perch is able to sort out food and the game of bait should be taken very seriously. You should always pay attention to the wiring speed: it should be minimal. Naturally, the bait cannot be taken far to the side, so it will always be within this hole.
Most anglers are looking for a fish site by randomly punching holes, determining the depth and, as a result, determining the bottom topography. In this case, holes and brows are needed. These are the places where the predator prefers to be.
It does not make sense to stop for a long time near each hole: it is enough to apply the 8×8 formula to catch each hole. At the moments of pauses, you can animate the movements of the bait a little, no more. As a rule, it is at the moments of pauses that predator attacks on potential prey are carried out.
As practice shows, the amphipod is exactly the bait that can interest any predator with its unique game.
Lures and baits for flashing pikeperch
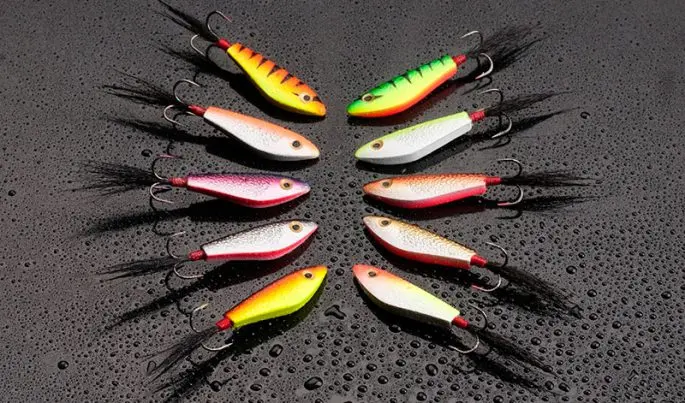
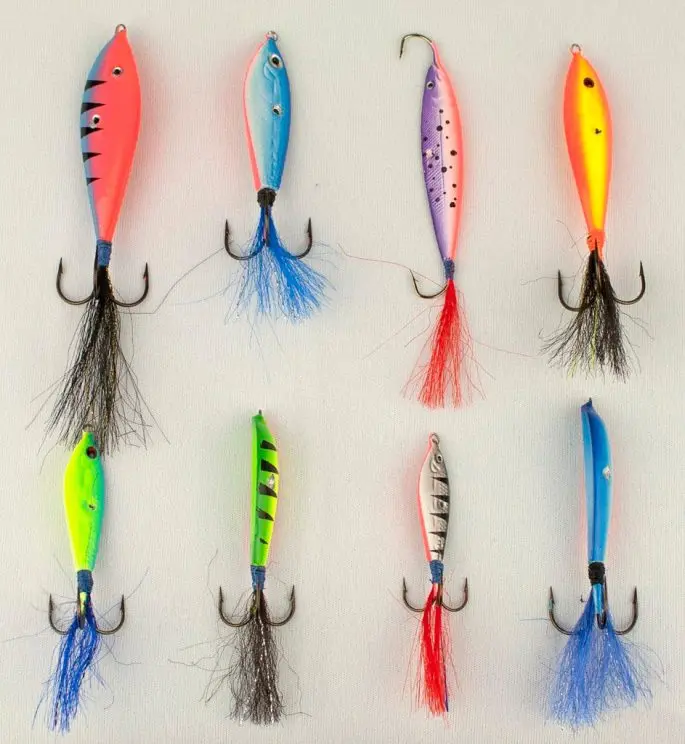
To make the bait more interesting for the fish, it is enough to place some additional element on it that would additionally attract the fish.
It can be:
- a small piece of fabric;
- several woolen threads;
- a piece of cambric;
- a piece of styrofoam of any color.
Natural elements can also be used, such as a fish eye, a fish tail or small fish. In this case, much depends on the imagination of the angler.
Do-it-yourself amphipod for zander
Many anglers spend a significant amount of their personal time making lures for catching fish, both in winter and summer. Why not? After all, it is interesting, and fishing is much cheaper.
First production option
This method is considered one of the simplest and most affordable, both in time and in materials.
To make a “booplav” you will need:
- A piece of foam or foam rubber.
- Lead or tungsten pellet with a diameter of about 4 mm.
- Hooks from #1 to #5.
Manufacturing technology:
- First of all, a blank is cut out of foam or foam rubber, 2-3 mm thick and having a longitudinal shape.
- The workpiece is put on a hook along the entire length.
- After a few millimeters, the thread is pulled and cut off, leaving a tip about 5 mm long. These will be the legs of the crustacean.
So, the mormyshka is ready and you can go to the pond to catch fish.
How to make amphipod wasp – do-it-yourself winter bait for pike perch
The second variant of manufacturing
You will need some materials and tools. For example:
- Lead.
- A piece of wood.
- Styrofoam or other suitable material.
- Scissors.
- Ruler.
- Adhesive tape (adhesive tape).
- Alabaster.
- Knife.
- Tee.
- Hooks.
- Zelenka
- Paint.
- Brush for painting and other components.
Step by step production.
- At the initial stage, they are engaged in the manufacture of a bait layout. 1.1. For this, a material such as foam is suitable. This is where the piece is cut from. The better the workpiece is prepared, the better the finished product will be. 1.2. A piece of wooden block is taken and glued on all sides with adhesive tape. It will serve as a kind of formwork for further operations. In this case, it is necessary to check that the height of the formwork is at least 20 mm.
- A solution of alabaster is prepared and poured into this mold.
- It should be remembered that alabaster quickly hardens, therefore, as soon as the solution is leveled, the workpiece is half immersed in it. To make it easier to pull out the workpiece, it is lubricated with a soapy composition. The form will harden in 15-20 minutes, after which the work continues in the same way.
- Picking up a knife, you should create 2 recesses that will serve as a kind of guide for the second half of the part.
- The entire surface of the mold, together with the workpiece, is treated with a soapy solution.
- Again, with the help of adhesive tape, formwork is made, as in the first case, after which it is poured with alabaster solution.
- When the alabaster hardens, the two parts of the mold are separated and the workpiece is pulled out. Using a knife, make holes for pouring: there should be two of them. Air must escape through one of the holes when lead is poured into the other hole. After that, the mold for pouring is left to dry: it should dry well. This process should not be forced, as the form will lose its strength. Somewhere, in a day, you can proceed to further operations.
- Alabaster has a low coefficient of thermal conductivity, so the castings are of high quality. If the form does not dry well, then the lead can seem to shoot out of the form. In this regard, it is better not to rush and let it dry as it should.
- To make the body of the “amphibian” turn out to be two-color, one of the halves of the form can be painted green, for example, with green paint. Such models are considered more attractive to fish.
- The next step is to determine the center of gravity. The bait should be in the water column with the nose slightly raised, and one of the ribs should be higher than the other. With this calculation, a hole for fastening is drilled.
- In conclusion, the bait is given an aesthetic appearance by painting. 11.1. Before painting, the part is carefully processed if there are burrs or some manufacturing costs, and only after that the surface of the bait is primed. 11.2. After the primer dries, proceed to the final stage – painting. There are a lot of painting options, but one should take into account the fact that pike perch have their own color preferences. Quite often, the body of the bait is painted in a bright lemon color.
- There remains one more, no less important operation – this is the formation of the tail and the fastening of the tee. On this, we can assume that the bait is ready for use.
How to knit amphipods?
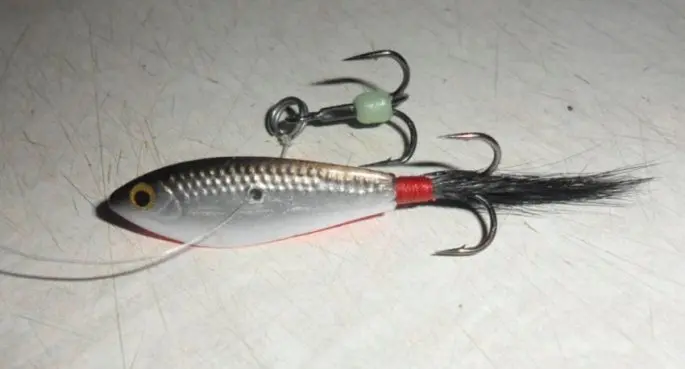
It is worth focusing on two options for attaching the “amphibian”. Here they are:
- Fastening from the tackle side, when a monofilament fishing line is threaded into a hole where there is a wide plane, and then a tee is attached.
- Fastening, when a corkscrew is installed on a monofilament line, a tee is attached and another corkscrew is placed. The end of the line is wound through the body of the lure and is attached to the tee, just like on the mormyshka.
Is it possible to buy a “amphibian” for pike perch?
In our time, it is realistic to purchase any bait, including the “amphibian”, if only there was something for it. It is enough to visit the nearest store that sells fishing accessories and you can become the owner of this super catchy bait. Alternatively, you can “climb” on the Internet and find a suitable site that offers various baits for catching fish, both in summer and in winter. As a rule, there is a much larger selection on the Internet, and the prices are not so “biting”. There is another possibility – this is a visit to the market, where you can buy not a bad piece of handicraft. Such an instance may cost more, but there is still a guarantee that it will be catchy. But this is on condition that the bait is purchased from a well-known master. It is better not to buy from a random person.
Winter fishing is not only the right choice of gear, lures, as well as promising places, but also a share of luck. One manages to get to the fish site the first time, while the other has to drill a dozen holes, or even more. Winter fishing is not only recreation, but also hard, up to a sweat, work. Despite this, none of the anglers have yet given up such hard work. Water bodies attract them like a magnet.
“Bokoplav” (with your own hands)