Contents
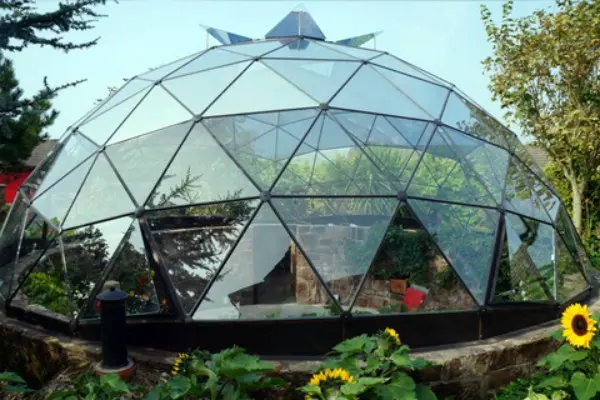
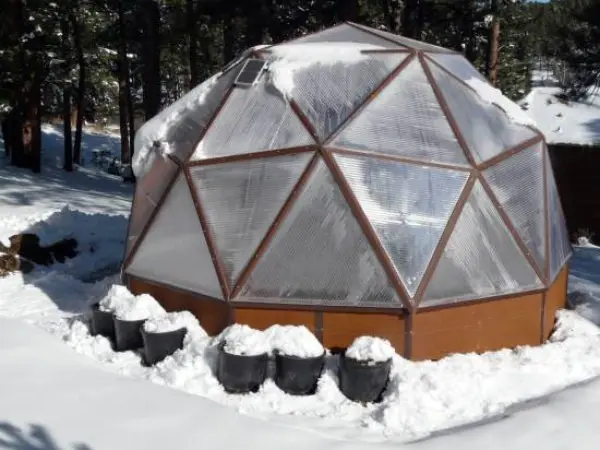
A domed greenhouse, in addition to its functionality, can become a real decoration of a summer cottage. A transparent hemisphere with a mesh frame looks more like a decorative gazebo than a greenhouse built to grow vegetables. Spectacular, functional, economical, especially if you build it yourself, it has a number of advantages over its counterparts.
Description of the greenhouse
A geodesic or domed greenhouse has the shape of a hemisphere assembled from triangular elements. The frame can be made of metal, wood or plastic. Of course, a metal structure, especially if treated with anti-corrosion agents, can last longer than other options. The wooden frame is easy to assemble with your own hands, it is environmentally friendly and durable, although it also requires treatment with protective agents for long-term operation. Plastic is light, durable, easy to use, but its service life (especially with year-round use) is unlikely to be longer than that of metal, and the high cost also does not add points to it.
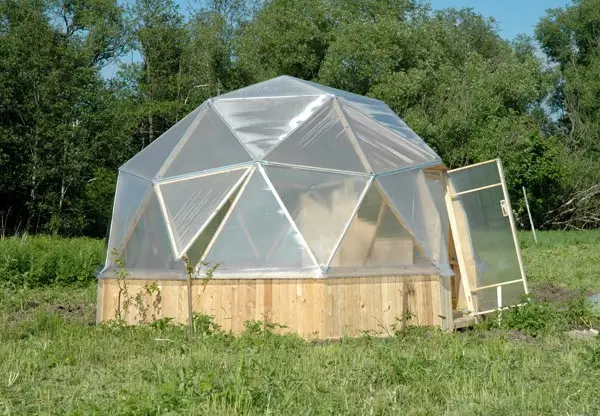
For the covering material take glass, polyethylene film or polycarbonate. Glass is the most transparent material, but it is heavy, fragile and expensive. The film is often used for seasonal greenhouses, it is quite transparent and easy to work with. But polycarbonate, with a similar transparency and, perhaps, a little more weight, keeps heat much better. High thermal insulation, lack of response to changes in air temperature, sufficient transparency, ease of installation have made polycarbonate the most popular cover material for greenhouses, especially those built by oneself.
Benefits of a dome design
It is the dome design that provides the plants with the greatest amount of light, since it penetrates from all sides. The spherical shape allows you to create the desired microclimate, retains warm air longer without special heating, and allows its circulation inside the greenhouse. The sun heats the soil during the day, it gives off heat to the air. The air heated during the day is collected under the dome, cooling down, it falls down again. The frame heats up during the day and also gives off heat to the plants. In the center of such a greenhouse, a container with water is installed, which also accumulates heat, it can be used for irrigation.
Dome greenhouses are quite mobile – the segments of which they consist are easily assembled and disassembled. This design requires much less cover material compared to others.
The segmented structure is seismic resistant. Round shape provides strength and stability. With year-round use, you do not need to be afraid that the snow will break through the roof. And even the strongest wind will not be able to move it or turn it over, so hemispherical greenhouses are most often used in the steppe regions, where a strong wind can have devastating consequences.
Video “Greenhouse-dome: advantages and features”
This video clearly demonstrates what features a dome-shaped greenhouse structure has.
Disadvantages
Such a wonderful design does not have too many flaws. It is necessary to make a rather large greenhouse, more precisely, to take a large diameter of the sphere, so that it is convenient to work inside, straightening to its full height. In addition, it is problematic to arrange racks for multi-tiered beds, most likely. You will have to be content with one level, and tall plants should be placed closer to the middle, and low ones around the perimeter.
It is possible to assemble a geodesic greenhouse with your own hands, but it is difficult to independently calculate the dimensions of all elements and build drawings. Not everyone has the opportunity to build frame frames at home. You can, of course, order the drawings to specialists, as well as the manufacture of segments, but such a step will significantly increase the cost of the entire product. Perhaps this, along with the forced space savings, explains why such greenhouses are not very common in our summer cottages.
Another difficulty when assembling a greenhouse with your own hands is that such a large number of joints must be made with a high degree of accuracy in order to ensure the necessary sealing of the building.
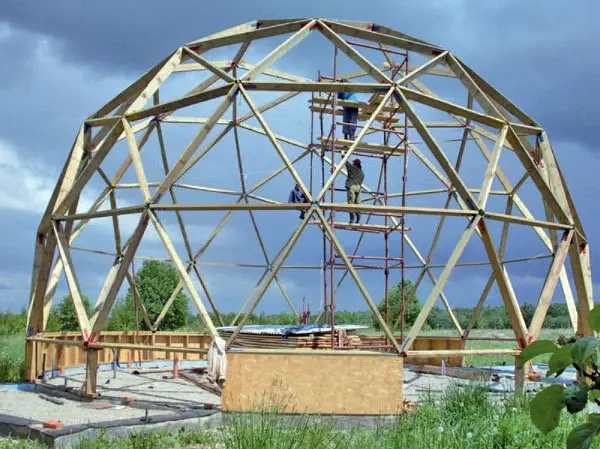
If you wish, you can buy a ready-made greenhouse, collect it on the site, grow berries and vegetables in it, or turn it into a winter garden and a greenhouse for exotic flowers.
How to build
If the summer resident nevertheless decides to create a spherical greenhouse with his own hands, he will have to start with calculations, drawing up drawings, selecting materials, tools and free time. You will have to acquire, in addition to metal beams or wooden bars (or maybe plastic profiles) of the right size and material for the planes, also steel strips, self-tapping screws, washers and screws. You will need to purchase foil to cover the north side with it from the inside, prepare a tape measure, a level, a shovel.
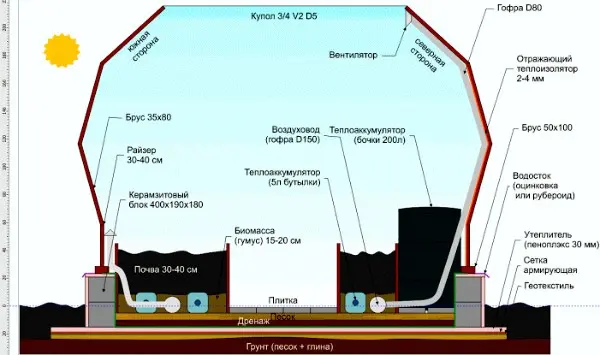
Draft project of a domed greenhouse
Calculation
It is necessary to calculate not only the total area and height of the future greenhouse, but also separately the surface area of the dome itself, the number of ribs and their exact length, intercostal angles, the type and number of connecting elements. All these calculations are based on the desired area, and the height is determined by the diameter. Moreover, it must be remembered that the area of uXNUMXbuXNUMXbthe finished structure will be less than the area of uXNUMXbuXNUMXbthe circle, since the perimeter of the base will be a polygon, not a circle.
There are separate formulas for calculating all these quantities. But you can avoid this painstaking work with numbers by resorting to the help of a special computer program – a geodetic calculator.
If the summer resident has decided on the desired area and height, then the program will calculate not only the number of segments (triangles), but also their sizes, even build a multi-colored drawing that can be used as a guide in the manufacture and assembly of your own hands.
The best option for a domed greenhouse with a polycarbonate coating is a structure where the height is equal to half the diameter of the circle into which the base is inscribed. So with a diameter of 4 m, a dome height of 2 m, the frame will consist of 35 triangles with an edge of 1,23 m or 30 triangles with an edge of 1,09 m.
Materials
Knowing the number and dimensions of the parts, you can begin to manufacture them, paying special attention to accuracy, because the success of the assembly and the degree of sealing of the entire structure depend on it.
Connecting elements are best made of galvanized materials, as they are resistant to corrosion. If a tree is chosen for the frame, then it is desirable to treat it with a special fire-retardant composition – this will increase its service life.
From steel with a thickness of one and a half to 2 mm, you need to cut strips, drill 7 holes in them at regular intervals for self-tapping screws. Then the strips are bent at an angle of 250 degrees so that there are 3 holes on one side and 4 on the other. To perform this work, you will need a vise, pliers and a template (so that the angle is the same). The edges of the cut steel strips must be filed.
Site preparation
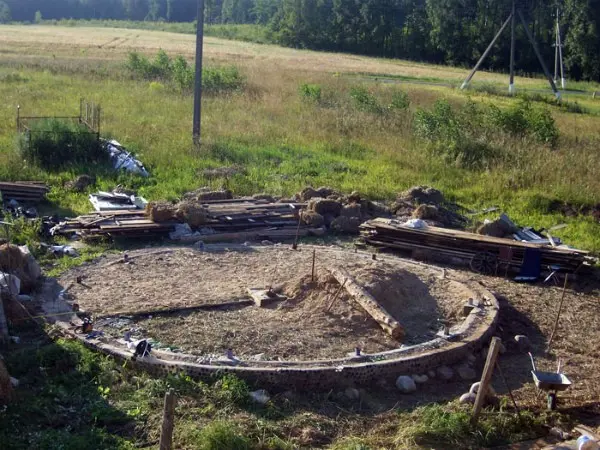
As with any greenhouse, a flat, unshaded place is chosen for the dome, it is cleared, and leveled if necessary. If the foundation is not planned, then the ground (the bottom of the future room) is covered with a protective material, it can be a non-woven fabric that will protect plants from pests and weeds. Before this, it is desirable to remove the layer of turf and lay it back upside down, that is, with the roots up. A layer of gravel is poured on top – this will be the base of the closed beds.
If you plan to equip a year-round greenhouse, then you should make a foundation.
If glass is chosen for the dome, then the whole structure will turn out to be very heavy, it is advisable to install it on a foundation or metal piles for stability and to prevent distortions. For the foundation, a trench is first dug out.
Assembling the frame
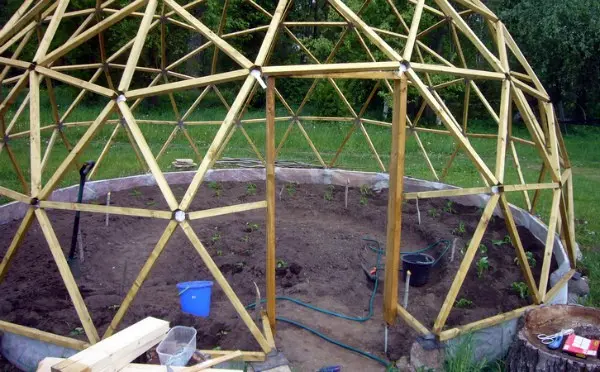
Assembling the frame with your own hands means connecting all its segments and fastening them with special connectors. You need to do this, guided by the scheme that the geodetic calculator issued.
Quadrangular elements are installed in the base, they are fixed on the ground (or foundation) with metal brackets. Then the triangles are assembled into pentagonal segments.
The whole structure is assembled by hand from the bottom up. First, the elements of the lower tier are fixed, then the elements of the next tier are attached to them. It is better to place steel strips on the inside so as not to damage the protective coating, although they are also attached from the outside.
Air vents are made in the upper part of the hemisphere, they can be equipped with an automatic opening and closing mechanism for ease of use.
Internal work
It is usually advised to close the northern part of the dome with foil, which will reflect the light, thereby returning it back inside the structure, directing it to a container of water installed in the middle. This container, such as a metal barrel, will heat up during the day, and then give off heat at night.
If the greenhouse is to be used in winter, pipes for heating are laid along the perimeter walls. When natural air movement is not enough, you can install a conventional electric fan.
Video “Construction of a domed greenhouse-vegetaria”
In this video, the design developers tell about the features of the construction of a domed greenhouse.


