Contents
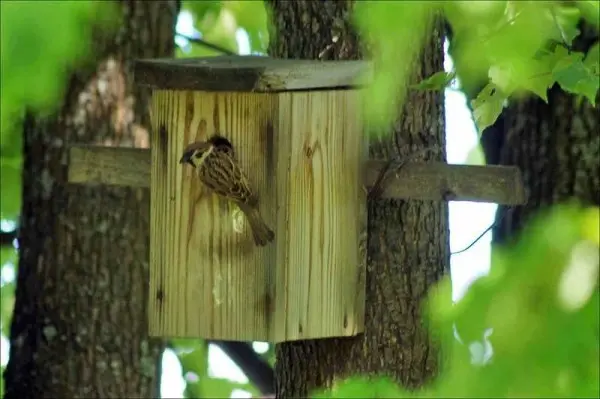
Attracting birds to the site is both useful and enjoyable. It is useful because they destroy pests, it is pleasant to listen to their singing and observe the behavior of birds. Therefore, many come up with the idea – to build a birdhouse with their own hands. People over 40 years old, while they can remember their school years: at the lessons of labor, the boys made houses for birds. But not only site owners make birdhouses. Often residents of apartment buildings hang them on trees near the house, on balconies and loggias.
What to make
The answer is unequivocal – from wood, and hardwood: conifers are too resinous. Resin can stain the plumage, leading to the death of the bird. Do not use plywood, chipboard or OSB. Rarely does anyone settle in such birdhouses: glue and binders scare away birds. For the same reason, we assemble and fasten blanks only on nails or screws, we do not use glue.
Most often, birdhouses are made from boards. The thickness of the boards is at least 20 mm. This thickness is sufficient to maintain a stable temperature inside, which is important when hatching chicks. Moreover, the boards are needed unplaned, in any case, the inner surface should be rough. The front part under the notch is also specially scratched: along these notches, chicks and birds rise to the notch.
To prevent cracking of the boards during assembly, we pre-drill holes for the screws. The diameter is slightly smaller than the diameter of the screw.
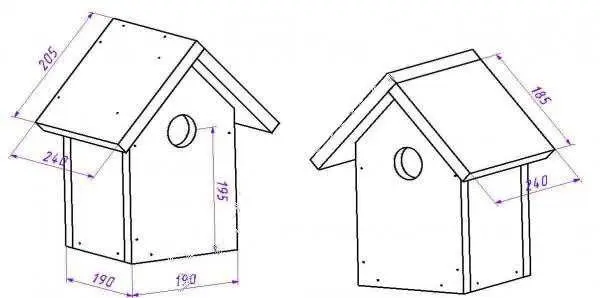
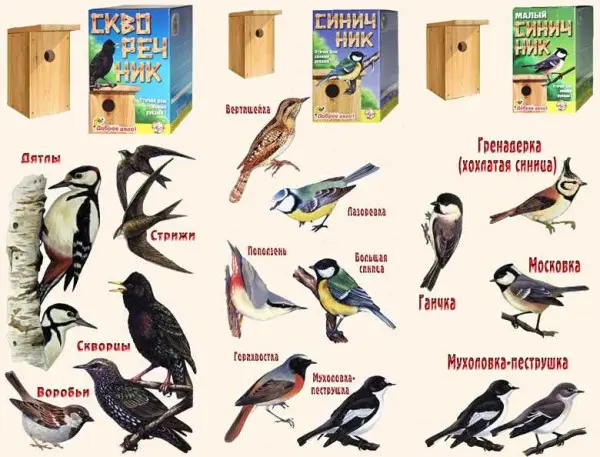
Sizes of birdhouses for different types of birds
To attract different types of birds, the size of the house should change. The proportions of the “body” itself and the letok change mainly. The task is to create more familiar nesting conditions for this species.
| bird species | Bottom dimensions | Birdhouse height | Notch dimensions | Note |
|---|---|---|---|---|
| Starlings | 10 * 10 cm | 30-40 see | about 5 cm | letok is preferable to a round shape |
| Sinichnik – tits, flycatchers, redstarts, sparrows, pygmy owls | 10-12 see | 25-30 see | 30-35 mm | notch round |
| Small titmouse or flycatcher (flycatcher, redstart) | 10 * 8 cm | 25-30 see | 30 mm | |
| Semi-duplianka | 10 * 8 cm | 20 см | height 33-50 mm across the entire width of the wall | letok – a longitudinal slot in the entire width of the front wall |
As you can see from the table, basically only the height changes. The width remains more or less stable. It’s not worth making birdhouses anymore. They will stimulate to lay more eggs, and the birds will not be able to fully feed a large number of chicks, as a result, the offspring will be weak and, most likely, will die.
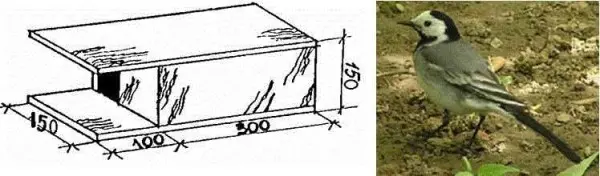
If you want to attract wagtails, make a birdhouse laid on its side: it will be 10-12 cm high and 35-40 cm wide, with the same small entrance located approximately in the middle. Wagtails have weak legs, and they cannot climb the high wall to the entrance. Therefore, such a choice of nesting. It is also desirable to make a trapik about 10 cm wide in front of the entrance in the “wag-worm” so that they can enter “on foot”.
Some explanation is required for the half-hollow. Some birds are used to nesting not in hollows, but in depressions between branches. In a completely closed artificial nesting place, they rarely settle. If you want to attract, for example, a gray flycatcher, make it a small box in which the notch goes the entire width of the front wall.
Just keep in mind that some types of squirrels also like to settle in such houses.
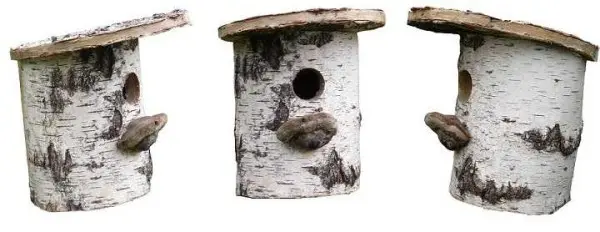
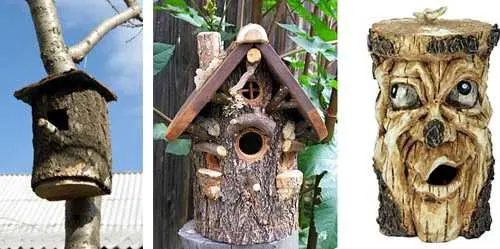
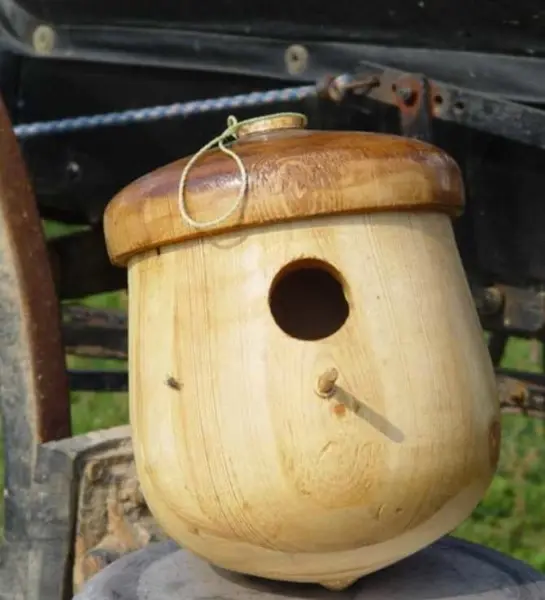
There is another nesting place that birds often like more – the nest box. This is a birdhouse, hollowed out from a piece of log. Often a dried tree is sawn into logs of a suitable size, turning it into apartments for birds. The height and diameter are selected based on the dimensions that were indicated for an ordinary birdhouse. The bottom and roof in the hollow are made from a piece of board.
If the notch in the birdhouse is small, the lid is made removable. This is necessary in order to be able to process the insides from parasites. Sometimes it happens: birds live for several years in a row, and then they stop settling. It’s just parasites growing inside. After removing the lid and throwing out the old nesting place, the birdhouse is scalded with boiling water. This is enough. It can also be treated inside with a weak solution of potassium permanganate (slightly pinkish).
Security
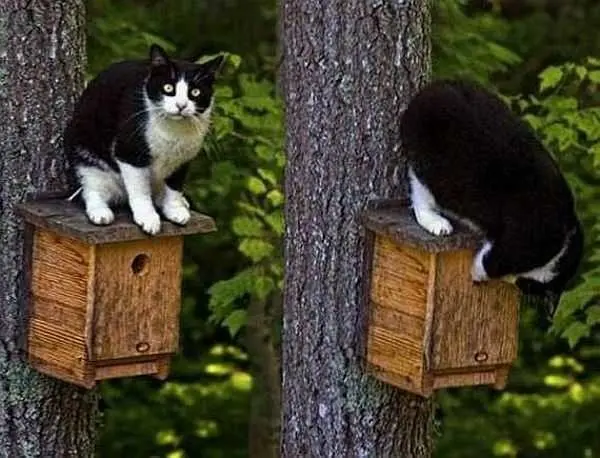
It’s a shame and a pity when the nests of birds are ruined. Cats are mainly engaged in this, and even woodpeckers. Therefore, when you make a birdhouse with your own hands, increase the overhang of the roof. In almost all drawings, it is drawn 5 cm long. In order to protect the birdhouse from the cat, it is necessary to make sure that he cannot reach the notch. To do this, the roof should protrude by at least 7 cm, and it is better to add a couple more – for large specimens. This ledge will also protect from slanting rain: the chances that the chicks will get wet becomes even less.
Another option is to put nails on the lid. The cat is unlikely to get hurt, but it won’t work to sit comfortably – they won’t give nails.
There are several ways to protect chicks from woodpeckers:
- beat the notch with tin:
- drive a few nails around the notch;
- nail an overlay made of wood on the notch area, the fibers of which run horizontally.
All this will prevent the woodpecker from expanding the notch and getting to the eggs or chicks. The last trick – the overlay – will also complicate the task for the cat: it is more difficult to reach the chick through a long entrance.
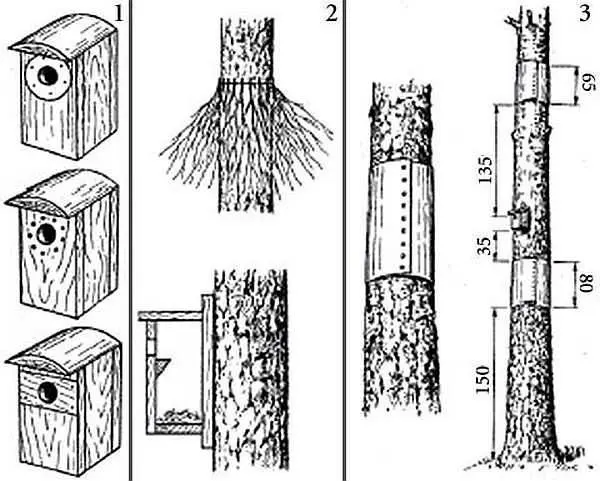
They are still saved from cats and possible invaders with the help of protective belts. They are made either from tin strips or from “brooms”. You will understand everything by looking at the picture. Please note that the distances must be maintained within an accuracy of 3-4 cm. Then the animals will not be able to jump over the protective belts. There should not be knots, feeders and other possible supports between them and the birdhouse.
Where to hang
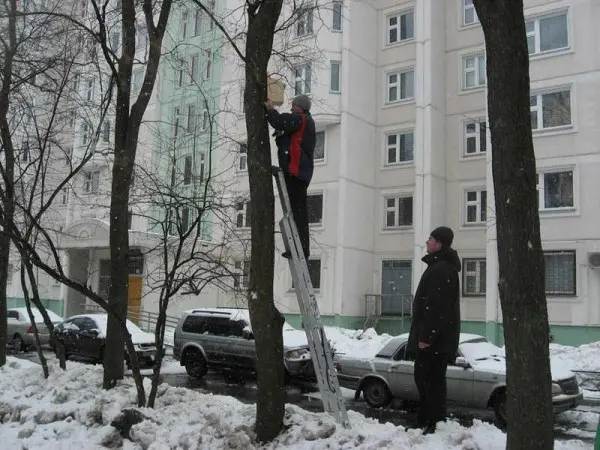
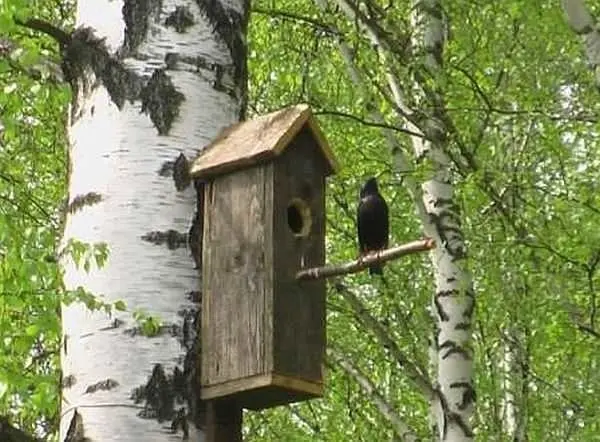
Where to hang a birdhouse is also a science. If they gathered to hoist on a tree, then at a height of at least 2,5-3 meters. There should not be paths or busy metas near the selected tree – a well, a bench, etc.
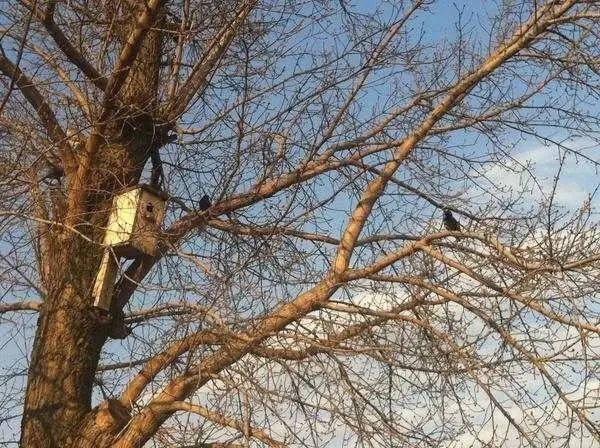
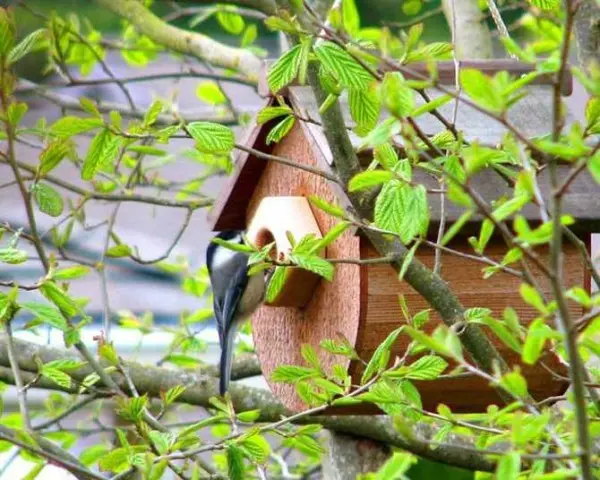
When choosing a place on a tree, keep in mind that there should not be large branches in front of the entrance: the approach should be free. At the same time, you need to deploy it so that the “window” looks south. All this increases the chances that tenants will settle in your birdhouse.
Another point: you need to tie or nail so that the “house” is tilted slightly forward. So it will be easier for the chicks to get out, and less rain will clog.
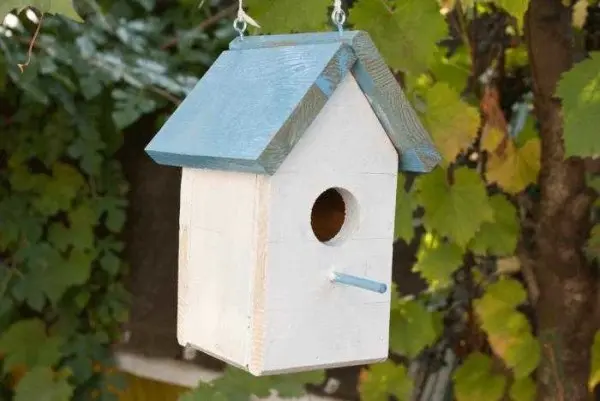
How to make a birdhouse with your own hands: photo report
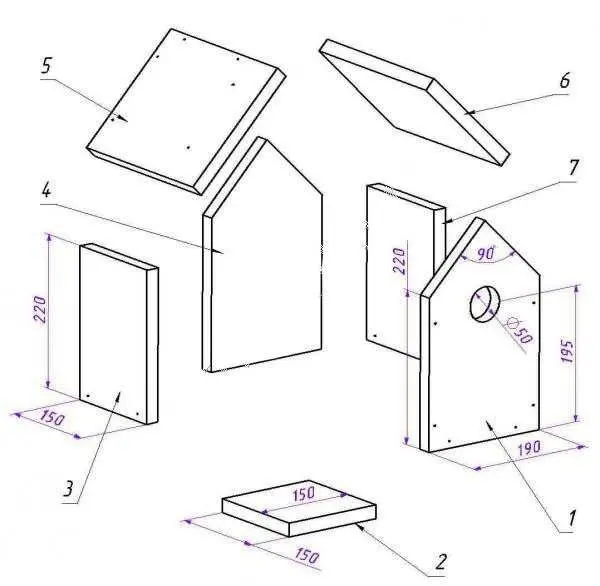
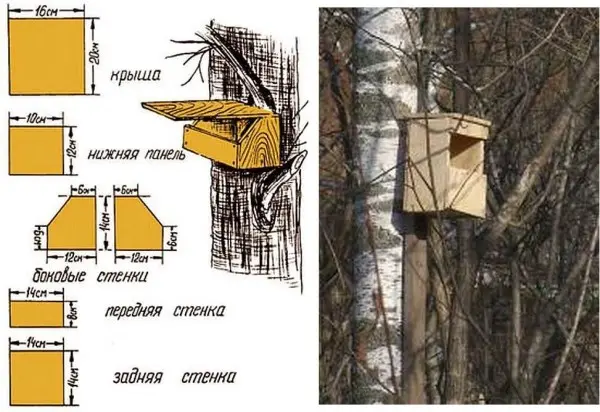
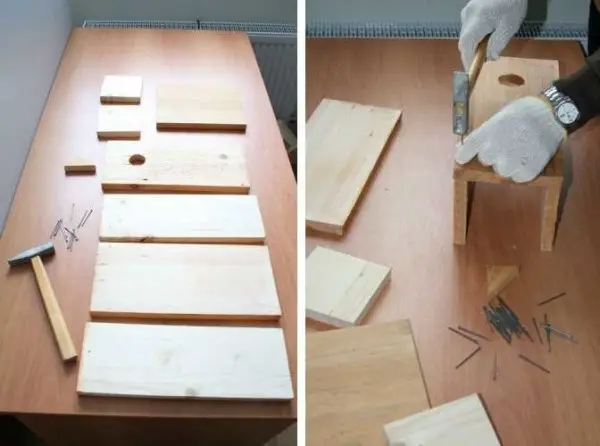
We will do the easiest option – with a flat roof. As already mentioned, we take non-planed hardwood boards with a thickness of 20 mm or more. To avoid splinters, it is better to work with gloves. We cut the blanks according to the drawing. Try to keep the saw cuts even and at a right angle: there should be no gaps. Immediately after hatching, the chicks are without plumage, and the slightest draft can kill them. Therefore, all edges must be even.
We take long thin nails – diameter 1,5-2 mm, length 4-5 cm and a hammer. We start assembly. We nail the sidewalls to the front part at a right angle. For each – three or four nails.
Turning the workpiece upside down, take the bottom, insert it, align it. We nail to the sides. From above we cover with a back wall, we also nail. Do not forget about the connection of the back wall with the sidewalls.
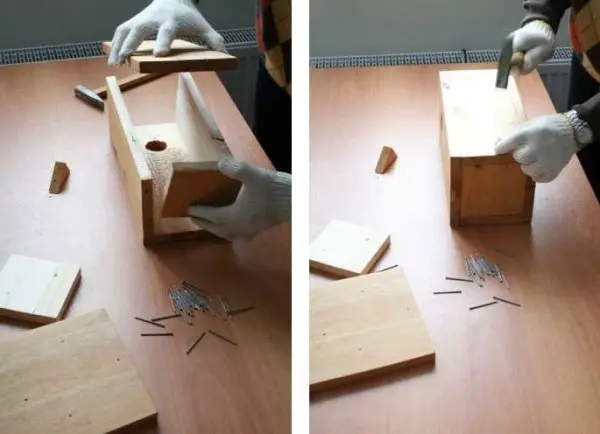
Turning the notch up, we nail the bottom also from this side. It remains to assemble the roof. We take the remaining square – a double of the bottom, nail it so that the visor sticking out in front is at least 5 cm (preferably 7-10 cm, as they said before). If the nails stick out, bend them.
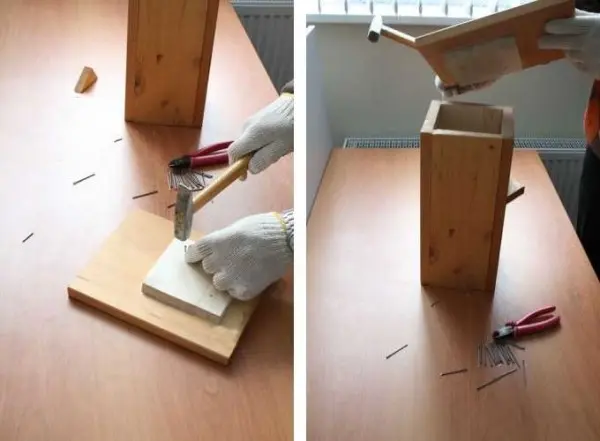
The roof just needs to fit snugly. If something interferes, we earn money with a chisel. That’s all, the birdhouse is ready with your own hands.
Often a perch is installed under the entrance. Is she needed or not? If there are enough branches around, it is better not to do it. If there are no branches, you need to either make a perch or a small shelf, although you can do without them. Why? Because cats also rely on them and it is easier for them to reach the chicks with support. How to make a titmouse, see the video
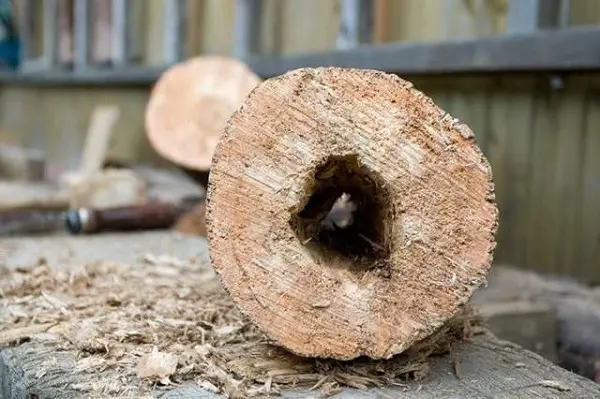
We make a nest box – a birdhouse from a log
If the feathered people have a choice – to settle in a nest box or a birdhouse made of boards – they will choose a nest box. It looks more like the usual “housing” – a hollow, it has no slots on the sides and, therefore, is warmer. They are less noticeable on the tree, which means more chances to grow offspring. This is a plus from the bird’s point of view. Now about the pluses from the point of view of “manufacturers”: a fallen tree goes into work, and it is free. If you find a suitable one, it will be enough for a large number of birdhouses. About the minuses – making hollows is longer and more difficult: you have to manually pick out the core, leaving the walls intact.
Now about how to find a suitable tree. Aspen is best suited: it usually rots from the inside, and remains hard along the outer edge. Therefore, we go in search of an aspen forest, and there, among the fallen trees, we look for a suitable one: we cut several trunks. It is important to find with a whole edge and a rotten middle – the work will go faster.
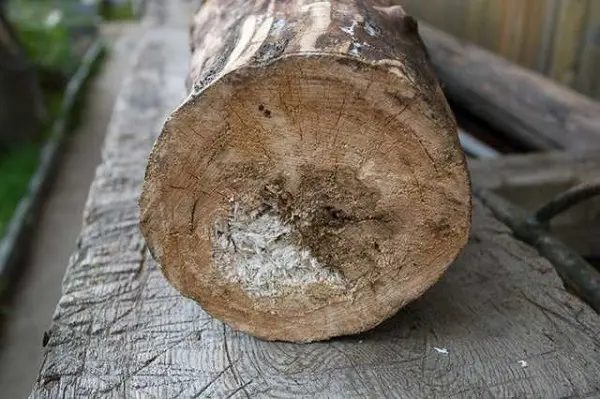
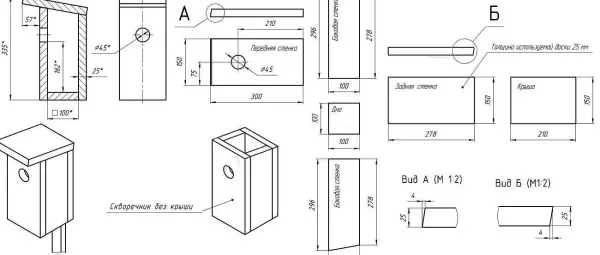
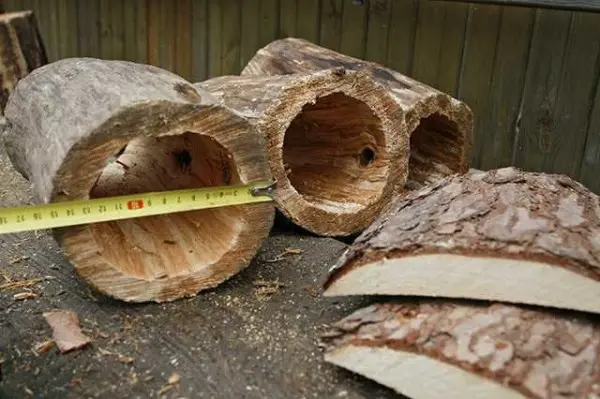
Often such trees have rotten bark, which makes them look unsightly. We clean off the bark, pull the log to the dacha or to the house. There we cut into logs of a suitable size. Dimensions are determined by the diameter. For a birdhouse, the inner diameter of the nest box should be 22-30 cm, respectively, the outer diameter should be 27-36 cm.
The height of the block of wood also depends on the type of house – a titmouse 20-40 cm high (but they are more likely to settle in low ones), a birdhouse – from 30 to 45 cm. precipitation dripped from the roof. For the manufacture of roofs and bottoms, you will need trimming boards, you can use unedged and slabs.
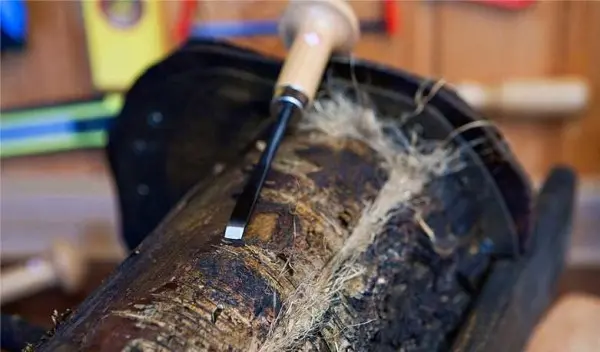
We take a cut off block of wood and begin to pick the core with a chisel. The task is to dig a through hole. After that, even hard wood is easier to chip. To make the process go faster, you can drill holes with a drill, then break out the jumpers with a chisel.
As a rule, the rotten core ends quickly, then you have to chip off pieces of wood with a chisel and a hammer or mallet. But with a hole in the center, it is much easier – longitudinal pieces are chipped off, work goes on at a normal speed.
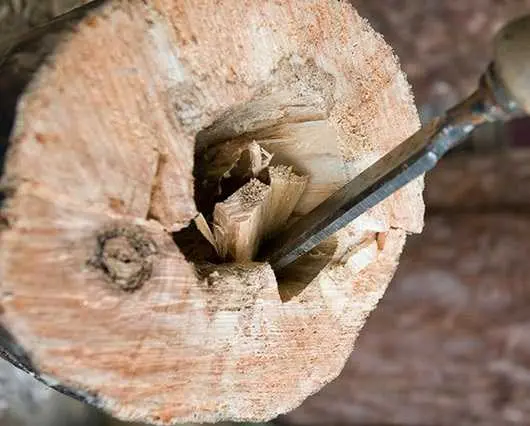
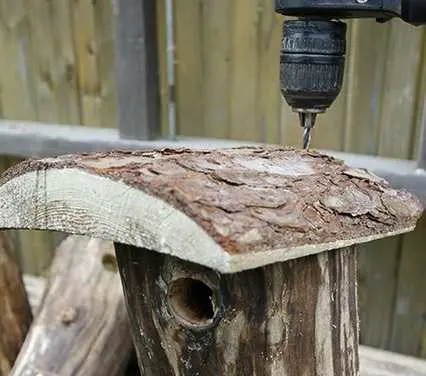
The walls should remain about 1,5-3 cm. We try to work out the middle more or less smoothly, without large chips. When the walls are selected, we make a notch. If there is a knot, you can hollow it out. Or take a bark and a drill, drill in a suitable place. If there is no crown, we take an ordinary drill, drill holes in a circle, then, using the same chisel, we cut through the remaining jumpers.
A piece of board 2-2,5 cm thick goes to the bottom. It is nailed or screwed onto self-tapping screws. The protruding parts are cut as close to the walls as possible.
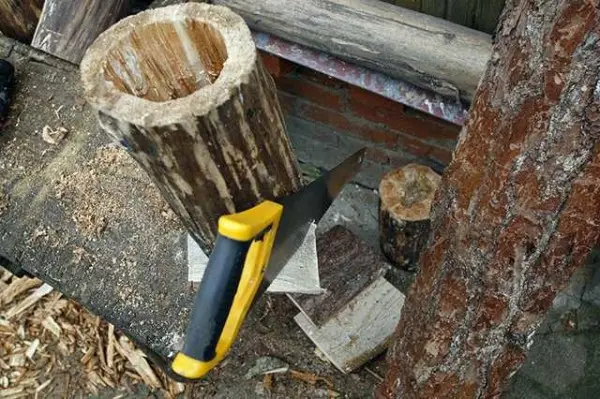
It remains to nail the roof. The same board or slab will do. Before screwing in the self-tapping screw, drill holes, otherwise the board may split.
Actually, you have already made a birdhouse with your own hands, it remains to protect it from woodpecker attacks. If there are knots on the walls, it is advisable to coat them with plasticine (regular, for children). They can also close up the gaps that remain between the bottom and the roof and the walls: it is rarely possible to fit everything clearly. If you do not want to cover with plasticine, you can caulk with a hemp rope. It is applied to the slot, and driven into it, with a flat screwdriver (actually, there are special blades for caulking, but they are large – this is the time, and for “one-time use” they should be bought …). If it “goes” badly, you can knock on the handle with a hammer.
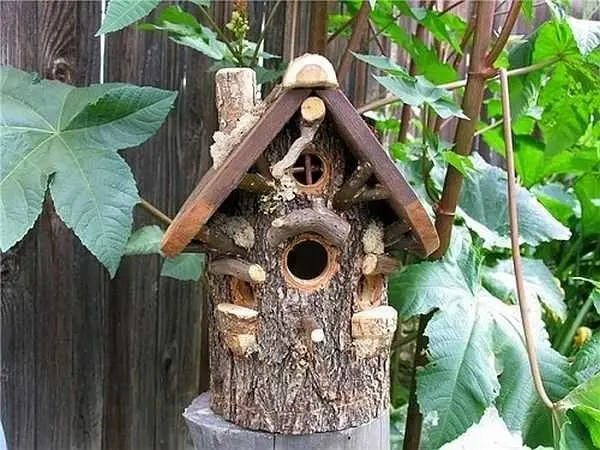
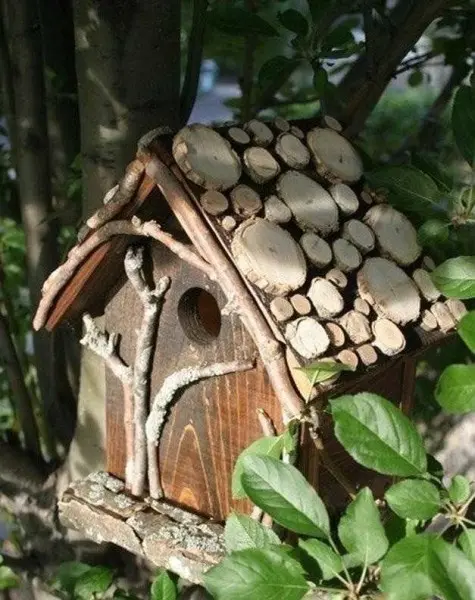
How to decorate a birdhouse
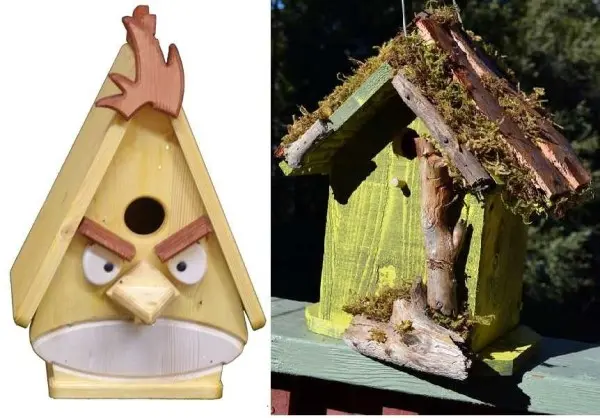
While the birdhouse is new, it looks relatively good, but after a couple of months it will darken. For birds, this is good – it will become less noticeable and they will only benefit from this. But not all homeowners like to look at such an unsightly “decoration”. To improve the appearance, the birdhouse can be painted, but you need to choose “natural” colors – brown, gray, shades of green. Do you want your birds to survive? This means that their nest must be masked, and not painted in all the colors of the rainbow, attracting all possible predators.
We hope that now you can not only make a birdhouse with your own hands, but also competently (from the point of view of birds) decorate it.
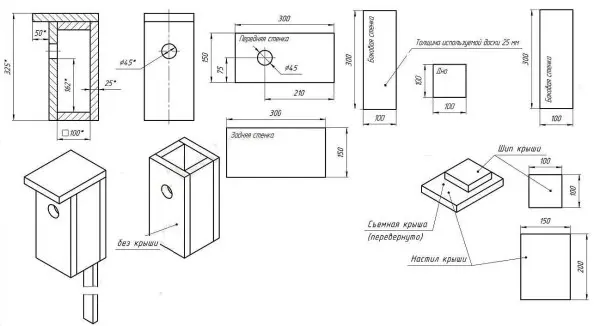
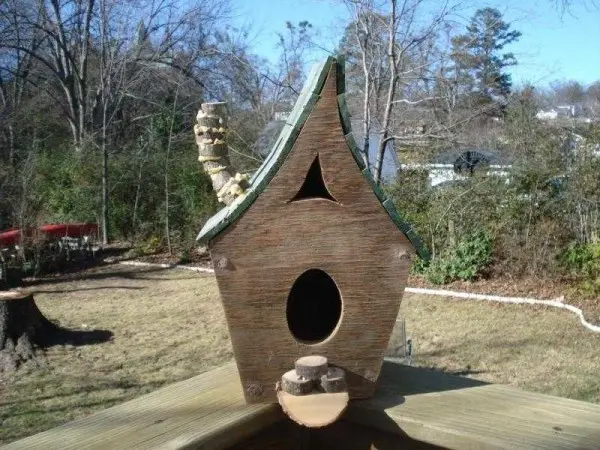
Dimensional Drawings
Some drawings of birdhouses are in the text, we post a few more in this section. Correcting the dimensions for the planned “residents” is probably not a problem. Also note that the layout is given for a board with a thickness of 2 cm. If the thickness is increased or decreased, adjustments are necessary.