


Cell styles in Excel allow you to quickly format a cell. You can create your own styles. To quickly format a range of cells, use the tool Format as Table (Format as a table).
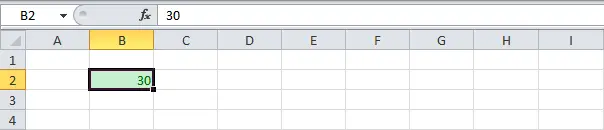
- For example, select a cell V2as in the picture below.
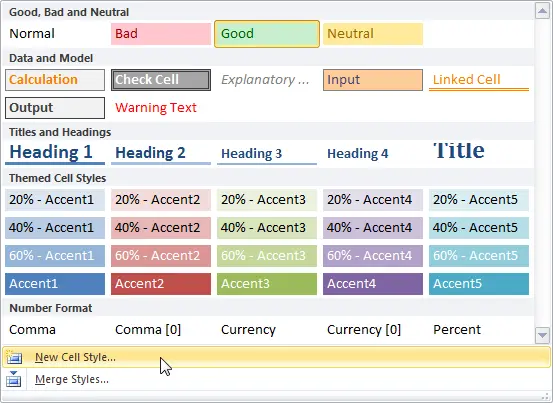
- On the Advanced tab Home (Home) in a group Styles (Styles) click on the button Cell Style (cell style).


Result:
To create your own cell style, do the following:
- On the Advanced tab Home (Home) in a group Styles (Styles) click on the down arrow, which is located at the bottom right.

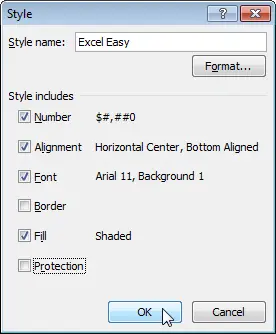
- Here you will find even more cell styles. Click on the button New Cell Style (Create cell style).
- Give the new style a name and click the button Size (Format) to set the number format, alignment, font, borders, shading, and protection. If you do not want to apply any type of formatting, simply uncheck the box next to it.
- Press OK.
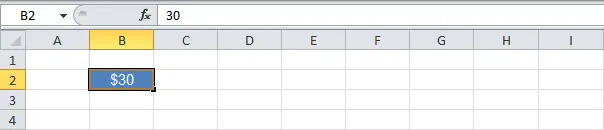
- Apply the created cell style by selecting it from the group Styles (Styles) Tabs Home (Home).

Result:
Note: To change or delete a cell style, right-click on it. Changing the cell style will affect all cells in the workbook that are formatted with it. This saves a lot of time.
Cell styles are stored only in the document where you create them. To import cell styles, open a new document and click on the button Merge Styles (Combine styles).