


Many in their dachas have braziers, on which barbecue is fried and barbecued in the warm season. A canopy is placed so that in bad weather the barbecue can be used. From our today’s article you will learn how to make a canopy for the barbecue with your own hands.
Varieties
Sheds for the barbecue serve not only as a decoration, but also protect it from rain. With a canopy, it will be easy to cook barbecue in bad weather, and you will not worry that raindrops will put out the coals.

There are two main types of canopies, which differ from each other in their form:
- Simple. Such structures look like four supports on which a sheet of metal is fixed. They reliably cover the brazier from direct rain, but in general are not very effective in heavy rain. Although such a design can be decorated with additional decorative elements, giving it an elegant look.
- In the form of a gazebo. This option is suitable for those who want to make the brazier a decorative element of their site. In addition, the gazebo will protect from bad weather and strong winds.
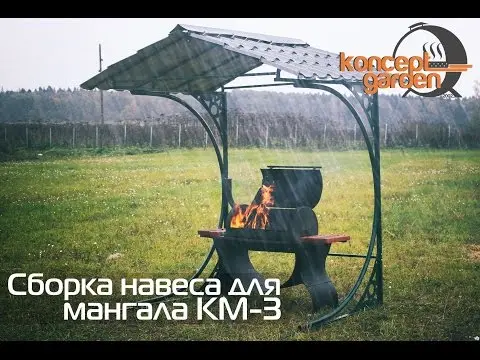
Video “Canopy for barbecue grill”
This video shows how to quickly assemble a canopy for an outdoor barbecue with your own hands.
What can be made
The design can be made from different materials, each of which has advantages and disadvantages. We will now consider this issue in detail.
What is the canopy made of?
- Metal. Metal shelter is a budget, but not a very good option. The material will heat up from the sun’s rays, as well as from fire and smoke – the constant companions of barbecue frying. Because of this, in the heat, being under a canopy will be unbearable. Therefore, only compact covering structures for small barbecues are made of metal.
- Wood. Wooden canopies will decorate any site, as they look aesthetically pleasing. In addition, they are easy to customize and install. However, there is a significant drawback – poor fire resistance. Given that this is a barbecue shed, which means working with fire, this drawback can be critical. Also, a wooden shelter is less durable and strong than its counterparts made of other materials.
- Polycarbonate. The most popular option. The material is inexpensive and durable, easy to install. He performs his duties very well. In addition, polycarbonate is flexible and durable, so the structure will last a very long time. Also, polycarbonate transmits a lot of light. This material has no disadvantages.
- Decking. No less popular option than the previous one. It is durable and lightweight. In addition, corrugated board does not ignite. It is easy to fit into any interior. In addition, thanks to a large assortment, you can choose the color or shade that you like. Of the minuses, one can single out poor light transmission and rapid heating.
We build on our own
Now we will tell you how to build a canopy without the involvement of specialists. This is easy to do if you follow the step-by-step instructions below.
Supports
We start with the supports on which the “roof” of the shelter will be located:
- We dig four holes in which we will later place the supports. Each hole should be about 30 cm in diameter and 60 cm deep.
- Now we take metal profiles 50×50 cm and about 3 m in length, and install them in the center of each pit. To fix them, fill the remaining space in each dimple with liquid concrete.
We take a metal square and pass it through all the upper points on the supports, then weld it. It is important that all sides of the square are at the same level.
Roof
Now that the supports and frame are ready, let’s take care of the roof.
- We install 3 arches. Two of them will be on both sides of the gazebo, and the last one in the center.
- So that all the upper points of the arches are fixed at the same level and do not diverge, they are connected with a square of 20×20 cm.
- The final touch is coverage. We recommend choosing polycarbonate as the most common material. It is best to choose a variety that can withstand loads up to 150 kg.
- First, the sheet is screwed to one of the edges of the arch, and the overlap should be about 30 cm – for reliable protection from raindrops.
- Now, after a step of 50-60 cm, we fix the polycarbonate layer with bolts (M8 bolts will do).
- Ready! You have made the easiest canopy for the barbecue.

So, we examined the features of different canopies for the barbecue, and also told how to build a structure with our own hands. Now you can make a shelter yourself and safely cook barbecue even in bad weather.
Author: Svetlana Golitsina
Loading…