Contents
In the spring, I really want to do not only the garden, but the aesthetic design of the site, the construction of flower beds. You can make a flower bed fence out of bricks, decorative tiles, stones, even plastic bottles. The variety of possible options is simply breathtaking! A flower bed made of bricks with your own hands will not require much effort and time, but it will bring pleasure from the very process of construction and give you reason to be proud of yourself.
Choosing and preparing a site
People usually plant a lot of flowers in home gardens or summer cottages, and this is understandable – only aesthetic pleasure can restore strength after a hard day’s work in the name of the future harvest. In the country, I want to relax, and not just work, so I want to make beautiful flower beds of the most exquisite forms, plant different flowers on them that will delight with their appearance and aroma throughout the season. The great thing about this is that you can do everything yourself, embody your idea of uXNUMXbuXNUMXbbeauty, and not explain yourself to a landscape designer hired for a lot of money.

Before starting work, you need to decide on the shape of the flower bed and its content. The choice of location depends on what flowers you plan to plant. Since the flowerbed is made so that it can be admired, it should be in plain sight: it should be clearly visible from the house or gazebo, where we usually relax and receive guests. But it cannot be placed in absolute shade from a house or other structures – flowers need a sufficient amount of sunlight.
The choice of flowers largely determines the place of the future flower bed: you need to choose so that they can all grow in similar conditions, so that their requirements for light and moisture coincide, so that plants that cannot tolerate each other are not nearby. The shape of the flower garden and the place are also interconnected. Ring flower beds look very nice, placed in a regular ring around a tree or some small structure (a tiny pond, gazebo, fountain).

Round island flowerbeds are placed in the middle of the lawn, narrow long ones along the wall of the house or a footpath, multi-level ones turn with ascending steps towards the viewer. Oval, smoothly curved or irregularly broken polygons suit large flat areas, but rectangular flower beds can level the landscape or emphasize terraces. Having decided on the place, it is necessary to prepare the site. To do this, remove everything superfluous from it (stones, debris, bushes, grass), level it.
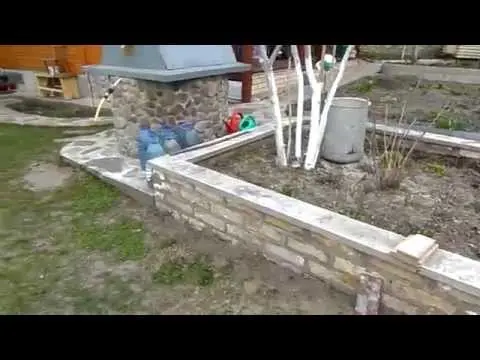
Video “Building a flower bed in a summer cottage”
An example of building a brick flower bed with your own hands in a few days.
What materials and tools will be needed
If you have already decided to make a brick flower garden in the country, then you will need this same brick, moreover, not necessarily new and beautiful. Sometimes the old, used brick, left after the cleaning of some structure, looks very impressive. What kind of brick to make – white or red – is up to the owner to decide. There are no wrong decisions here, everything will look good, if desired, you can paint it in any color.
In addition to brick, you will need cement and utensils for kneading it, sand and gravel for the base, a shovel, trowel, rope (or fishing line) and pegs for marking. You may need beautiful stones, shells, wooden elements that can decorate your work. Clay or wooden garden sculptures, stumps, old shoes scattered across the lawn look very good in the country, which can become magnificent pots for flowers or colorful grass.

How is the layout of the flower bed
Construction work begins with the marking of the flower bed. Borders are marked right on the ground, pegs are driven in, a rope is pulled over them. According to the outlined contours, a ditch 30 cm deep is dug for low walls – 4-5 bricks. The higher the wall, the deeper the moat should be. If a high stepped flower bed or brick posts is supposed, then the base must be deepened by at least 80 cm. The ditch should turn out with even sides, one brick wide.
At the bottom of the resulting ditch we pour sand, at least 5 cm thick, then crushed stone, of the same thickness and sand again. Having rammed all this, you can put the first layer of bricks on top. The sand-stone base will not only hold the walls, it will become excellent drainage, excess water from the flower bed will freely go to the sides so that the roots do not rot.

For the same purpose, the first 2-3 layers of bricks are not connected with cement, they are simply laid on top of each other, and already the 4th layer is placed on cement.
Sometimes the walls of the flower bed, in general, are not fastened with cement, they are simply laid on top of each other – such a design also has the right to exist, but it will not be durable. At the end of the masonry, the structure is left for 4-5 days, so that the cement finally sets and dries.
Useful Tips
When the flowers grow, there is some movement of the soil, because of this, the flower bed can expand. In order to avoid trouble, when building walls, they are slightly shifted inward (slightly wrapped like a pot), for this it is enough to press the bricks with your hands.
Before starting the laying of bricks, you need to outline the height, for this, high pegs are driven in and the rope is pulled again.
The horizontality of the masonry must be checked constantly so as not to miss distortions – after all, the base is movable, which means that there will definitely be shifts and distortions, you just need to eliminate them in time. If columns are supposed, then work begins with them. For columns, a hole is dug 1 m deep – they must be even and stable. Often pots with plants are placed on brick columns.

And for curved walls, you can use flexible plastic: first lay the plastic, and then lay bricks along it. At the end of the work, the plastic on the inside can be easily removed. For those who doubt their abilities, you can find a suitable video on the Internet, watch a master class, and only then proceed with the realization of your plan. There are people who have already walked this path, enjoyed it and are eager to share their experience.
Last stage of construction
When the cement in the brick walls sets well and dries, you can fill the soil. It is not rammed, just poured, watered and left alone. It must stand for at least two weeks before planting flowers. If the soil drops below the desired level, it is topped up, but it is simply necessary to wait the allotted time – it will settle down on its own, as it should, and it will be seen whether it is worth adding more or not.

Only after the expiration of 2 weeks, you can plant thoughtful and prepared flowers in advance, put individual pots or some decorative elements on the platforms, sides and columns. If you build 1 flower bed in the country house yourself, then most likely you will not stop there. You will definitely want to do more and more, because there are many options that will look so good on your site.
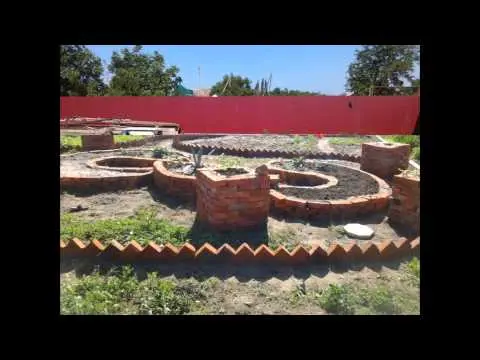
Video “Formation of the walls of a brick flower bed”
A simple way to build the foundation and walls of a brick flower bed, recommendations for self-forming brickwork.