


Contents
- Pros and cons of benches from a bar
- Types of benches from a bar
- What you need to assemble a garden bench from a bar
- Drawings of a shop from bars
- Dimensions of a bench from a bar
- How to make a bench from a bar
- A simple bench made of timber
- Bench from a bar with a back
- Benches from the remnants of timber
- Bench made of cinder blocks and timber
- Bench made of timber and boards
- Garden bench made of timber with a table
- Bench for giving from a bar around a tree
- Corner wooden bench from a bar
- Wooden swing bench made of timber
- Making a wooden bench from a bar
- Conclusion
A bench made of timber in terms of aesthetics and strength outperforms analogues, where boards serve as the material of manufacture. The design has an impressive weight, so it is often installed permanently in the yard, in the gazebo, near the sidewalk path of the garden.
Pros and cons of benches from a bar
Massive benches are in demand among summer residents, owners of cottages, country houses. They are installed in squares, parks and other places of recreation.
The popularity of timber construction is due to many advantages:
- The beam is stronger than the board. The bench will last longer. It is difficult to break it or drag it to intruders.
- The beam can withstand heavy loads. The bench can be made long for a large number of seats, and it will not sag.
- Smooth edges of the timber give the attractiveness of the design. The bench will fit even in the courtyard, where the design of the architectural ensemble is decorated in a modern style.
- The timber is an environmentally friendly material with a low thermal conductivity. The bench in cold and heat keeps the comfort of sitting on it. The wood does not get hot from the sun and stays warm in cold weather.
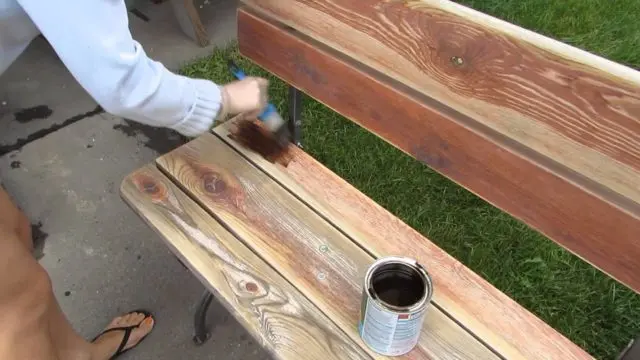
The downside of the benches is considered to be a lot of weight. Timber construction is not easy to move from place to place. To maintain an aesthetic appearance, the shop must be carefully looked after. So that the wood does not turn black, it is treated with an antiseptic twice a year, opened with varnish or drying oil. From frequent exposure to dampness, the bench will begin to rot. For the winter, you will have to hide it in a barn or organize a reliable film shelter.
Types of benches from a bar
A feature of the massive bench is good stability due to the large weight. Despite this fact, the designs differ in the way they are installed:
- Stationary benches cannot be moved to another place or moved to the side. They are dug into the ground with their legs, concreted, fixed to the floor of the gazebo or other base.

- Portable benches with legs are not fixed to anything. Even if the structure is heavy, it can still be moved or moved to the side if necessary.

There are many differences in form. Benches are made classic and according to an individual scheme. The beam is combined with other materials. Despite the large variety, all shops are conventionally divided into three groups by design:
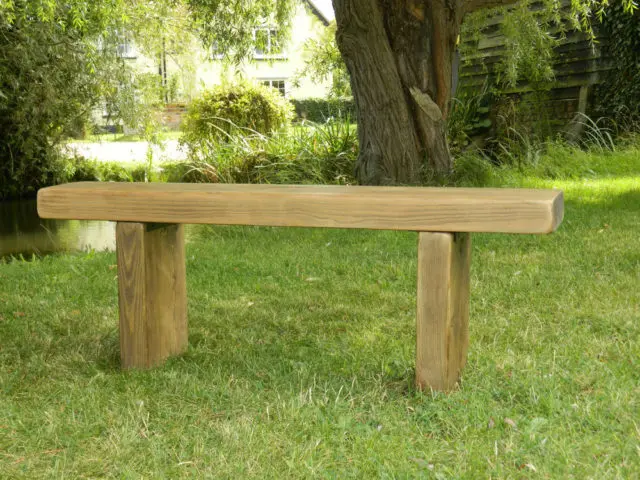
- A simple bench made without a back. It is designed for short sitting. Put in places where people need a short rest.
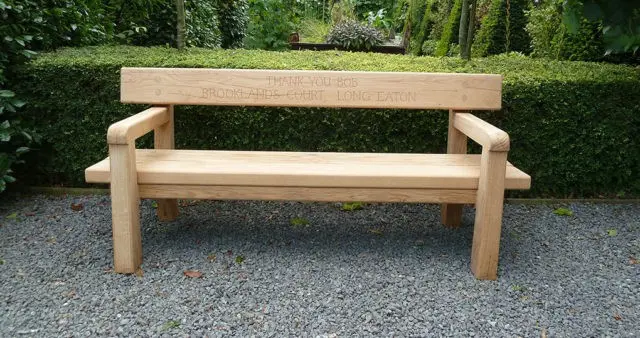
- A simple bench with a back allows a person to take a comfortable position, enjoy a long rest.
 Advice! Often summer residents make a simple bench with their own hands from a bar 50×50 mm and a board 25 mm thick.
 - Benches of increased complexity are not only for relaxation. Designs serve as an element of decoration of the site. The bench is equipped with a beautiful carved back, armrests. Figured recesses are cut out from the timber on the legs.
All types of garden furniture made of timber are attractive, reliable and durable. However, if you want to make a bench, you need to decide for what purpose it is needed. So it will be easier with the choice of the most suitable model.
What you need to assemble a garden bench from a bar
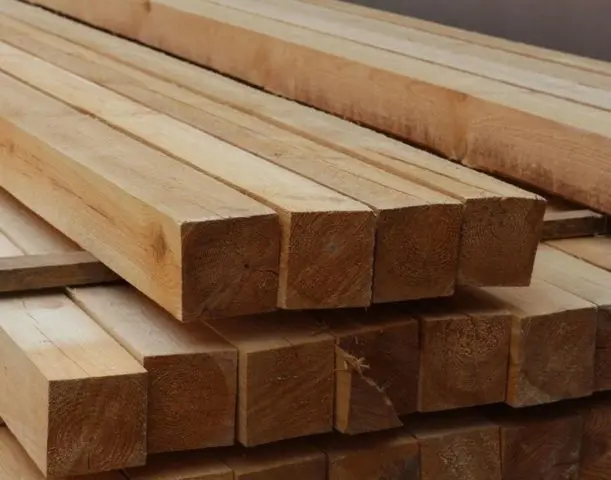
The main building material for the bench is timber. The cross section of the blanks is selected taking into account the load the structure is designed for. If there are many seats for adults, the best option is to build a bench from a 150×150 mm or 100×100 mm timber with your own hands. For a children’s shop, a beam of a smaller section is used.
For benches, it is best to use hardwood timber, such as oak. Coniferous representatives are poorly suited due to the release of wood resin. It is better to use a beam of pine, spruce, larch for the manufacture of a bench frame, and lay hardwood lumber on the back and seat.
Additionally, from the materials you will need self-tapping screws, bolts, nails, antiseptic, varnish, stain or drying oil.
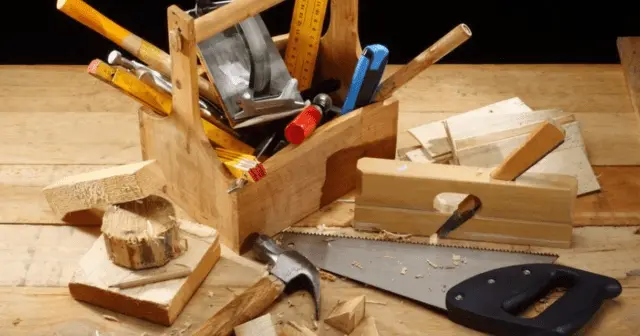
Assembling a bench from profiled timber does not require the use of expensive tools. A standard carpenter’s set will do: saw, planer, chisel, hammer, drill, screwdriver.
Drawings of a shop from bars

Dimensions of a bench from a bar
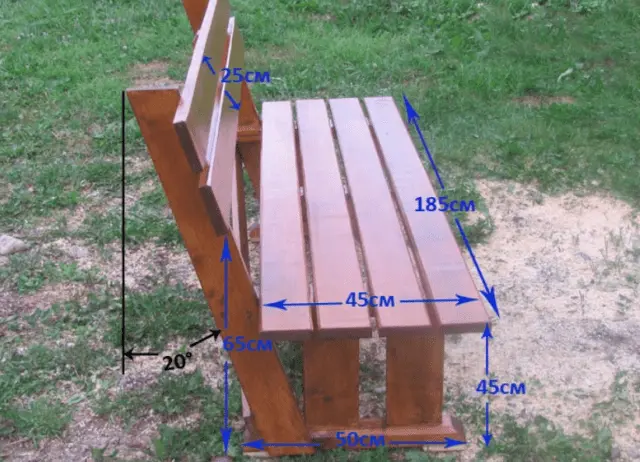
For benches, there are norms where standard sizes are provided. However, more often benches are made at their discretion. Dimensions are calculated so that it is comfortable to sit on the bench. It is convenient when the seat rises 45-50 cm above the ground. From here, the length of the legs is determined. If the bench is installed permanently, the length of the supports is increased to penetrate into the ground.
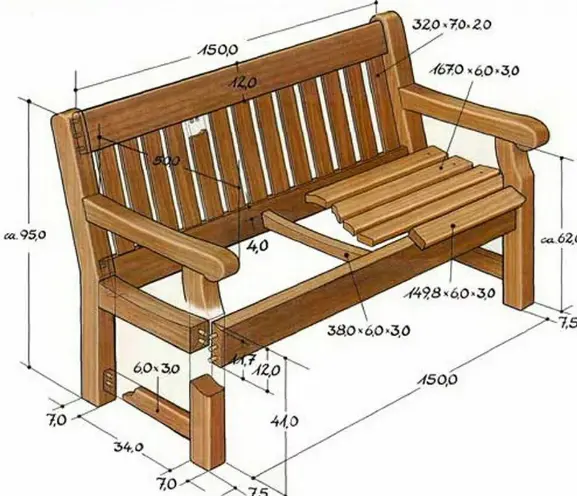
The width of the seat is about 45 cm. Moreover, it can be installed at a slight slope – up to 20 о to improve your comfort. The back is made 50-60 cm high. Here, in the same way, you can maintain a slope or a right angle at your discretion. The number of seats depends on the length of the seat. Typically, a shop is designed for 2 or 4 people, adhering to the parameter 1,5-2 m.
How to make a bench from a bar
Bench assembly options have nuances that depend on the design of the product. Work begins when the material and the project are prepared.
On the video, useful information about the benches:
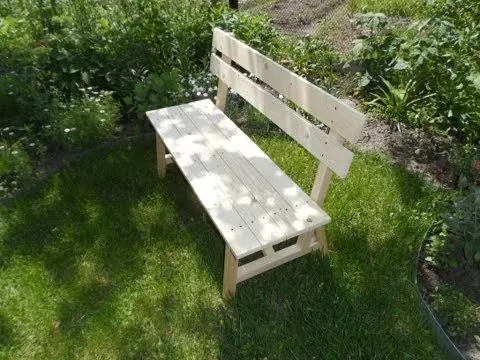
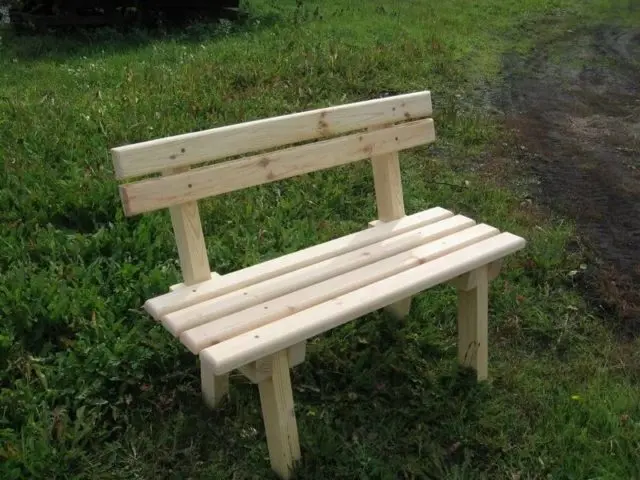
A simple bench made of timber
The simplest design does not have a back, designed for a short rest. For stability, the legs are buried in the ground. Summer residents usually assemble simple garden benches from scraps of 50×100 mm timber left after construction. To make a portable bench, the structure is equipped with four legs for stability. A jumper is installed between the paired supports.

Opposite racks are connected to each other with a long beam. The element will play the role of a spacer that prevents the bench from loosening. The seat is laid on legs and fastened with bolts. There are two options here. You can find a piece of a wide board for the seat or put together several pieces of timber.
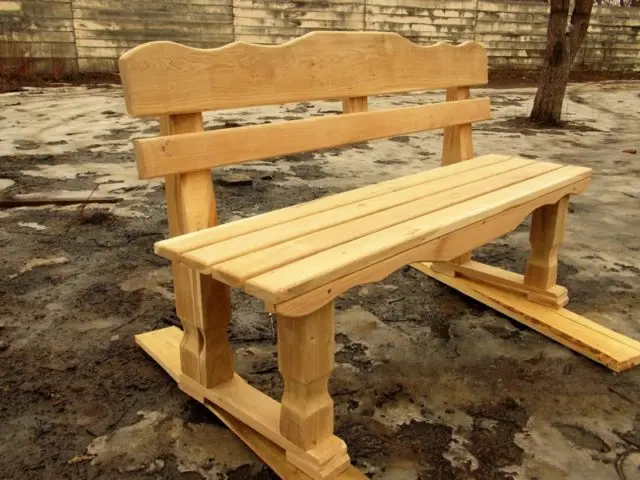
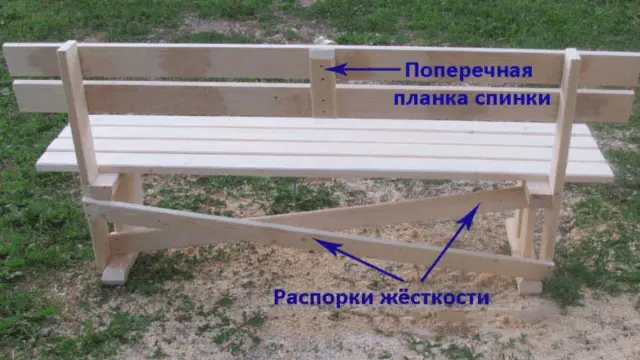
Bench from a bar with a back
It is believed that it is difficult to build a bench with a back. Nothing like this if you use the simplest project. The bench is made on crossed legs. For each side support you need a short and a long beam. They are connected to each other with the letter “X” at an angle of 30 о. The leg of a long bar is a continuation of the base on which the back is fixed. Between themselves, the opposite supports are connected by a jumper made of timber.
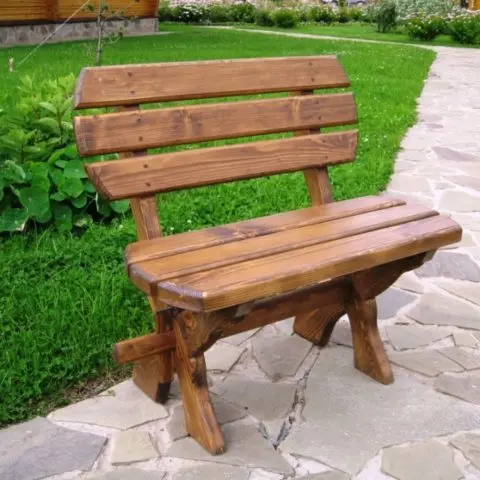
The bottom of the legs is cut at such an angle that they fit snugly against the asphalt or the ground. At the height of the seat attachment, crossed racks are connected with a bar. Boards are fixed to it with bolts. The skin is attached to the bases of the back in the same way. The finished bench is polished, opened with varnish.
Benches from the remnants of timber
If short pieces of timber remain in the yard after construction, this material is similarly suitable for a bench. Stable legs are made from pieces of different lengths. The bars are stacked horizontally according to the pyramid principle. To fasten the support, a bar is applied on the side, screwed with screws to each element of the pyramid.
A rectangular seat frame is laid on the supports. On one long side, at an angle, two pillars of the backrest base are bolted. The finished structure is sheathed with a board.
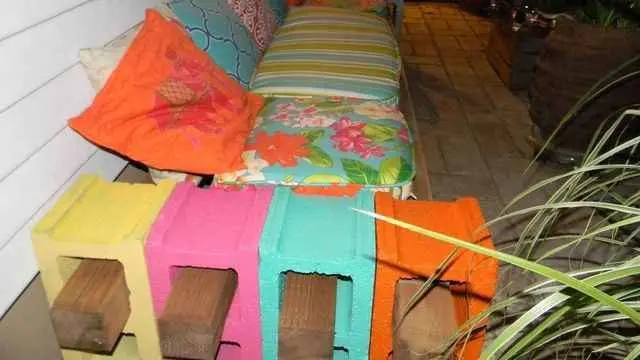
Bench made of cinder blocks and timber
An original bench without a back can be made in 5 minutes. The structure will be collapsible. It can be used for sitting or instead of a bed if you put a mattress.
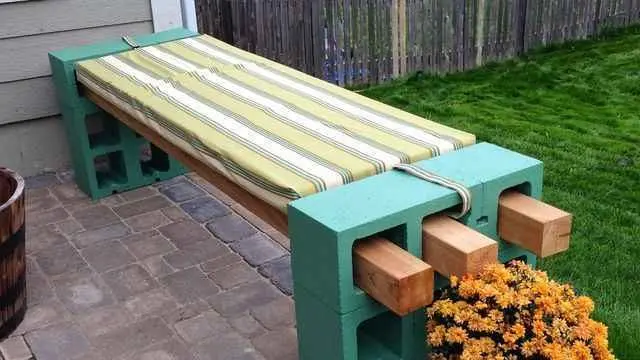
Cinder blocks act as a support for the miracle of the bench. Moreover, full-bodied material will not work. You need a cinder block with through holes. The number of blocks depends on how wide the bench is supposed to be. If there are enough seats from three bars, then 6 cinder blocks will be needed for two supports. For four bars you need 8 blocks.

The beam is selected according to the cross section so that it enters the through holes of the cinder blocks. If the lumber is of a larger section, the ends are cut off with a planer or chisel.
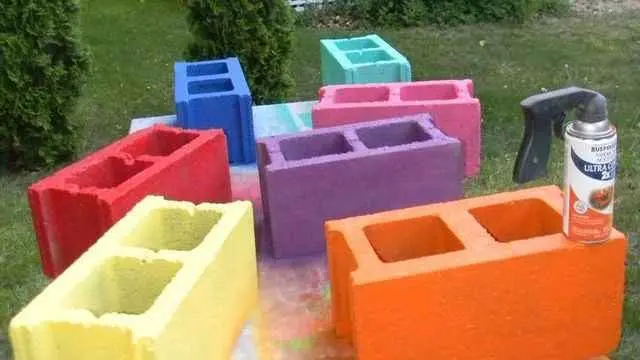
To make the bench beautiful, the blocks are painted with facade water-based paint with the addition of different color schemes. You can use paint in spray cans.
Multi-colored blocks are installed vertically against each other. Inside the windows lead the ends of the timber. The bench is ready. To prevent the racks from falling over, the blocks of each support can be pulled together with a belt.
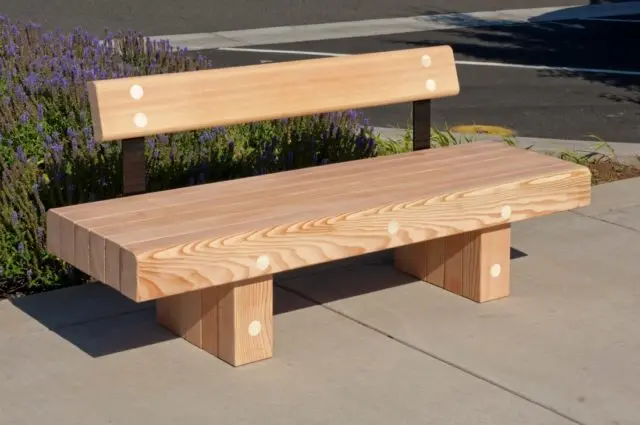
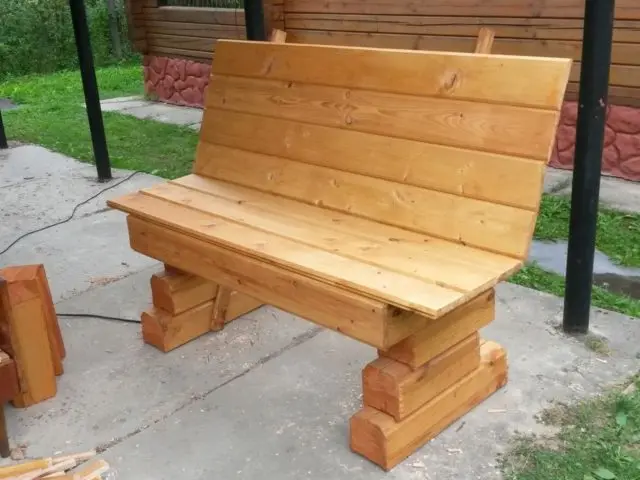
Bench made of timber and boards
In this project, the beam was used only for the legs and the base of the back. An example in the photo of a bench from a bar is shown with dimensions, but you can change them at your discretion. Paired racks of a bench are fixed on a horizontal sole from a bar. The lower ends of the bars forming the base of the backrest are also fixed here. The upper ends of the legs are also connected by a bar. At the same time, this element at the level of the seat supports the bars of the base of the backrest, giving rigidity to the structure.
On the back side of the bench, opposite posts are connected crosswise by two boards, forming stiffening struts. For the back and seat, a board with a thickness of 25 mm was used.
Garden bench made of timber with a table
Garden furniture is in demand in the country for family and collective recreation. They make the base of the table and two benches from 100 by 100 mm bars, and the seats and the tabletop are assembled from the board.
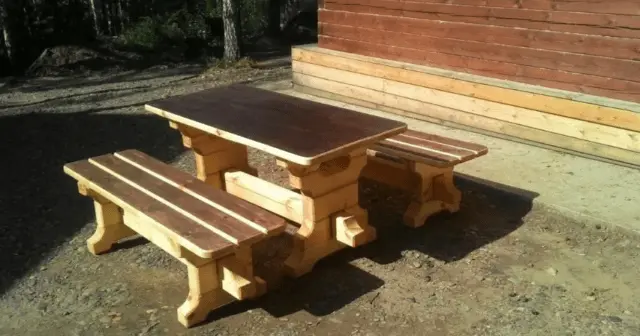
A set of furniture can be made whole and from individual items. In the first version, benches with a table are fixed to a common base made of thick timber. This design is not always convenient. Firstly, it is heavy, uncomfortable and difficult to carry. Secondly, benches and a table cannot be used separately if the situation requires it.
It is optimal that the set consists of individual items. For two benches, 4 identical supports 45-50 cm high are assembled from a beam. Similar two supports are made for a table, only their height is 70-80 cm. Boards on bench seats can be laid with a gap. The countertop needs solid flooring. A good smooth table surface is obtained if laminated fiberboard is laid on the boards.
Bench for giving from a bar around a tree
The design feature is the arrangement of the seats in a circle. A bench around a tree is made in the form of a triangle, square, hexagon. The more corners, the more legs you will need, because at each turn you need support for laying the seat boards.
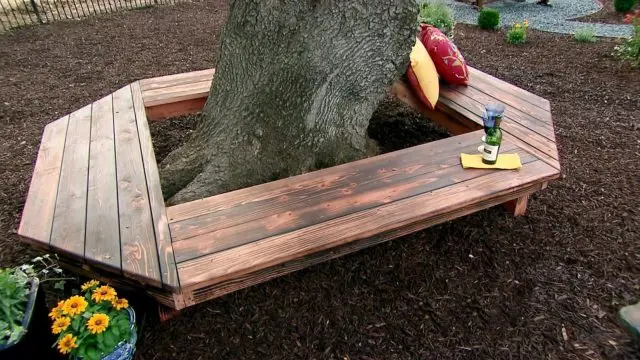
The bench is made stationary by deepening the legs into the ground. First, the required number of supports is collected, installed in a permanent place. The long boards of the seat are fixed first, gradually moving to short blanks. The back of such a shop is installed at will, but more often such designs are made without it.
Corner wooden bench from a bar
In the gazebo, on the terrace, and sometimes on the street, a corner bench is in demand. For aesthetics and comfort of use, the design will be improved by adding a table. It is placed on the corner at the junction of two benches.
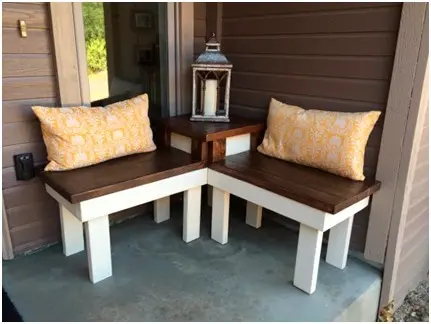
Building a corner bench is easy. First, a frame in the shape of the letter “G” is created from a bar. Inside the frame is divided by jumpers into squares. Elements will give strength to the structure. The next step is to attach the legs from the pieces of timber to the frame. The corner square in height must be increased in order to raise the countertop. This is done by laying the bars horizontally, but it is better to put racks from scraps 15-20 cm long and fasten them on top with wooden elements. The resulting frame with a niche allows you to insert a table drawer.
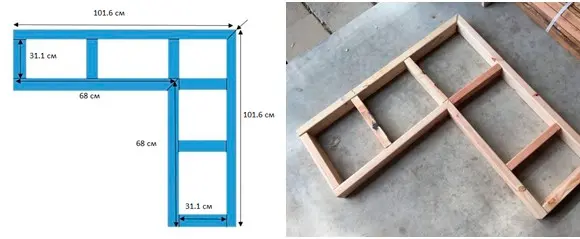
The tabletop is cut out of plywood. The seats of the benches are sheathed with a board. If the furniture will stand under a canopy, laminated chipboard is used for the table top and seat.
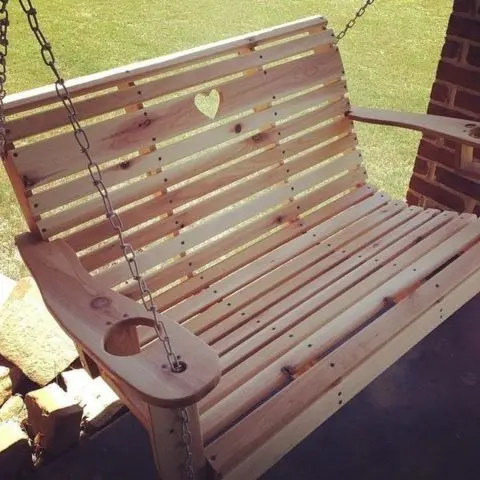
Wooden swing bench made of timber
Sometimes on the bench you want not only to sit, but also to swing. A swing assembled from a bar helps to achieve this goal. For the supports, you will need four blanks with a length of more than 2 m. Each pair of bars is connected at one point and moved apart to form the letter “L”. A distance of 160 cm is made between the extended ends of the paired racks. In this position, they are fixed with a jumper. The element is installed at a height of about 1 m from the ground. The resulting A-shaped supports are connected by a crossbar.
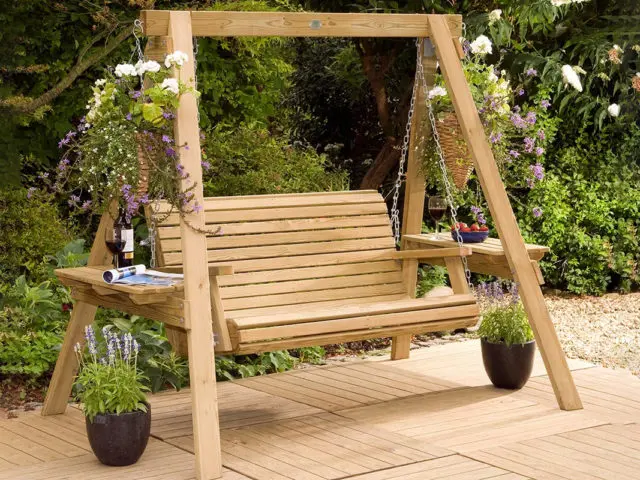
The bench is made with a back and armrests, but without legs. They don’t need swings. Eye bolts are installed in four places. Two fasteners are placed at the corners of the back and two at the corners of the seat. Chains are connected to the eyes of the eyebolts.
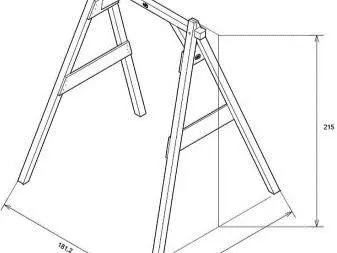
To hang the finished bench, a fastening unit is similarly installed on the crossbar. The same eyebolts will do, but hinges with bearings will work better.
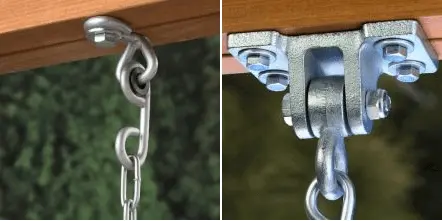
A swing, like a bench, can be installed permanently by digging the legs into the ground, or placed on the surface of the earth. The method is chosen at personal discretion.
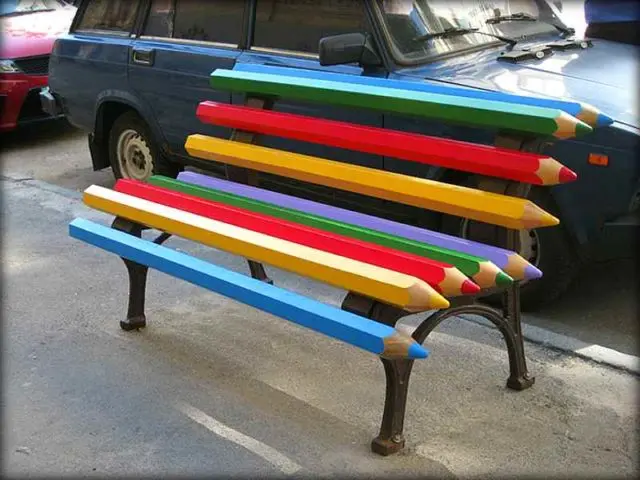
Making a wooden bench from a bar
When designing benches, they include all their imagination. For children, a seat with a back is made out in the form of colored pencils, painted with patterns, drawings. Moreover, the legs of such a design can be made of metal, and the sheathing is made of board or timber.
Beautifully looks garden furniture, painted stain, drying oil, varnish. These compounds help to preserve the natural texture of wood and protect it from negative natural phenomena.
The technology of aging wood is popular. The surface of the beam is burned with a blowtorch with a gas burner, scratched with a brush on metal, or lightly traversed with a chainsaw chain.
It turns out beautiful furniture with carved elements. The patterns are cut with an electric jigsaw on a board, which is then attached to the back of the bench.
Conclusion
A bench made of timber can last up to 20 years. Twice a year, in spring and autumn, it is treated with an antiseptic and dyed. Protective measures help to maintain an attractive appearance of the structure, extend the service life.