


Contents
A building made of aerated concrete can stand without exterior finish without any damage to the integrity of the blocks (we are talking about autoclaved gas silicate). But, over time, dust settles on the surface of the blocks, and the previously white outer surface becomes an untidy gray color with streaks. So anyway, sooner or later, but the question arises about the cladding or finishing of aerated concrete outside. Inside, aerated concrete is finished almost immediately after construction: the blocks in the interior do not look very attractive.
Since aerated concrete has a very high vapor permeability, there are certain nuances when carrying out finishing work. The fact is that almost all materials conduct vapors worse than gas silicate. This causes difficulties, since in order to ensure the normal removal of water vapor from the room, the vapor permeability of the walls – from the room – to the outside, must increase. Only special plaster mixtures for foam concrete meet this requirement. But subject to certain rules, the finish can be any.
Exterior finishing of aerated concrete
First, about how you can not finish. It is impossible to insulate with foam plastic or expanded polystyrene, plaster outside with ordinary sand-concrete plaster, paint with covering film-forming paints. As a heater, if necessary, you can use mineral wool, paint with paints that do not block the pores for moisture to escape from the wall. Now about how you can finish the facade of foam concrete.
Hinged facades: lining, siding, panels, etc.
When finishing with any materials that are mounted on a crate or guides, a gap remains between the finishing material and the wall. It is called ventilation, since in this gap, with the right device, there is an active movement of air from bottom to top. The correct device is the presence of holes in the finishing material at the bottom and top. This ensures the movement of air flow from the bottom to the top. This flow carries away moisture, which is removed from the room. Such a device solves the problem of condensate, and also maintains the normal humidity of the walls. Since aerated concrete has lower strength characteristics at high humidity, maintaining its normal humidity contributes to a longer “life”. The dependence of the strength of aerated concrete on the percentage of moisture is shown in the graph.
When outdoor finishing aerated concrete with a ventilated gap, most of the time it has a moisture content in the range of 10-15%, i.e. is in the optimal zone. To create such a gap, a crate is stuffed over the entire area of u3bu5bthe wall, providing a distance from the wall to the exterior finish of XNUMX-XNUMX cm.
For the crate, a wooden beam (treated with antiseptics) is used, metal guides are galvanized profiles for drywall or special for ventilated facades. The frequency of the lathing is 40 cm. According to this principle, the aerated concrete facade is sheathed with clapboard, siding, facade panels.
When fastening the crate to the wall, the question arises: with what, or rather, “on what” to fasten the crate to the gas silicate. You can just use self-tapping screws (black, they are stronger), but in order for the crate to hold well, you will need large lengths. This means that metal enters deep into the body of the block. In winter, it is an excellent cold bridge. But this is not the worst. Under wind loads, the frame vibrates, vibration, of course, is transmitted to the fasteners. Under the action of vibrations, foam concrete is crushed. As a result, the screw may fall out.
And that is not all. Due to the temperature difference – relatively warm aerated concrete and rapidly cooling metal of the self-tapping screw – condensation forms on the self-tapping screw. When the temperature drops, it freezes, destroying the body of the block. In general, just do not use self-tapping screws to attach the crate to aerated concrete from the outside.
To avoid such a situation, plastic plugs are inserted into the wall and dowel-nails are used. Ordinary ones are of little use, although better than just self-tapping screws. If you use ordinary ones, the length of the plastic cork should be at least 30 mm.
In general, it is better to mount on special ones, which are called “for aerated concrete”. There are they in specialized stores selling hardware. They may not be found in the ordinary construction market. From the usual ones, they are poured over with a large size of the plastic part, as well as more developed screw plates.
The installation method is standard. A hole is drilled under the dowel plug (plastic part). Depending on the shape of the helical surface, a plastic insert is driven into it (in the photo, the upper dowel) or screwed (lower). Then the screw is screwed in.
When using wooden bars or galvanized profiles, they are attached to such dowels. The installation step of the crate is less than usual – it is about 40 cm. This is for a more even distribution of shock loads that occur during strong winds. An example of aerated concrete sheathing with siding can be seen in the video. There are many useful nuances.
brick finish
If you lay brick on the aerated concrete facade correctly, it will stand without problems for decades. A prerequisite is that there must be a ventzaor between the wall of the finishing material and the wall of aerated concrete. Its width is at least 30 mm. In order for it to work, when laying the finishing bricks, air is left in the lower part – small holes into which air will enter. To prevent animals from getting into them, they are covered with ventilation grilles.
Only this type of finish, unlike ventilated facades, should be taken into account when calculating the foundation. Firstly, the mass of brick finishes, even half a brick, is considerable, and it must be taken into account when calculating the bearing capacity of the foundation. Secondly, the width of the finish is taken into account when determining the width of the foundation: the brick overhang cannot be more than 3 cm, and you also need a ventilation gap of 3 to 5 cm between the wall and the finish.
But, if you just put a brick wall at the required distance from the wall of the house, it is very likely that it will simply fall. Therefore, it is necessary to connect the walls of foam concrete and brick. To do this, even at the stage of laying foam concrete, thin plates are installed between the blocks, which are called “flexible connections”. Best of all – if they are made of stainless steel. The environment in the solution in which these strips are sunk has an alkaline reaction, and in an alkaline environment, metal, even galvanized metal, quickly collapses.
The plates on the wall surface are placed approximately 60 cm apart in every second row, the maximum height distance between two rows is 50 cm. The plates are staggered. In the area of uXNUMXbuXNUMXbcorners, window and door openings, they should be placed more often.
Sometimes, when laying, they forget about the plates. In this case, a dowel is screwed into the wall, to which a perforated metal plate or also a special stainless stud is already attached. Another option: during bricklaying, strictly opposite the seam, a hole is made in the wall into which a hairpin is hammered. The hairpin should go 10 cm into the concrete body and almost the entire width of the brick. But the hairpin is not flexible and can break both aerated concrete and brick trim (on the floor of a brick – for sure). Therefore, it is better not to suffer from such “economy”. How the aerated concrete is finished with the help of a finishing brick with a ventazor – in the video.
How to plaster aerated concrete facade
As already mentioned, plasters for aerated concrete can only be used with high vapor permeability. These plasters are expensive, but are applied in a thin layer. Therefore, a number of preparatory measures are required to obtain a smooth surface.
You can start plastering work when the humidity of aerated concrete blocks is not higher than 27%. Before starting work, the surface is treated:
- dusted with a brush;
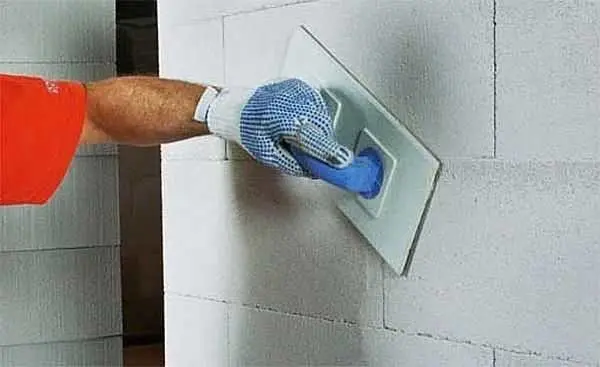
- using a grater, the surface is leveled;
- dents and chips are sealed with glue mixed with aerated concrete dust, which was obtained when cutting blocks.
The minimum layer – up to 10 mm can not be reinforced. Due to the adhesive additives in the composition, it will adhere tightly to the surface. If the layer is 10-15 mm, it is necessary to reinforce with a fiberglass mesh, with a thickness of 15-20 mm, a metal painting mesh is required. Exterior finishing of aerated concrete with plaster of greater thickness is impractical.
The grid for outdoor work should have a cell of the order of 3 mm. It must be resistant to alkaline environments (written on the package), otherwise after a couple of months it will lose strength and stop holding the plaster. As a result, the finishing layer will fall off.
Reinforcement is carried out along the applied layer of the primer mixture. It is also used special, has excellent adhesion to foam concrete, creates the basis for applying decorative plaster. The composition is applied to the wall in a strip. Until it freezes, a mesh is rolled onto it. Using a notched trowel or float, the mesh is pressed into the solution. After it has completely submerged, they take an ordinary wide spatula and level the surface, adding mortar if necessary. The leveled surface is left to dry. The term depends on the material used and is specified by the manufacturer. The average time is 7 days.
A primer is applied to the dried surface of the reinforcing layer. It performs several functions:
- levels the absorbency of the base (reduces it);
- paints over gray (it is white);
- reduces porosity.
On a dried primer (available in the description), a finishing finish is already applied – decorative plaster. The technique of its application depends on the type of composition.
Insulation of aerated concrete walls
With normal calculation and observance of technology (laying on glue with a seam thickness of 1-2 mm), gas silicate walls do not need to be insulated. In central Russia, a block thickness of 325 mm is sufficient. If, nevertheless, a need arose, the insulation must be vapor-permeable. And this is mineral wool and foam glass. Foam glass has excellent characteristics, but a high price. Mineral wool is cheaper. The thickness of the insulation depends on how cold it is in the house, but 50 mm is usually used as a minimum.
When finishing with a crate, it is made from a wider board or profile, taking into account the fact that the thickness of the insulation is also added to the thickness of the ventilation gap. Sometimes you may need a counter-lattice. These are additional strips, which, depending on the circumstances, are stuffed along or across the first crate. Thermal insulation is attached to the wall with special plastic dowels with a wide cap in the form of a fungus.
Internal finishing of aerated concrete
Finishing aerated concrete indoors has its own characteristics. Most often, such walls are still plastered. It is possible to use the same expensive mixtures as for exterior decoration, but it is very expensive. There are ways to make walls normally using ordinary cement or gypsum plaster. But this requires additional measures: a preliminary relief is created using cheap tile adhesive. It has good adhesion (cohesion) even with a relatively flat surface of aerated concrete, creates an excellent basis for applying subsequent layers. plasters. The procedure is as follows:
- We reduce the hygroscopicity of aerated concrete. If you apply any plaster on an unprepared block, it will not have time to “grab”, as the aerated concrete will absorb all the moisture very quickly. The layer will just fall apart. Therefore, first the walls are cleaned of dust, then coated with a deep penetration primer. Requires two layers. The first dries for about a day (depending on humidity and temperature).

You can prime the walls with a roller, or you can pour the composition into a regular garden sprayer - We apply a layer of tile adhesive 3-4 mm thick.
- We reinforce with a fiberglass mesh with a cell of 3 mm (we lay the mesh on fresh glue and press it inward).
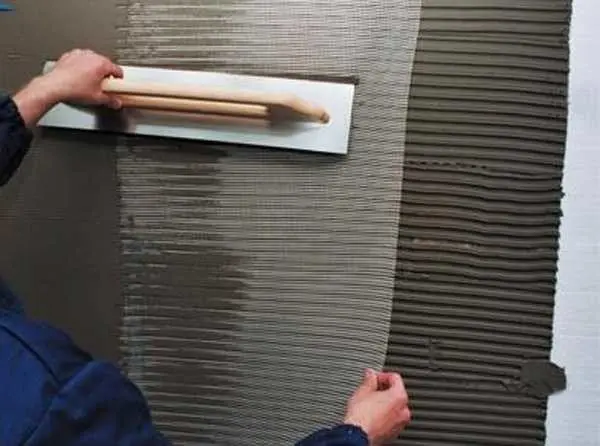

The reinforcing mesh is pressed into the applied layer of glue - With a notched trowel we form a horizontal relief.
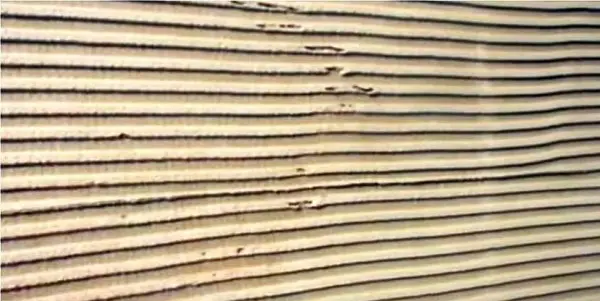

Wall prepared for plaster - Let dry for a few days.
On the dried glue, you can apply plaster, or you can lay tiles. She is definitely not going anywhere: she will hold on well. In wet visits – bathroom, kitchen – you can choose a film-forming primer, which reduces the vapor permeability of paints.
For information on how to properly prepare a gas silicate wall for plaster, see the video. With its help, do-it-yourself plastering of aerated concrete walls is clear: everything is painted step by step and chewed.
Interior finishing options
Almost all options are acceptable for finishing walls made of aerated concrete inside:
- Drywall or GVL on bars or profiles. There are no more difficulties with fastening: no wind loads, no frost. But, this is only if we are talking about a house of permanent residence. In a seasonal unheated cottage and inside, the installation of dowels is required.
- Lining in all its forms.
- Plastic panels.
- Painting, but on a prepared and leveled surface. And paints are still better with at least some vapor permeability. Unless in the bathroom or in the kitchen you can use film-forming compounds.
Of all these processes, only painting requires some explanation. Under this type of finish, an aerated concrete wall does not have to be plastered. In general, the walls should be almost flat. If there are chips, dents or protrusions, everything is solved very simply. They are sealed with the same glue on which the blocks were laid. If the dents are large, sawdust can be added to the glue, which are formed when cutting the block. The seams are rubbed with the same composition.

If there are protrusions, they are cut off with a special grater, but it can also be done with sandpaper fixed on a bar. These tools achieve a smooth surface that can be painted. The wall is cleaned with a brush attached to the holder – dust is swept away. The dedusted wall is primed. The primer is selected compatible with the selected paint. They must be compatible. It is advisable to apply the primer twice. Then, paint is applied on a completely dry primed surface.