


Working with tables is the main task of the Excel program, so the skills to build competent tables are the most necessary knowledge to work in it. And that is why the study of the Microsoft Excel program, first of all, should begin with the development of these basic fundamental skills, without which further development of the program’s capabilities is not possible.
In this tutorial, we will use an example to show how to create a table in Excel, fill a range of cells with information, and convert a range of data into a full-fledged table.
Content
Filling a Range of Cells with Information
- To begin with, let’s enter the necessary data into the document cells, of which our table will then consist.

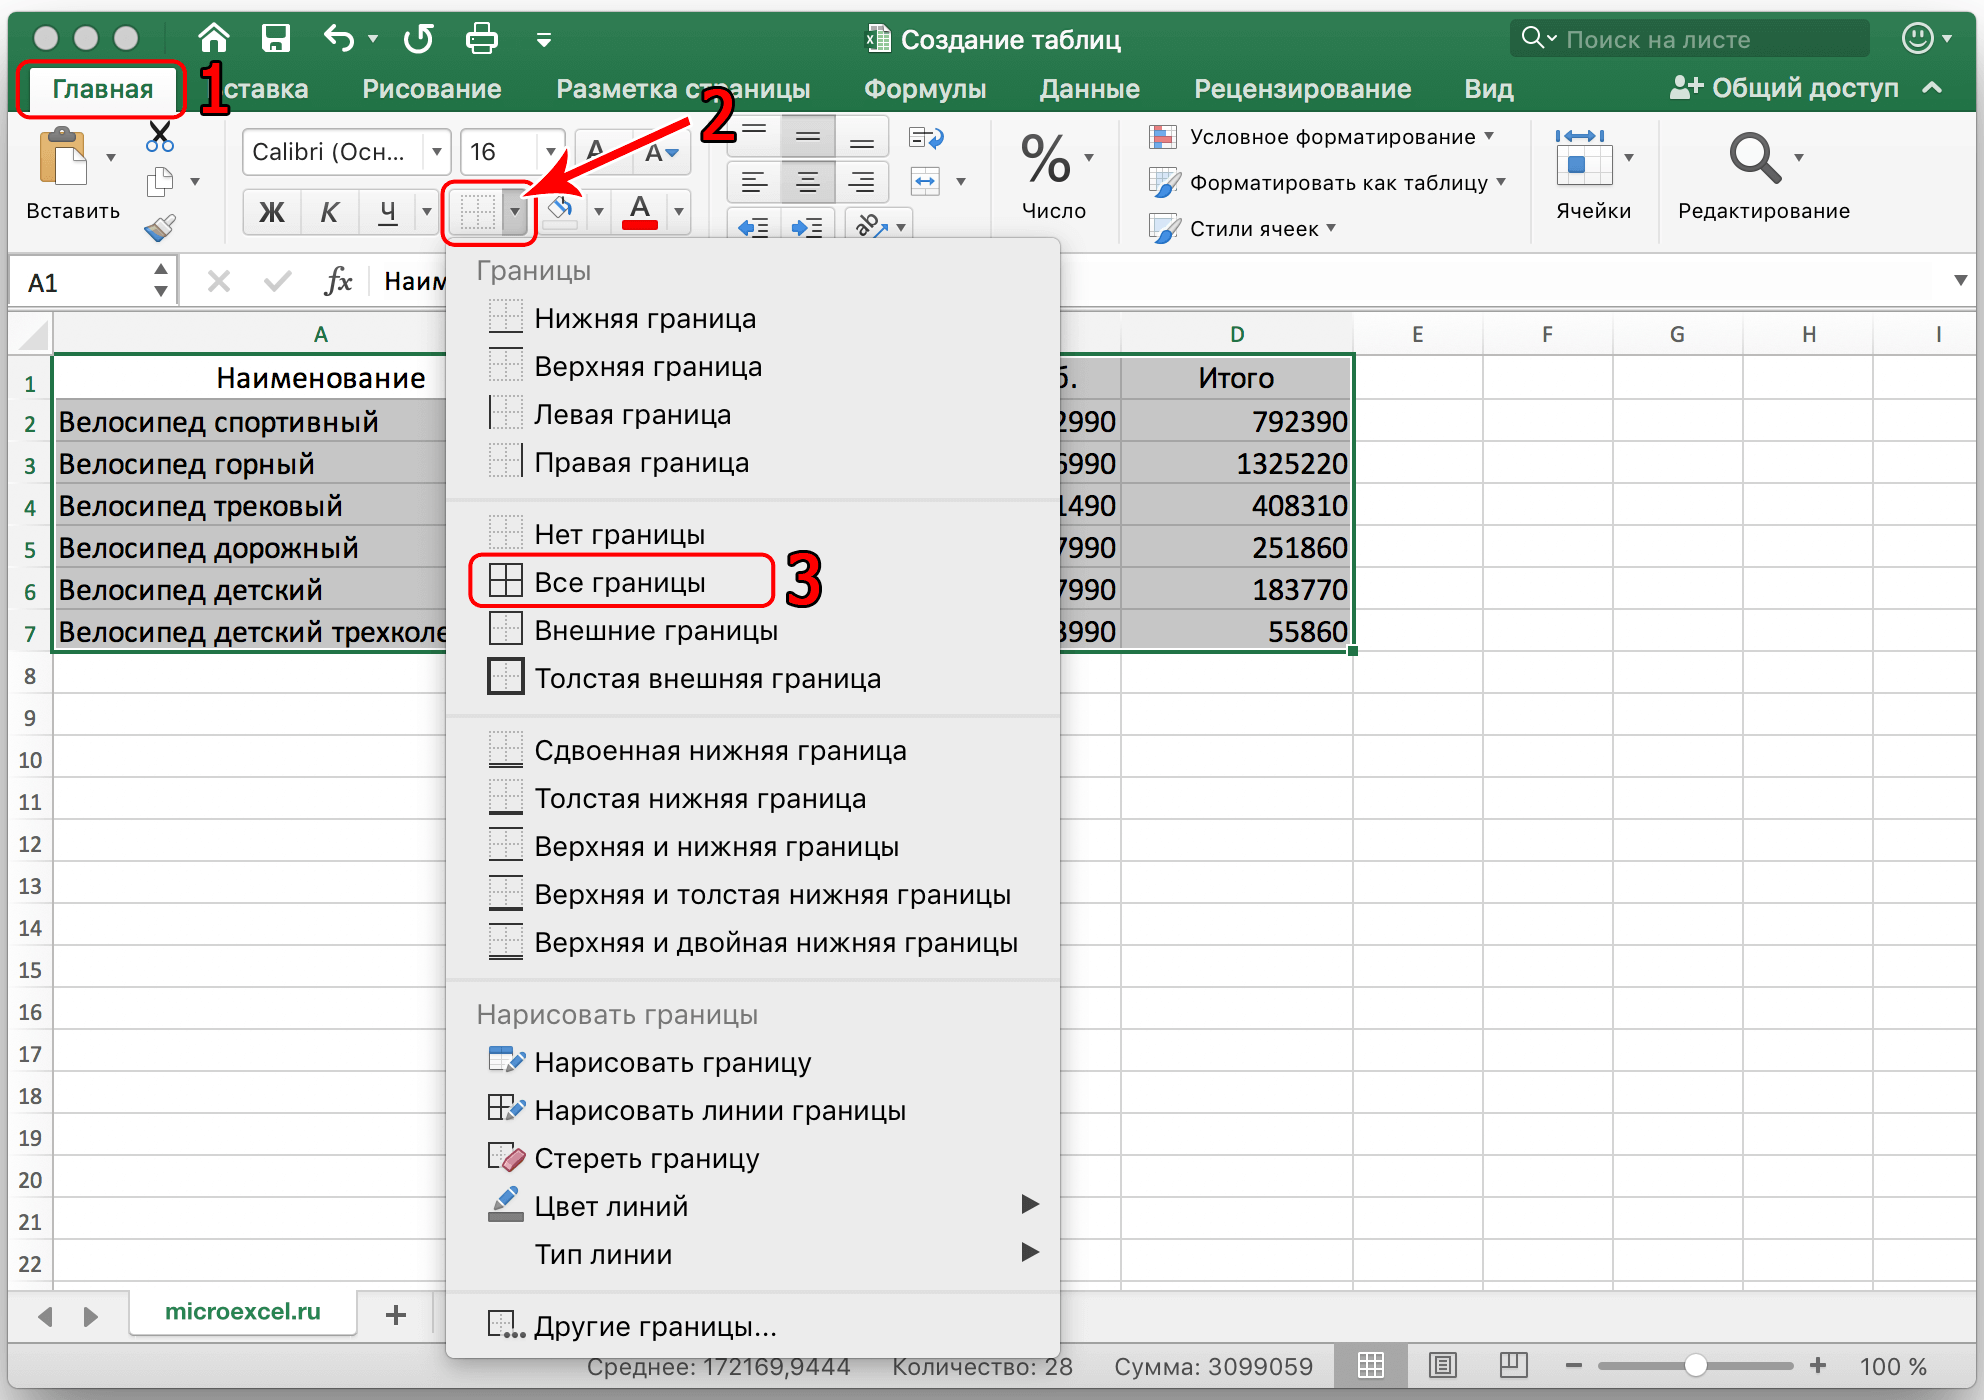
- After that, you can mark the boundaries of the data. To do this, select the desired range of cells with the cursor, then go to the “Home” tab. Here we need to find the “Borders” parameter. We click next to it on the down arrow, which will open a list with options for borders and select the item “All borders”.
- So, the visually selected area began to look like a table.

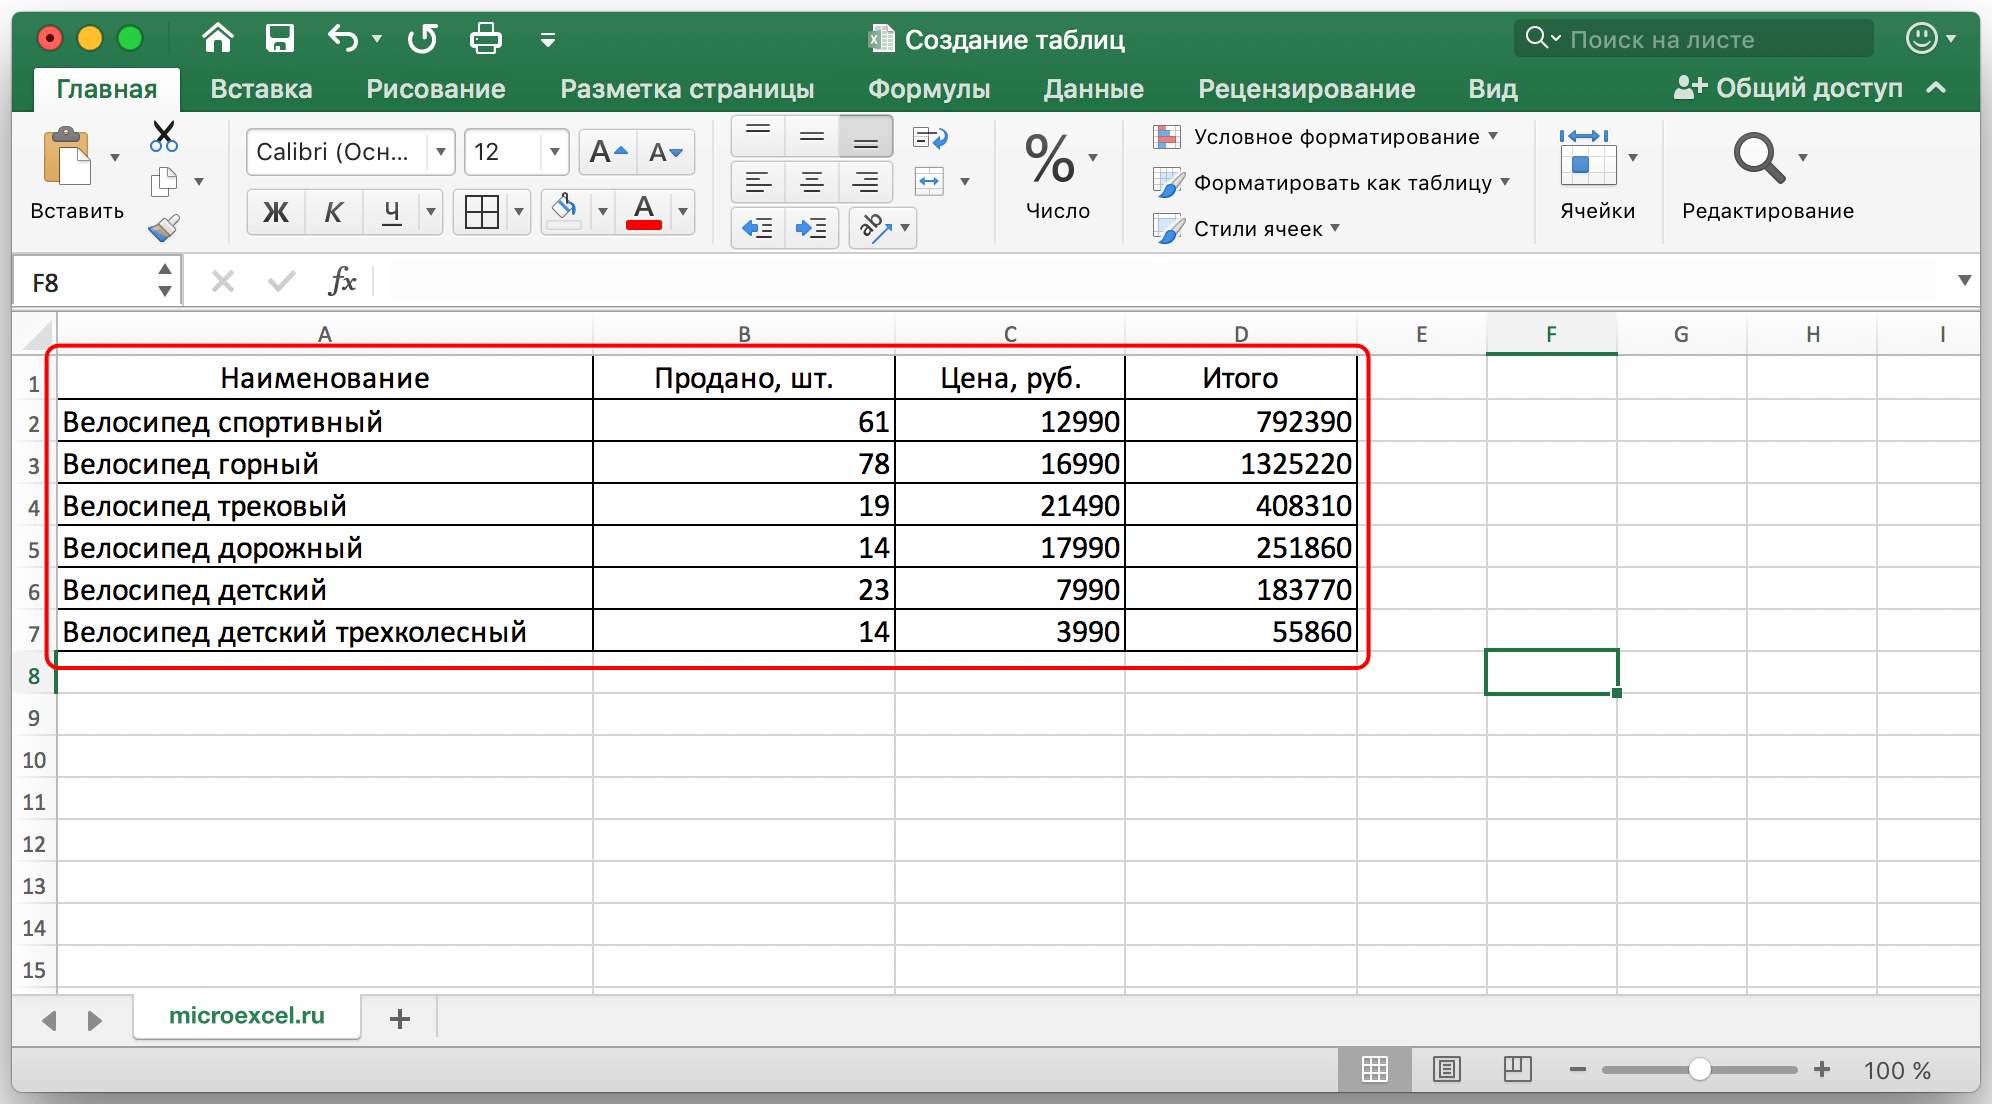
But this, of course, is not yet a full-fledged table. For Excel, this is still just a range of data, which means that the program will process the data, respectively, not as tabular.
How to convert a range of data into a full table
The next step to be taken is to turn this data area into a full-fledged table, so that it not only looks like a table, but is perceived by the program that way.
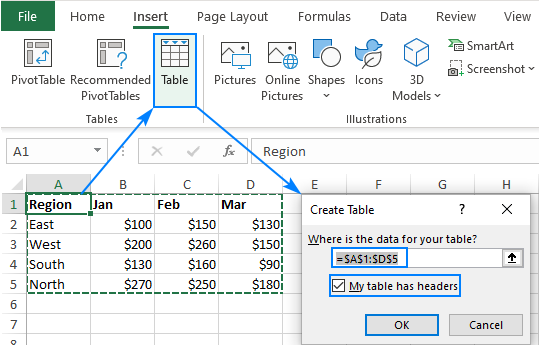
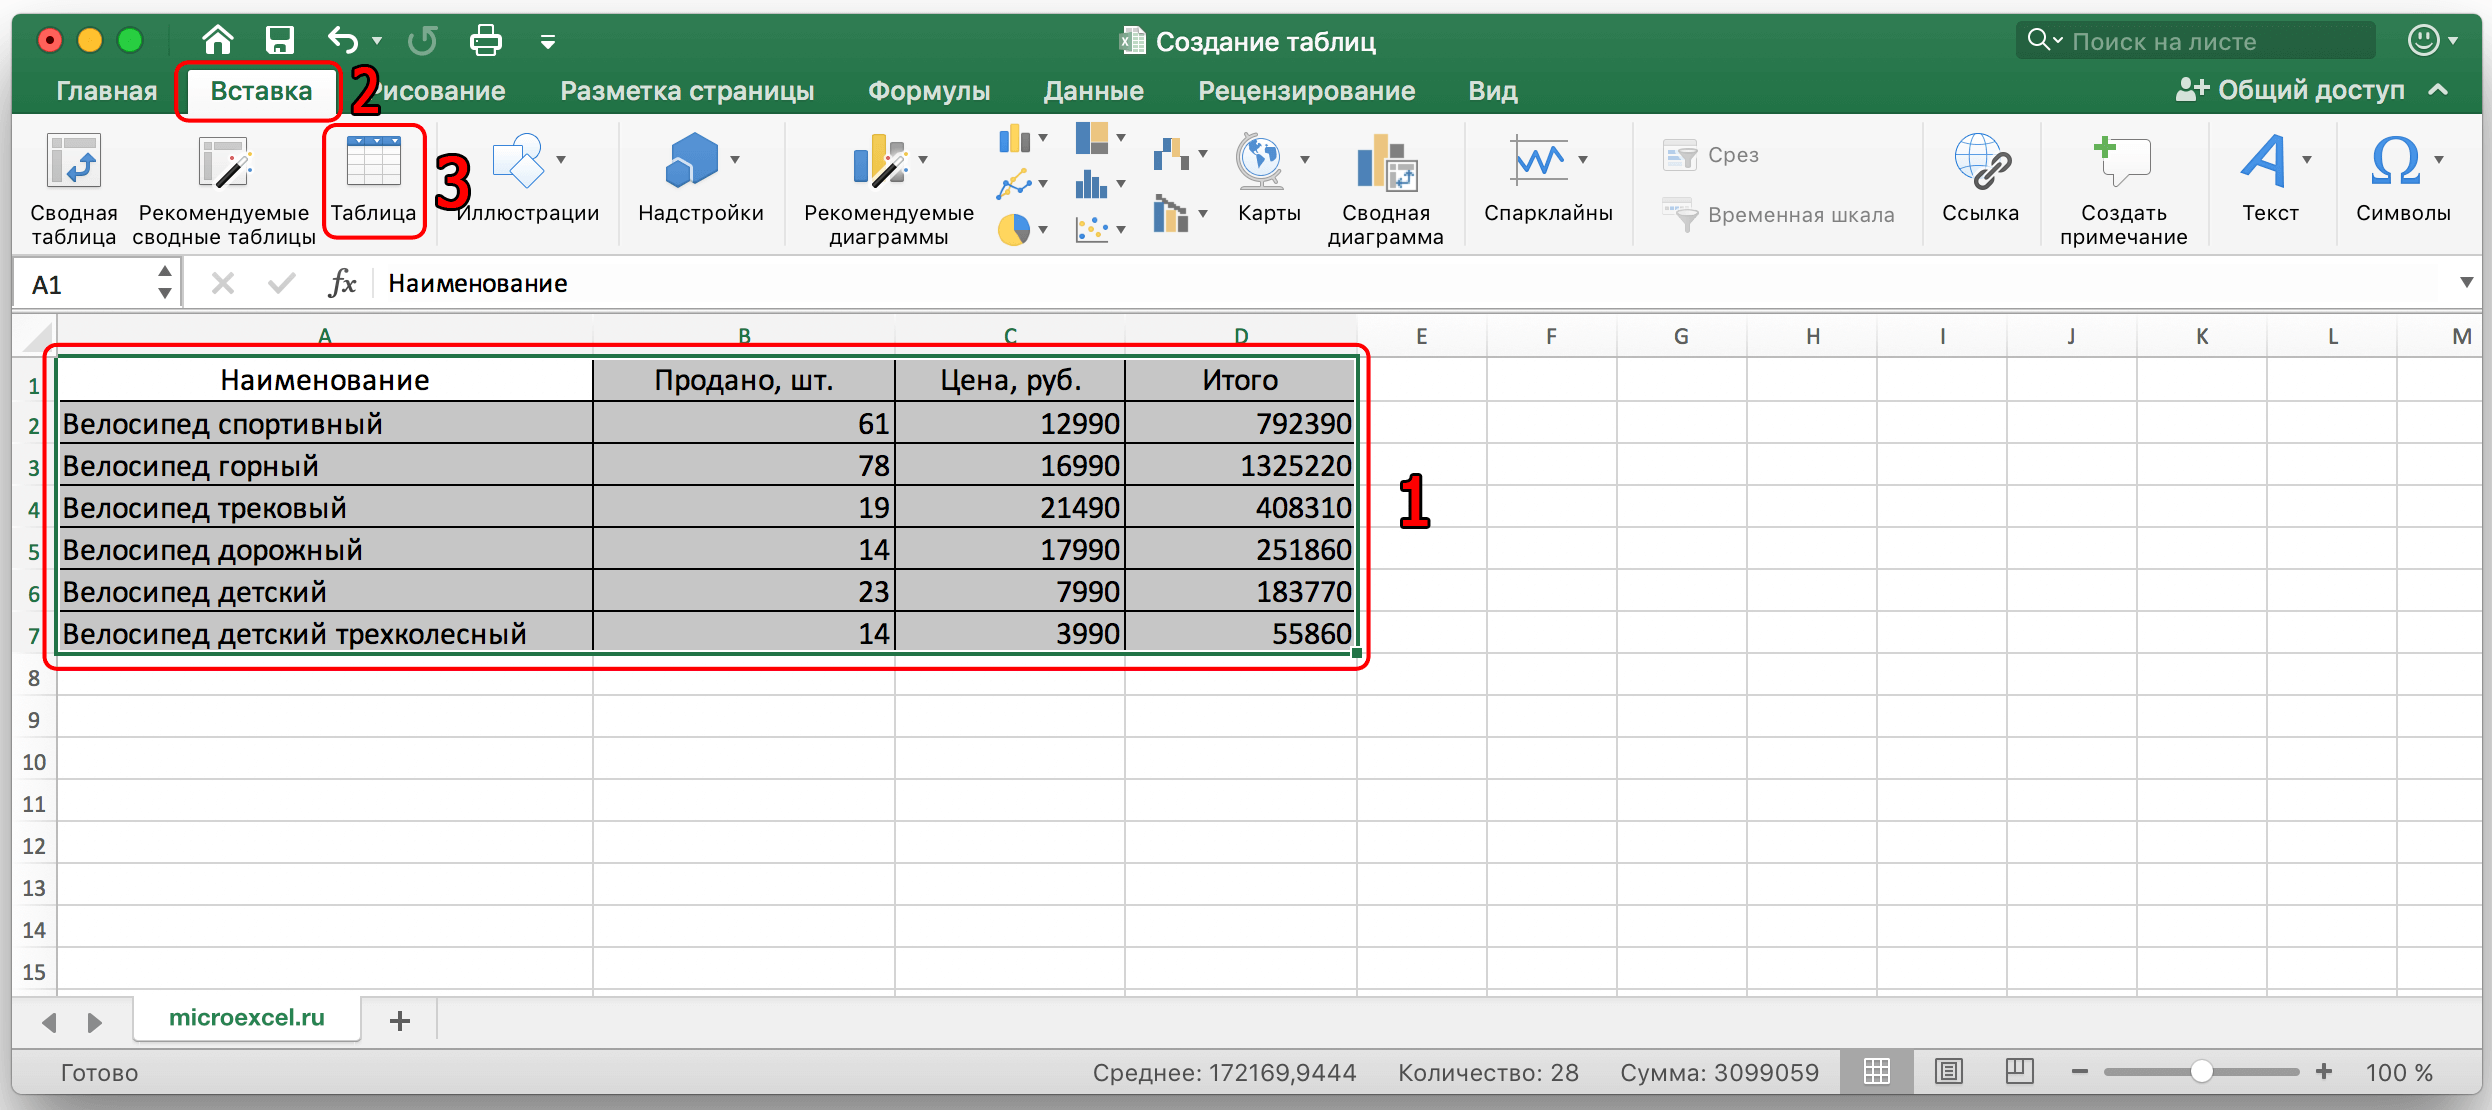
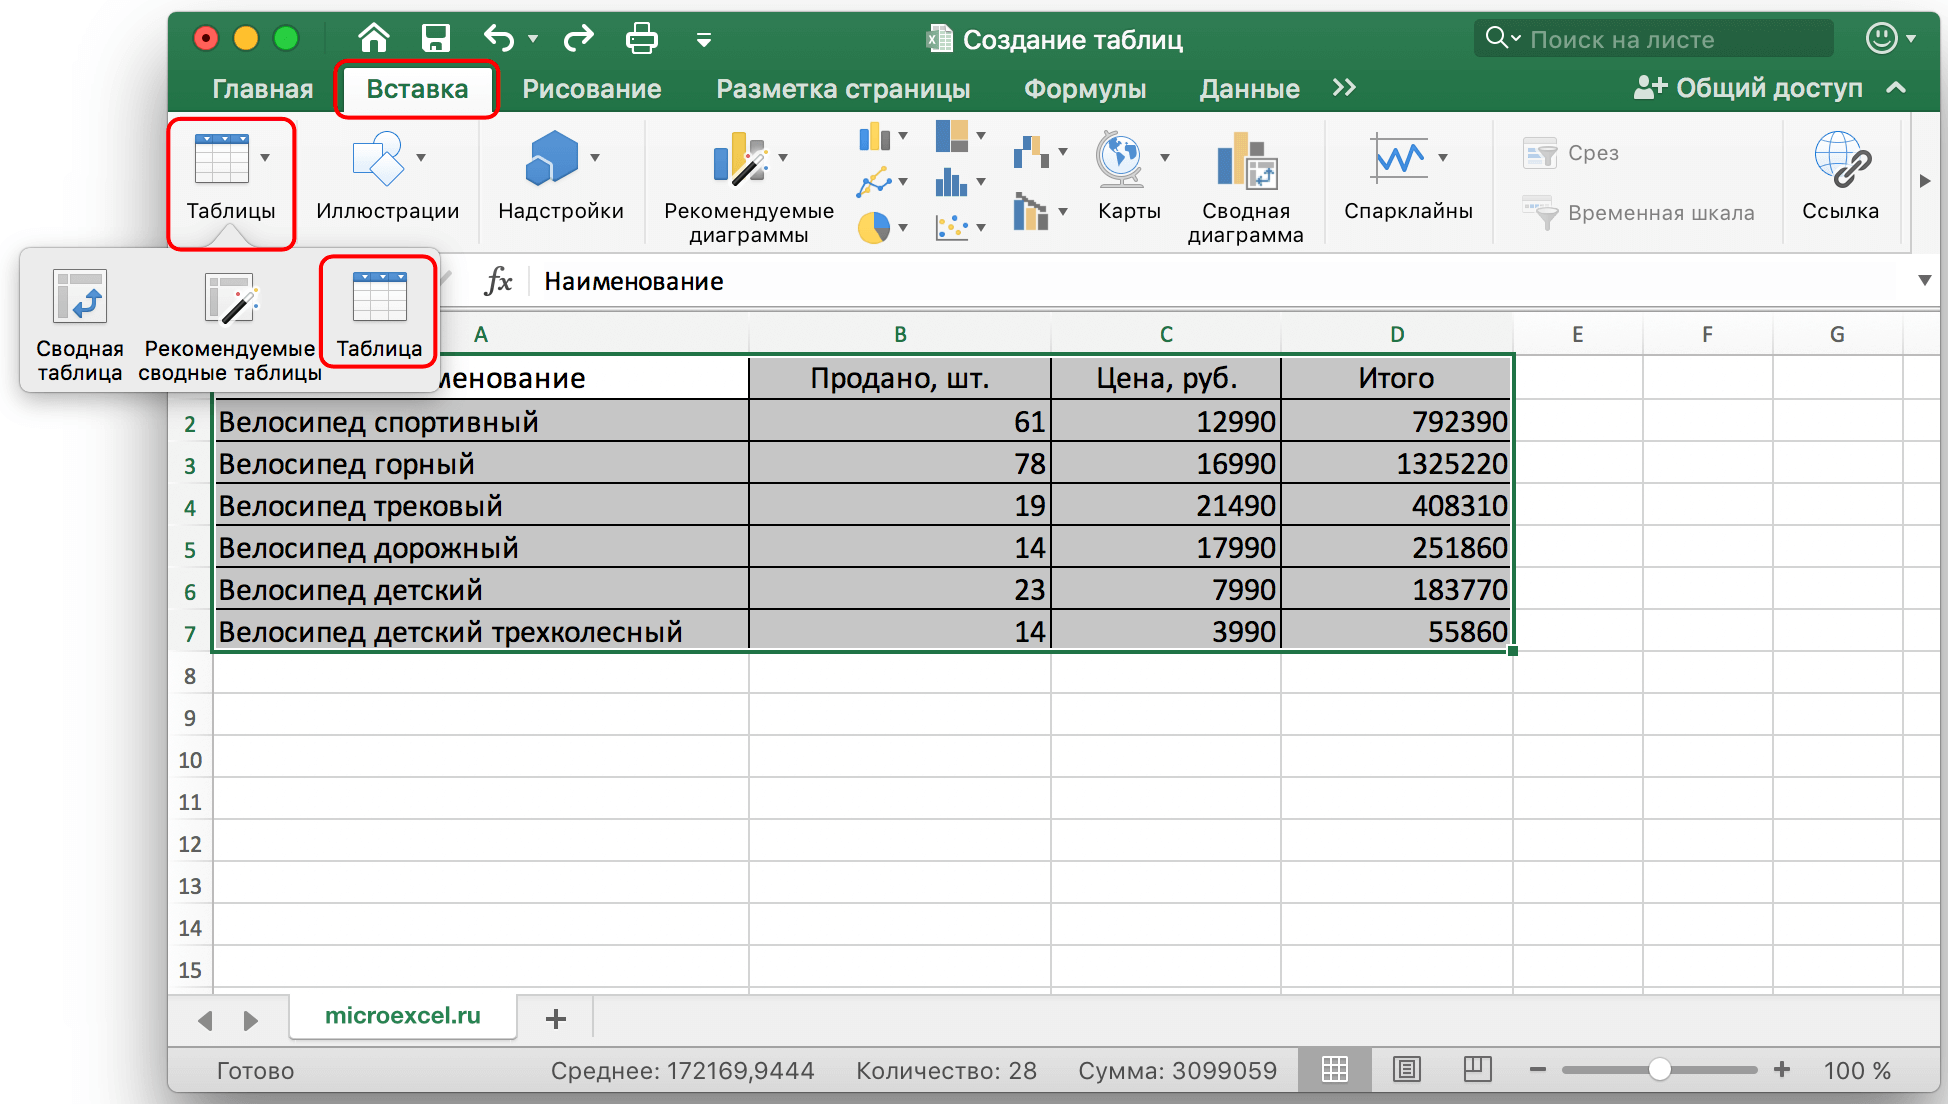
- To do this, we need to select the “Insert” tab. After that, select the desired area with the cursor, and click on the “Table” item.
Note: if the size of the window in which Excel is open is small, it is possible that in the “Insert” tab instead of the “Table” item there will be a “Tables” section, opening which with the down arrow, you can find exactly the “Table” item that we need.
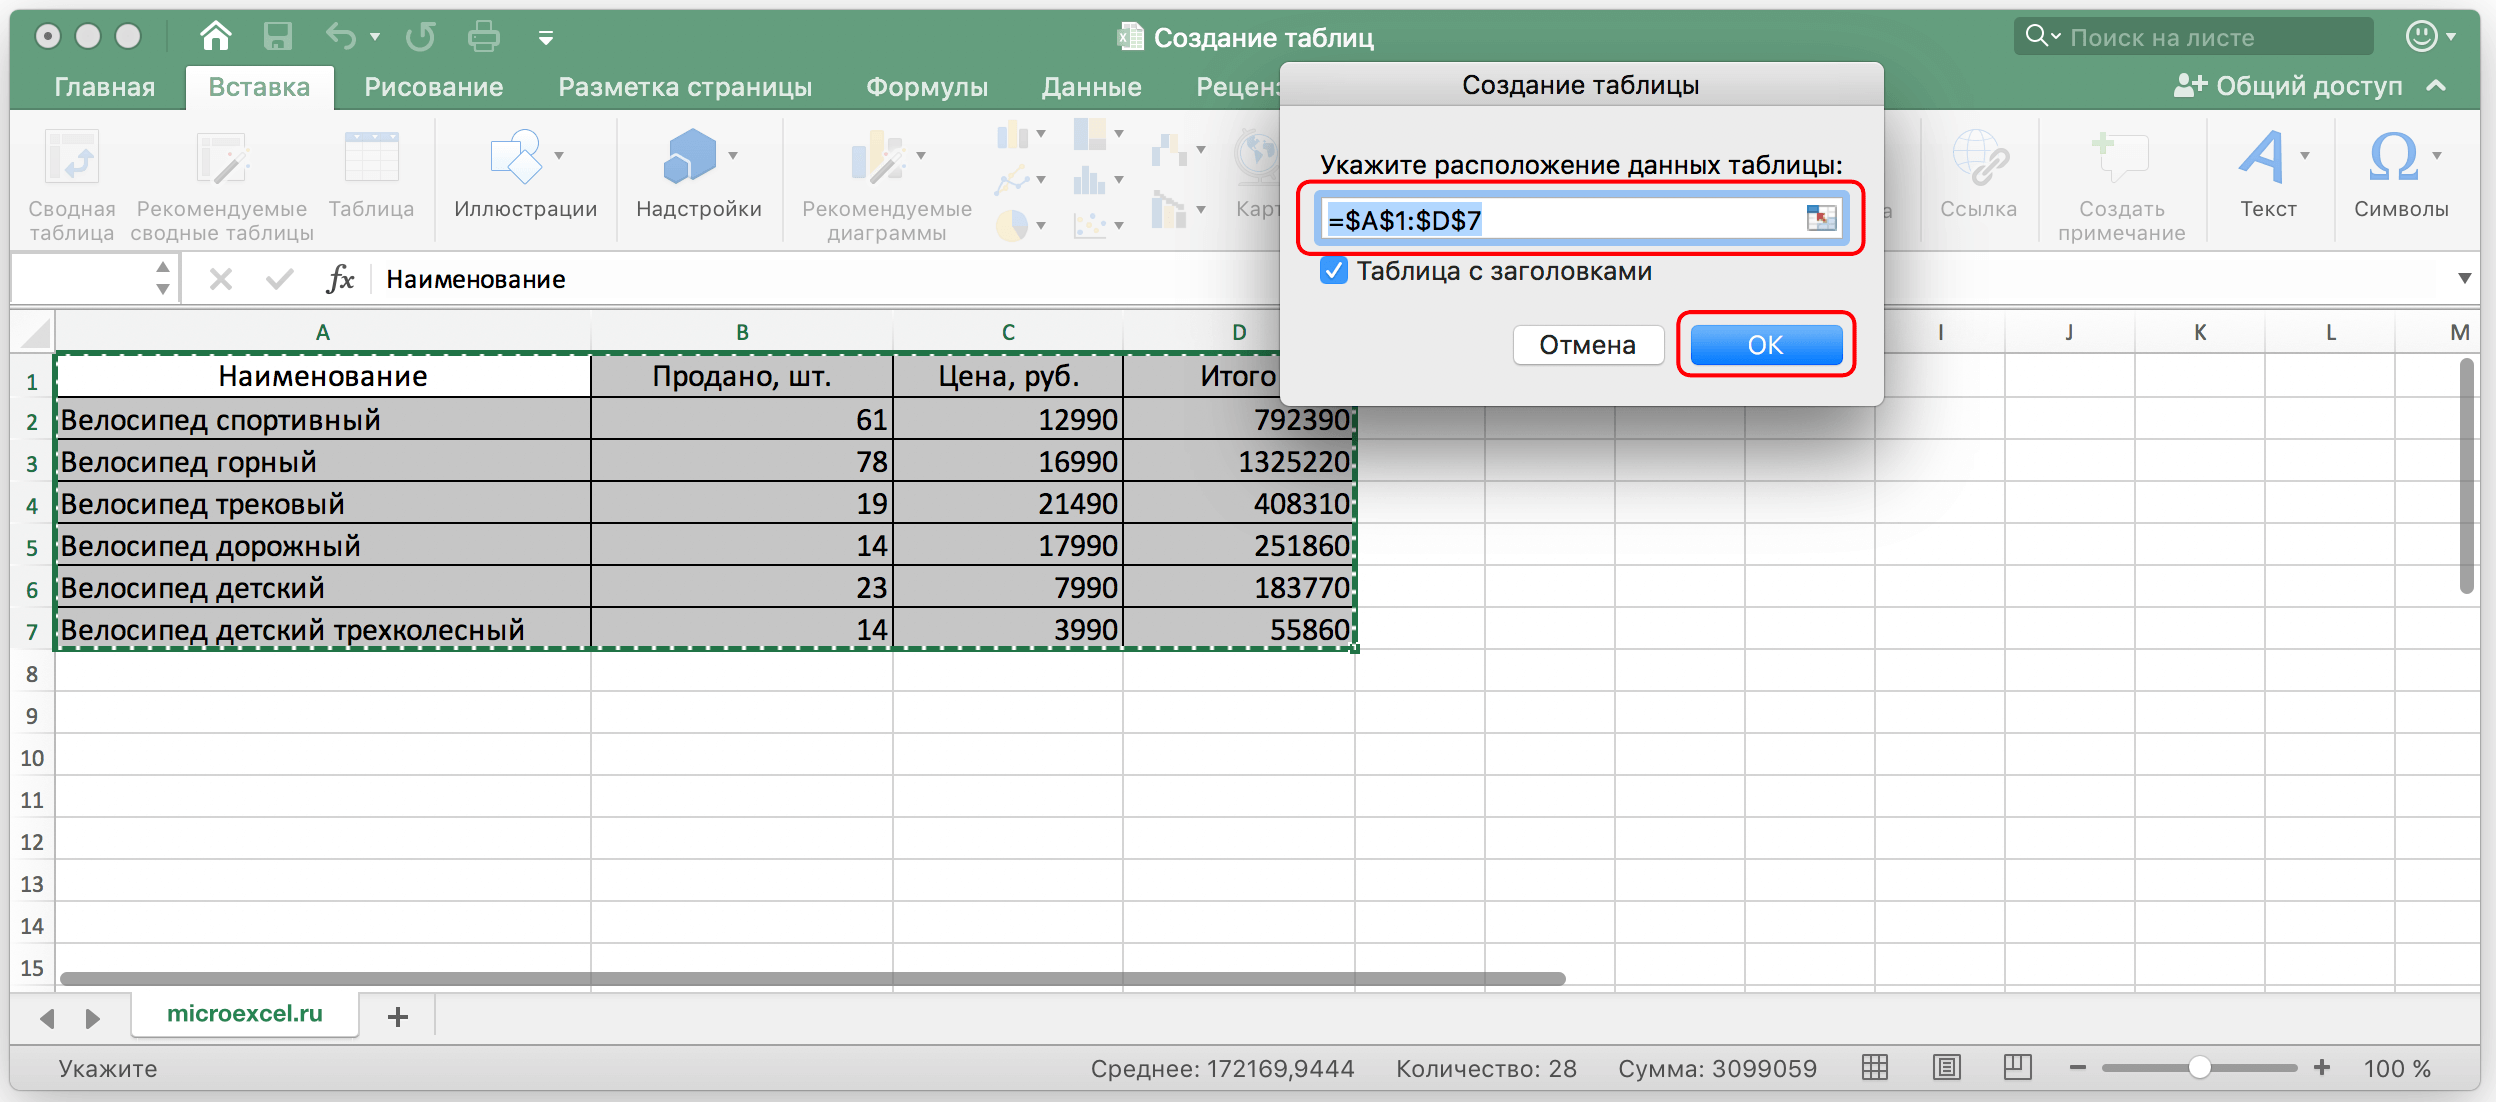
- As a result, a window will open, where the coordinates of the data area selected by us in advance will be indicated. If everything was selected correctly, then nothing needs to be changed and just click the “OK” button. As you may have noticed, this window also has a “Table with Headers” option. The checkbox should be left if your table really has headers, otherwise the checkbox should be unchecked.
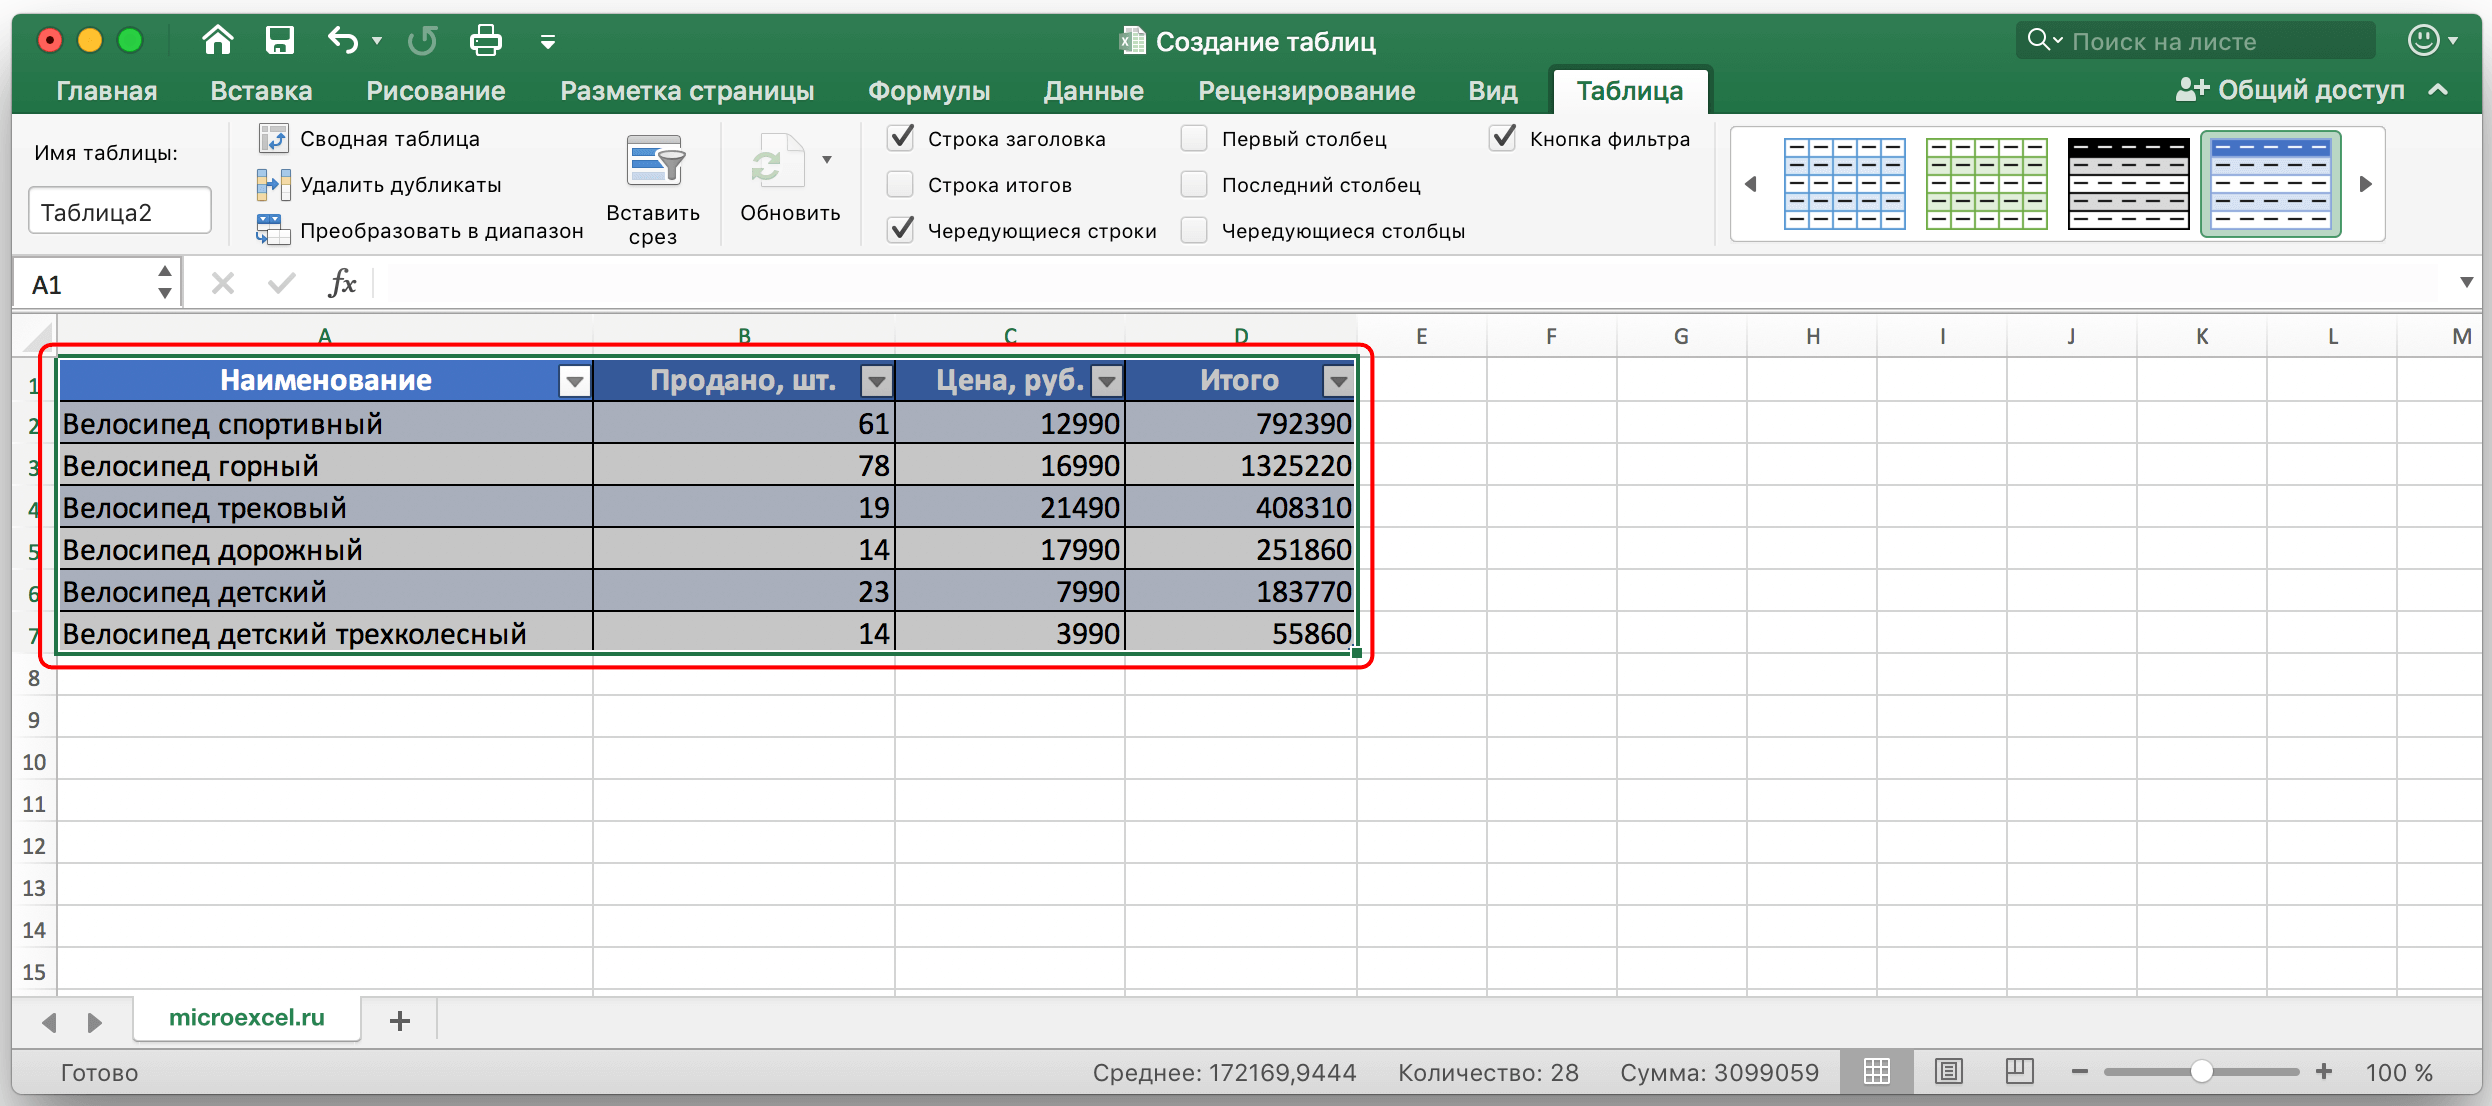
- That, in fact, is all. The table is complete.
So let’s summarize the information above. It is not enough just to visualize the data in the form of a table. It is required to format the data area in a certain way so that the Excel program perceives it as a table, and not just as a range of cells containing certain data. This process is not at all laborious and is performed quite quickly.